Showing posts with label ideas. Show all posts

Saturday, March 6, 2021

Sweet as Honey

 Now that I’ve got my big, all-consuming project out of the way, it’s time to focus on some of the smaller things I’ve been meaning to get around to. I’ve already spent a good month or so getting through some of the half-finished knitting and crochet pieces lying around, and now I’m ready for something new.

One of my goals this year is to end with less yarn than I started with. I was going to resolve not to buy any more yarn but… come on, I need to be a little realistic! I rummaged around my stash for inspiration and came upon most of a cone of yellow alpaca silk lace, leftover from my big special occasion shawl. I wasn’t really feeling another lace-weight project, but held double it acted like a fingering. After weighing it and doing some math, I figured I’d have just about enough for a sleeveless top. Perfect! Now to find a pattern.

The color reminds me so much of honey, so I knew I wanted a honeycomb-inspired design. I went searching for just that… and it came up blank. There are certainly patterns with a honeycomb texture, but they’re all sleeved sweater and baby clothes, not the tank top I wanted. I briefly debated trying to reconfigure one of the existing patterns, but it became obvious that it would be a lot of work. Like, I-might-as-well-just-make-my-own-pattern amount of work.

Wait.

Wait.

That’s exactly what I should do!

A sleeveless top is basically a cylinder with some holes in it, right? A tube plus shoulder straps. I could do that. I made a sketch.

(Should I apologize for the creepy mannequin face? I didn’t feel like drawing actual features.)

Yeah, something like that would work. It did need a bit of math to get the dimensions right, though. I got out my tape measure and measured some key points on my torso, including both circumferences and the vertical length between each (nothing worse than becoming the unwilling owner of a crop-top!). I added a few inches to each circumference to get a slightly relaxed fit, and so I could fudge the hip and bust measurements to equal each other (it just makes the math easier).


To go from inches to stitches and rows, I needed a gauge swatch. I was really, really careful with the gauge swatch on this one. I measured down to an eighth of an inch. And then I measured again in centimeters. I didn’t get a second ruler out, but maybe I should have, for reproducibility’s sake?

Where was I? Oh yeah, math. Big thanks to my high school chemistry teacher for making me do a million unit conversion problems. I don’t think you intended me to use it for knitting, but I’m not exactly converting grams to moles in my day-to-day work either, so. I’m repurposing this skill.

After a bit of though and consultation with knitting friends, I decided to make this top in two pieces: front and back. I could knit in the round, but honestly my circular needles aren’t the best quality, and adding seams would strengthen the garment overall. The only downside is that I won’t be able to try it on for fit until it’s nearly done. Here’s hoping my math holds!

With all those logistics out of the way, I’m just now starting to cast on. Most of the body is plain stockinette and pretty boring (why do I keep doing this to myself?), so I’ll check in with you all once I get to the interesting textured bits at the top. Until then, stay crafty!

Thursday, June 11, 2020

On a Wing and a Prayer

If there’s one thing I’ve learned over years of crafting, it’s this: prototype, prototype, prototype. Sewing a garment? Make a mockup. Knitting or crocheting? Gauge swatch. Using a new skill or technique? Get out your scrap yarn/fabric to test it out! Seriously, you won’t regret working the kinks out on a prototype before you start the full project. And the newer the skill, the less you know going in, the more important testing is!


My Dream Fairy costume is going to be chock-full of new skills and experiences for me, so prototypes are going to be a must. Drafting, historical hand-stitching, interpreting antique knitting and tatting patterns... the list goes on and on. And at the very top of the list, are the all-important fairy wings.


These won’t be just any fairy wings, either. No, they will be handmade lace wings. You see, I am what the youth call “extra”. It may not be obvious at first glance (I am also deceptively sneaky, as many a surprised friend will attest), but I just live to be able to whip out something gloriously over-the-top and unnecessary. Why make plain old fairy wings when I could spend dozens of hours with a 0.75 mm crochet hook? Of course, shenanigans like this require planning, and the construction of at least one prototype. I’ve decided to share my process and thoughts here, partly in case anyone else wants inspiration for similar endeavors, and partly so that my notes on what goes well and what goes poorly don’t just disappear into the recesses of my brain, never to be seen again. (Also this is my crafting blog? If I’m not writing about my crafts, then what’s this whole business even for?)


I should stress before we begin: this is not a tutorial. I do not know what I am doing. You’re more than welcome to try making your own pair of ridiculous lace wings along with me, but don’t think that anything I do will actually work as intended!


Disclaimers out of the way, let’s start with a bit of research. I’ve never seen anyone make fairy wings covered in handmade lace before, but there are plenty of fairy wings to be had all over the Internet. Construction usually follows the same basic pattern: build an armature out of wire, and cover it with your wing material of choice. The armature is then attached to a series of straps that affixes it to the wearer’s back, or else it’s tucked into a rigid support garment like a corset. I don’t have plans to make a corset at the moment (though it certainly wouldn’t be out of place for this costume), so straps it is!


Before we get there, though, we need some wings. I’m lifting my design straight off of the real-life luna moth, since Mother Nature is my all-time favorite designer. A nice, head-on image of the moth works as a perfect base.


 I only have enough wire on hand to make one wing, so let’s use the upper left wing as the test. I scaled the image up to human-size and traced it out onto paper. That served as a guide for bending the wire into shape. I still needed something to keep track of the inner details of the wing, though, so I grabbed some spare netting, stitched the wire frame onto it, and used some cotton crochet thread to mark where the details ought to go.


Some quick crocheting around the wire covered up the metal and created a good surface on which to anchor the lace. Color didn’t matter for this prototype, but I couldn’t just use any clashing hues at random. I still had to spend time looking at it after all! So I swapped green and maroon for an equally pleasing blue and white palette.


Next came putting in the eye-spot and veins. For the spot, I used a scaled-up version of Julia Hart’s Peacebloom. To make the veins, all I had to do was crochet some slip-stitch cording and sew it to the crochet-covered wire. A few pins stuck in the mesh backing help the veins retain their soft curves. Lastly, to complete the base I crocheted a rough mesh into the top white section of the wing. This is going to get covered up later, so it doesn’t have to be neat!


Moving right along: lace! Specifically, lace netting. I had a bit of yarn left over from a previous project (points if anyone can figure out which one!) that’s the same weight as the pale green yarn I plan to use for the final wings. I took a few pages from the Irish lace playbook for this, since a big part of that practice involves filling irregular empty spaces with netting. There are loads of netted fills to choose from, so I picked a few different staples to try out.


For the curious, the fills are as follows from the top: basic netting, trellis netting, netting with the Clones knot, dense basic netting, and netting with picots. The last three panels are just a repeat of the first three. Originally, I thought I’d pick whichever one fill I liked best and use that over the whole wing, but I think I rather prefer the look of all the different ones next to each other. The things we discover while prototyping!


At long last, I could remove the mesh backing. I was rather looking forward to being done with that thing, since it’s a bit difficult to crochet with one side of the work completely blocked off from you! Clipping the basting threads was a bit nerve-wracking, what with all my handmade lace mere millimeters away, but I got through it without incident. The wing was looking good, but it wasn’t quite finished yet. No, it needed flowers! Dozens of little blooms worked in white crochet thread. I tried out a bunch of different flower patterns for this, and my standout favorites were Tiny Peony by Picot Pals and Poppy by Vera Matrebo. I also made a bunch of super basic generic flowers that I didn’t really need a pattern for. All of these were worked separately, and then stitched onto the white net part of the wing with a tapestry needle.


There were so. Many. Flowers. So many. I expected the lace to take a while, but I’m pretty sure the flowers took just as long. It was, however, also very much worth it. Just look!


Last but not least, we need a way to wear the wing(s)! I had plans for this one, y’all. I drew diagrams and schematics. I contemplated materials. I... didn’t do a very good job. I suppose something had to give in this project, and it might as well be the supports.


Let’s go over what doesn’t work very well, so that next time it will be better. I designed this apparatus a bit like a bra, with an elastic band going round the wearer’s midsection and two straps on the shoulders. But rather than having two cups in the front, there’s one reinforced flat panel in the back, made of a piece of plastic sheeting sandwiched between muslin layers. The end bit of the wire is bent into a loop and sewn onto the muslin. In order to get an idea of what would happen when all four wings were in place, I added a few extra bits of wire to make little stubby wing-loops. The final result makes me want to read a story about a fairy born with only one wing, and her adventures out in the big wide world...


...anyway, back to crafts. The strap system... works... sort of. It’s not very stable, but it will hold the wings up, and I can get it on and off. That’s about all I can say for it, though. Honestly, it’s making me seriously consider adding a corset to this project, just to avoid the strap-nightmare this could easily become.


(Bad photo, but you get the idea. It’s really hard to photograph this delicate apparatus while I’m wearing it!)


And there you have it, the prototype! All in all, I think it was pretty successful. My basic idea works! I’m glad to have had some practice with the crocheted netting and making all those little flowers. As for the things I would change, here’s the list:


·      Wire choice. I used what I had lying around, which was 2.5 mm aluminum wire, and it was just a hair too flimsy. Next time, I’ll use 3 mm wire, or maybe I’ll swap aluminum out for the strength of steel.

·      Eye-spots. As much as I love Peacebloom, I don’t think the pattern works well here. The way it’s constructed makes it easy to pull out of shape, and it didn’t hold up well to the tension involved in making the netting. I have to find a bit of a sturdier motif to replace it.

·      Flower color. The flowers at the top of the wing turned out beautifully, but it’s a little difficult to distinguish petals and shapes in that sea of blooms. I might try my hand out at a bit of dyeing to make some of the flowers slightly darker, or give them a gradient effect to improve contrast and make it easier to see each individual blossom.


Clearly a bit more testing is in order. Sometimes one prototype just isn’t enough! (Though I think I won’t be making another full wing before the final project). Before I can do that, though, I need more materials, so it will have to wait for order to ship. There’s plenty else to do with this costume, though, so stay tuned for that! I think I’m in the mood for some tatting next...


Stay well everyone, and until next time, stay crafty!

Saturday, May 30, 2020

Dreaming of a New Project

Hello, friends! I hope the weather has been as lovely in your corner of the world as it has been for me these past few weeks, because it really is nice outside. I’m savoring all that spring has to offer before the heat of summer truly kicks in.


That’s not what I came to talk about today though. No, I realized a while ago that I’ve gone over six months without having a big costume project to work on. Six months! Half a year! Do you know what that is?


Unacceptable, that’s what! So I’ve set out to fix the situation by entering the annual Foundations Revealed competition. For those of you who don’t know, Foundations Revealed is a membership-based resource for sewing, especially historical sewing. I’m not personally a member (grad student budget, anyone?), but I happily gobble up their free resources, and I’d love to be a member someday. Each year, their competition has a theme, and this year’s is characters from literature (poems, novels, short stories, etc.). No character came immediately to mind, so I went searching and happened upon a poem by Thomas Hood titled The Dream Fairy. In it, the eponymous fairy comes down from the moon to grant dreams to good children. It’s a cute poem, and it gave me a similarly cute idea for a costume.


(As it turns out, tracing over a photograph is the fastest way to get realistic proportions for your design sketch. I have no shame.)


Art skills aside, let me take you on a tour of the plan. I’ve been itching to try my hand at some historical sewing for a while now, so the costume is based on late 19th century undergarments. Dreams are something of a transitional state, between sleep and wakefulness, so I want to capture that feeling in a “transitional” type of dress, as if the fairy were caught changing clothes. Plus, undergarments are typically simple and easy to make: an ideal first project! The specific pieces I’m going to make are a chemise, drawers, and stockings. I’ll trim everything with handmade lace (of course) and embroidery.

Then there’s the wings. Every fairy needs a pair, and what better wings for a fairy who comes down from the moon than those of a luna moth? I mean, just look at these beautiful bugs!


This is actually one of my own photos: I was lucky enough to spot a luna moth a few years back and wasted no opportunity in photographing it. They’re fairly rare to spot since they only live as adults for a short while. The fairy’s wings are modeled directly after the luna moth, both in shape and color. I’m going to make the frame out of wire and fill it in with crocheted mesh, in the style of Irish lace. In the interest of fantasy, I’d also like to add some floral motifs, as both the wing-spots and the top edge of the upper wings. Of course, I’ll need a harness of some sort to attach them to, and the chemise will need to be able to accommodate them. I expect the wings will be the most complicated part of the costume, and might require a few prototypes, but they also have the potential to be the most eye-catching component as well.


To be honest, I’m pretty nervous to enter this competition. I saw the entries for the previous years, and everything is amazing, even down to the absolute beginner level. I’m not entering to win, but I’d like to make something to be proud of. That being said, all we can do is our own personal best, right? I’m excited to start this project, and I’m excited to share it with you all! So stay tuned to hear more about it, and until next time, stay crafty!


Monday, March 2, 2020

Tutorial: Pompom Wreath


I love wreaths. Indoor or outdoor, on windows or doors or simply hung over the mantle, they always add a nice touch to the decor. Most wreaths are made of foliage and intended for the fall and winter months. But when we have the power to make our own, why limit ourselves to that style? Wreaths can be made of almost anything, and can decorate at any time of year.

 So why am I making a pompom wreath? The explanation requires a little bit of story time. You see, I have pretty curly hair, and when I was a teenager it was fairly short. This caused it to stick out from my head in a consistent orb of fluff. It was... well, it was definitely a look. And among my friends, that look earned me the nickname “Pompom.” I eagerly embraced my pompomness (pompomosity?) by changing all my profile pictures to photos of fluffy yarn balls. Eventually I grew my hair out of the orb-shape, but even now, a few of my accounts have pompom avatars. I have a fondness for pompoms. And I can’t think of a softer, friendlier way to decorate my front door!


If you too would like a poofy door decoration, these wreaths are super easy and quick to make. The materials you’ll need are:

  •  Pompoms
  • Cardboard
  • Cardstock, in a similar color to the pompoms (optional)
  • Scrap of ribbon
  • Craft glue (optional)
  • Hot glue
Once you’ve gathered all your materials, it’s time to determine the size of your wreath. I found it useful to pile my pompoms into a rough donut, in order to get a feel for how much space I could fill. From that shape, I measured the inner and outer diameter of the ring. Make your dimensions a little bit smaller than you think you have the pompoms for: a small dense wreath will look nicer than a large, sparse one.

(Note: your wreath doesn’t have to be circular. Experiment with other shapes too!)

Once you have the size of the wreath, trace the inner and outer circle onto a piece of cardboard, and cut out the ring. It should look something like this:


As an optional step, you can trace the same ring onto a piece of cardstock and glue that onto the cardboard. This will prevent the color of the cardboard from peeking through if your pompoms aren’t densely packed enough. If you’ve got plenty of pompoms to cover the area, though, the cardstock won’t be seen, and you can skip it. I erred on the side of caution and covered my wreath base with some pale pink cardstock.


Next is the fun part: the pompoms! Get a bunch of pompoms in a variety of sizes and colors. My pompoms happen to be sort of sherbet-colored, which I love, and they came in multi-size packs. You may find it helpful to sort them by size before you start.


Turn on your hot glue gun, and spread your workspace with newspaper or something else to catch glue drips. (Trust me, it’s worth the extra minute of setup!) While it heats up, take the biggest pompoms you have and space them evenly around your base. I had eight large pompoms, but the exact number isn’t crucial: what is important is covering the wreath as evenly as possible.

When your glue gun is ready, it’s time to start attaching the pompoms. If you’ve used a glue gun before, you know the drill. Put a dab of glue on the pompom...


And press it to the wreath where you want it to stick.


Alternatively, you can put the glue on the wreath first, and then place the pompom. I switched between the two over the course of the project, and both methods work fine.

Once you’ve gotten your biggest pompoms glued down, move on to the medium-sized ones. Here, your goal is to fill in the spaces left between the big pompoms. I found it helpful to arrange each round of pompoms before gluing them down, in order to space them well.


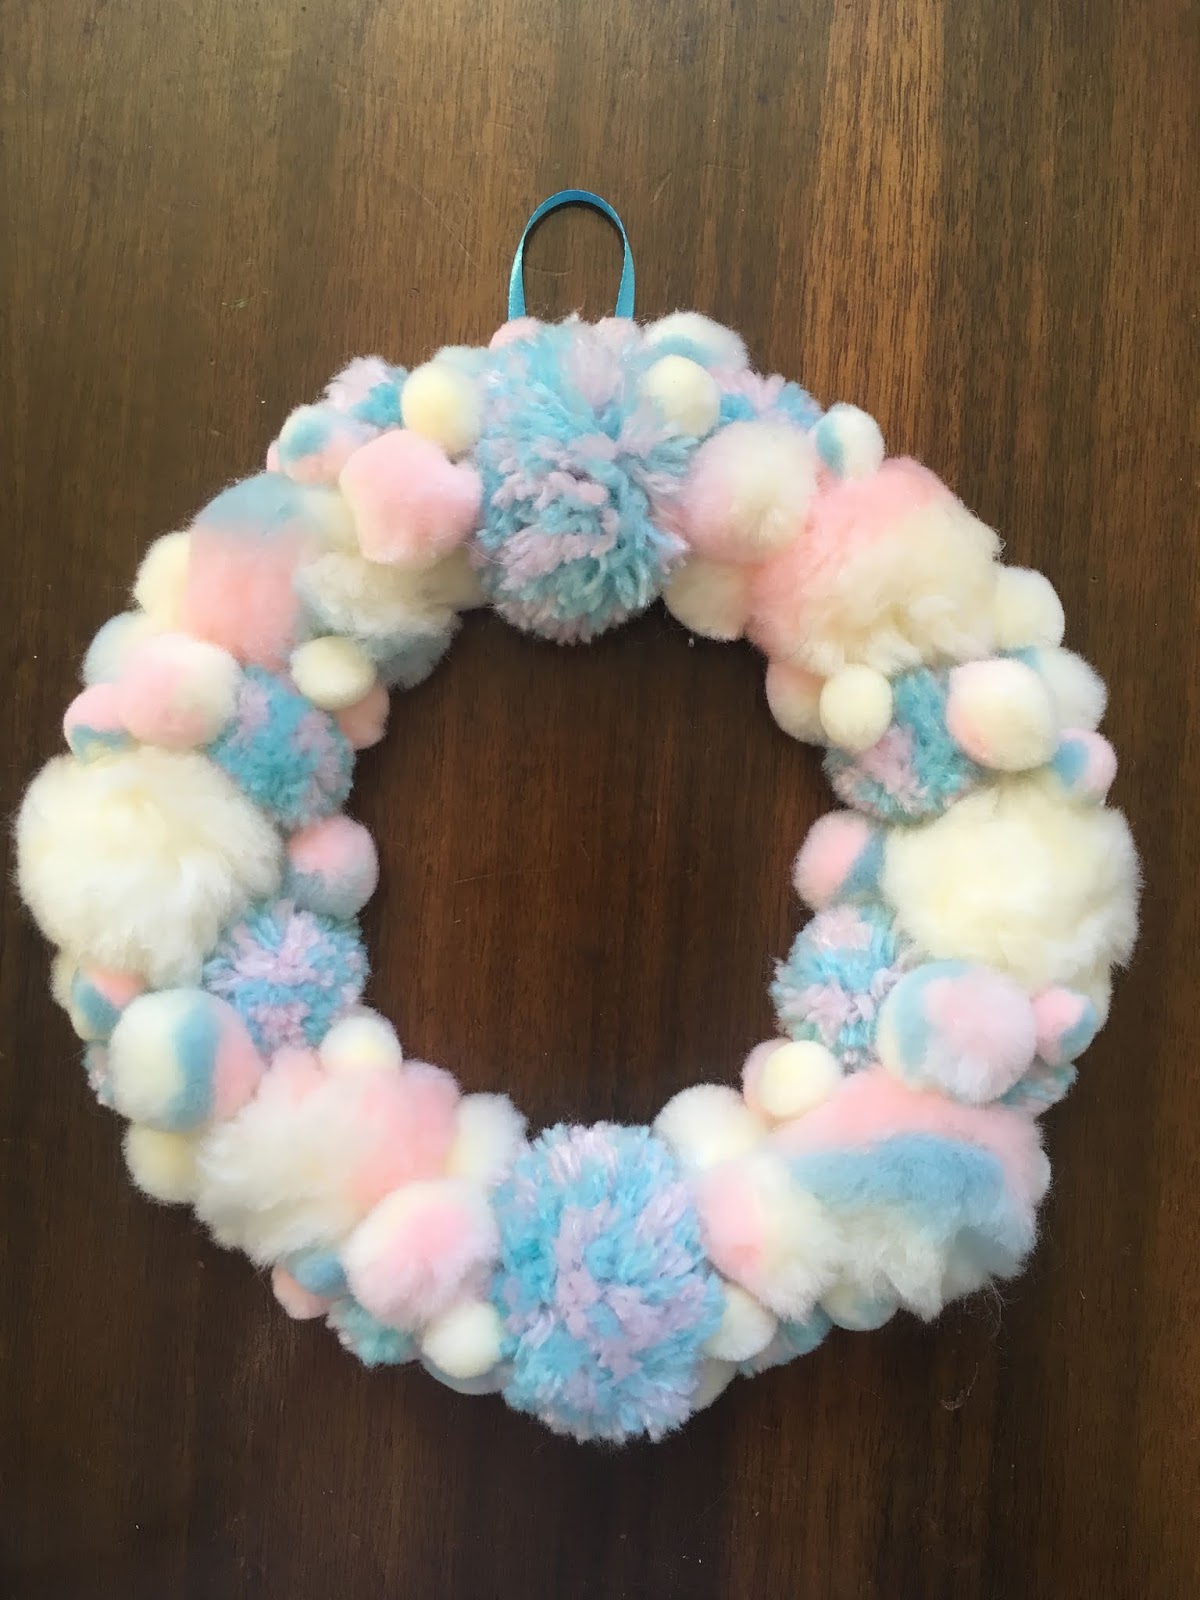
Continue using smaller and smaller pompoms to fill in the spaces. Don’t be afraid to squeeze pompoms into small crevices! That’s what will give the wreath its plush look and texture. Most pompoms will be glued directly to the base, but you can also stack pompoms on top of one another to round out the shape. When you’ve added your last pompom, the wreath should look something like this:


(Yes, it is as soft as it looks)

Finally, we need some way to hang our creation up. Take a small scrap of ribbon (a few inches long will work), fold it in half, and hot glue it to the back of the cardboard base, at the top of the wreath.


And there you have it! A fluffy cuddly pompom wreath to decorate any door or window you like!


The colors of my wreath would make it a good Easter decoration (though it’s a bit early for that), but your wreath can be any color, or any combination! Make a bunch of wreaths for every season. Make a wreath for each day of the week, and swap them out each morning! With how quick these are to whip up, the possibilities really are endless. In fact, I think I’ll pick up some more pompoms next time I’m at the craft store...

Well, it seems I have some shopping to do, so until next time, stay crafty!