I love fall. I love the colors, I love the chill in the air and warm drinks and cuddling up in a blanket. My mom would always decorate for fall, too, in the months of October and November. Leafy garlands and wreaths dominated the mantlepiece, chrysanthemums stood sentry on the front porch. And, of course, there were gourds everywhere. Big pumpkins, little pumpkins, strange goose-neck-shaped pumpkins. All were welcome!
Now that I have my own space, I understand why my mom loved seasonal decorating so much. It brings what you love about autumn (or winter, or spring, or summer) into the house so you can see it all day long! I want decorations of my own, and where better to start with some fall gourds?
(I know it's edging into winter by this point, shh. Pretend it's still November!)
Enter this wonderful crocheted pumpkin pattern by PlanetJune. It's cute, quick, and easy as (pumpkin) pie for anyone who has a good grasp of crochet basics. Even if you've never crocheted "into the back loop only", as the pattern calls for, it's very easy to pick up.
The finished pumpkins are just about the same size and shape as those little mini pumpkins that you can get at the supermarket, which is wonderful! I personally love putting them on windowsills. And because these gourds are made of yarn and stuffing, they keep for many, many years. I made three to start off with, but I know I'll be adding to my collection as time goes on.
That's it for me this time! Christmas is looming ever closer, so I have to get a move on with my presents. Stick around in the coming weeks if you want to see how that turns out. And as always, stay crafty!
Showing posts with label review. Show all posts
Sunday, December 8, 2019
Wednesday, July 24, 2019
To Bead or Not To Bead
Last week, my mother came to me with a plastic bag full of
loose and partially strung beads. I recognized it immediately: it was a
necklace I had made for her a few years ago, broken in multiple places and
hemorrhaging seed beads into the bottom of the bag. The damage was bad enough
that I had to remove and restring the entire necklace in order to repair it.
While I’m confident that the repair job will last, I’m certain that Mom will
come to me with another bag of beads not long from now, and another, and
another. It’s not because she’s careless with jewelry, far from it. It’s
because I was careless with how I strung the necklaces in the first place.
The material you use to string your beaded jewelry is
incredibly important, though it may not always be evident while you’re making
the piece. Some advantages and drawbacks can only be seen years down the line,
once the piece has been subjected to considerable wear and tear. I’ve made a
lot of choices in this department, both good and bad, so allow me to give you a
rundown of the common stringing materials for beads and how they are best used.
Sewing Thread
If you’re completely new to beading, this is likely the
material you had on hand for your first project. Sewing thread comes in a
million different colors and comes in a range of materials and thicknesses as
well. However, it’s not usually the best thing to make a necklace with. Sewing
thread is fairly delicate, and it breaks easily under the strain of heavy beads
and frequent usage. Quilting thread fares a bit better, as it is sturdier, but
similar problems apply.
I would only ever recommend using sewing thread for a
project if you need to pass a great number of threads through a single bead.
Bead weaving and bead netting are examples. Having multiple threads and anchor
points somewhat mitigates the weakness of the thread. Use quilting thread if
you can, and never use quilting/sewing thread with medium or heavy weight
beads, or with single-stranded beadwork. It will break, and you will be
unhappy.
Uncoated Wire
Another material that may have other uses around the house,
thin uncoated wire can also be used to string beads. Usually made of steel,
these wires are composed of a single strand of metal that has been drawn out to
a fine gauge. They can be shaped and twisted, but they easily sag under the
weight of heavier beads. Wire like this is good for bead weaving if you want
the resulting piece to be firm and not very flexible. Thread is better for
pieces that need to drape.
While uncoated wire can be very strong, it has some
weaknesses that make it unsuitable for many types of beadwork. If you’re not
very careful while working with it, wire will kink, and this kink will remain
as a point of weakness in the wire even after you straighten it out. Long,
unanchored strands of beaded wire can also kink as a part of daily wear, and
that results in breakages. Additionally, depending on the type of metal that
has been used, wire may rust or develop a patina that can discolor the insides
of transparent beads. I saw this on the necklace I just repaired: the light
blue seed beads that had been in contact with the wire had a dark grayish
residue on the inside of the hole.
Beading Thread
Now we’re getting into materials that are made specifically
with beading in mind. Beading threads are often made of nylon or polyester, and
are much stronger than sewing thread. Depending on the brand, they can come in
a wide variety of colors. It is usually thin enough to thread on a needle and pass
through a seed bead multiple times, making it suitable for bead weaving .
Beading thread is really a great all-purpose choice for
making beaded jewelry. It is strong enough to hold up to heavier beads (though
unevenly distributed weight may cause the necklace to hang oddly), but drapes
nicely even when used with delicate seed beads. My only gripe about this stuff
is the price: it can get pretty expensive to bead with specialty thread,
especially if you’re working on a project that requires a lot of yardage.
Nylon Filament
Much like wire, nylon filament is one continuously drawn
piece of material. Only instead of metal, it’s... nylon. I sure hope you didn’t
expect it to be made of something else! These filaments have multiple uses,
from fishing line to ukulele strings, but they can also be used for beading!
Nylon is incredibly strong, so it can safely be used for
stringing even very heavy beads. It tends to have a bit of stiffness to it, so
delicate beaded pieces may not drape as nicely as with something like thread.
Nylon is usually only available in while, clear, or a small range of other
colors, so it may not be suitable for projects where the threading material
will be very visible. It is also difficult to knot or tie, so supplemental
materials such as crimp beads are a necessity for a lasting piece of jewelry.
Coated Beading Wire
A distant cousin of the uncoated wire, coated beading wire
should be saved for your heavy-duty projects. It’s composed of a multi-stranded
twisted or braided wire, covered in a polymer coating. Unlike a single stranded
wire, this beading wire doesn’t kink and won’t discolor your beads. It’s
incredibly strong and difficult to break: it will hold up to even the heaviest
of beads. However, this strength comes at a price. I’ve only ever seen beading
wire in one color (steel), so you don’t have many options there. It’s also very
stiff, more so than nylon. If you don’t have any heavy beads to weight it down,
it’s not going to hang correctly on a necklace. And because beading wire is so
thick, you won’t be able to do bead weaving or any delicate beadwork that
requires multiple passes through a single bead.
You can use virtually any string-like material to make
beaded jewelry, but these materials are the ones I’ve used the most. If you’re
looking to start beading, I hope this guide will help you pick the best thread
for your project!
Monday, July 15, 2019
Swift Sweeping
Another week, another craft! And this time, it's home-centric. You see, I'll be moving into a new apartment at the end of the summer. It's going to be my first time with a place entirely to myself: no family, no roommates, nothing. To be honest, I'm a little nervous for the change, but also pretty excited!
Having a place to yourself also means having the chores all to yourself, though, which I'm... shall we say, less enthused about. I don't hate chores, I just don't love them. I also don't love throwing out lots of disposable cleaning wipes and Swiffer mop pads and whatnot every time I clean: it just feels wasteful.
Well. A few minutes of searching on Ravelry and I found a solution to at least one of those problems: reusable swiffer pads! These are super easy to make, they teach you a couple of fun weird stitches, and they're useful to boot!
Here's the finished duster pad. I personally think it looks like a mossy forest floor!
And the mop pad, which is a bit reminiscent of hard candy!
I had three skeins of worsted weight cotton yarn, and that was enough to make two of each kind of pad, with just a tiny bit of yarn left over.
Because they're made of cotton, these pads can just be tossed into the washing machine when they're dirty. I love projects that are easy to maintain too!
Expect more projects for around the home in the coming months. Like I said, this is my first time with an apartment entirely to myself, which means I need to fill it with stuff. From practical projects like this one, to decoration, to things that are a bit of both, I've got my work cut out for me. Stay tuned if you want ideas for your own projects, and as always, stay crafty!
Having a place to yourself also means having the chores all to yourself, though, which I'm... shall we say, less enthused about. I don't hate chores, I just don't love them. I also don't love throwing out lots of disposable cleaning wipes and Swiffer mop pads and whatnot every time I clean: it just feels wasteful.
Well. A few minutes of searching on Ravelry and I found a solution to at least one of those problems: reusable swiffer pads! These are super easy to make, they teach you a couple of fun weird stitches, and they're useful to boot!
Here's the finished duster pad. I personally think it looks like a mossy forest floor!
And the mop pad, which is a bit reminiscent of hard candy!
Because they're made of cotton, these pads can just be tossed into the washing machine when they're dirty. I love projects that are easy to maintain too!
Expect more projects for around the home in the coming months. Like I said, this is my first time with an apartment entirely to myself, which means I need to fill it with stuff. From practical projects like this one, to decoration, to things that are a bit of both, I've got my work cut out for me. Stay tuned if you want ideas for your own projects, and as always, stay crafty!
Tuesday, July 9, 2019
Puppy Present
Puppies are a lot of work! I don't know if you all know that. I didn't, because the last time I was in a house with puppies, I was about 6 years old and not super involved in the whole process. Honestly, I don't know how my parents managed to deal with me, my younger brother, and a puppy at the same time.
That being said, puppies are cute. Very very cute.
I wanted to make something for the new puppies, to show them some love. Even though I'm sure they don't understand the significance of a handmade gift, it's something I like to do for others! The trick was just finding a puppy-appropriate gift to make.
These puppies like tearing into things and chewing up fluff, so anything stuffed was right out. Nobody needs a trip to the vet because a pup ate a bunch of polyester filling. I settled instead on this frisbee by Gracie Castillo. It's a simple disc with a curved edge, perfect for playing fetch and tug of war! I had some plain cotton yarn lying around as well, which I figured would be the most durable for puppy-teeth (and least dangerous should they manage to swallow some fibers). It was quick and simple to whip up, too!
I don't have any photos of the frisbee in action, so you'll have to trust me when I say it flies well. A slightly larger version would probably work well for some indoor frisbee games between humans! As for this one, the pups seem to enjoy it well enough.
Maybe it'll keep them busy enough for me to sneak some time for a new project. Until that happens, stay crafty!
That being said, puppies are cute. Very very cute.
I wanted to make something for the new puppies, to show them some love. Even though I'm sure they don't understand the significance of a handmade gift, it's something I like to do for others! The trick was just finding a puppy-appropriate gift to make.
These puppies like tearing into things and chewing up fluff, so anything stuffed was right out. Nobody needs a trip to the vet because a pup ate a bunch of polyester filling. I settled instead on this frisbee by Gracie Castillo. It's a simple disc with a curved edge, perfect for playing fetch and tug of war! I had some plain cotton yarn lying around as well, which I figured would be the most durable for puppy-teeth (and least dangerous should they manage to swallow some fibers). It was quick and simple to whip up, too!
I don't have any photos of the frisbee in action, so you'll have to trust me when I say it flies well. A slightly larger version would probably work well for some indoor frisbee games between humans! As for this one, the pups seem to enjoy it well enough.
Maybe it'll keep them busy enough for me to sneak some time for a new project. Until that happens, stay crafty!
Sunday, June 30, 2019
Argyle Adventures
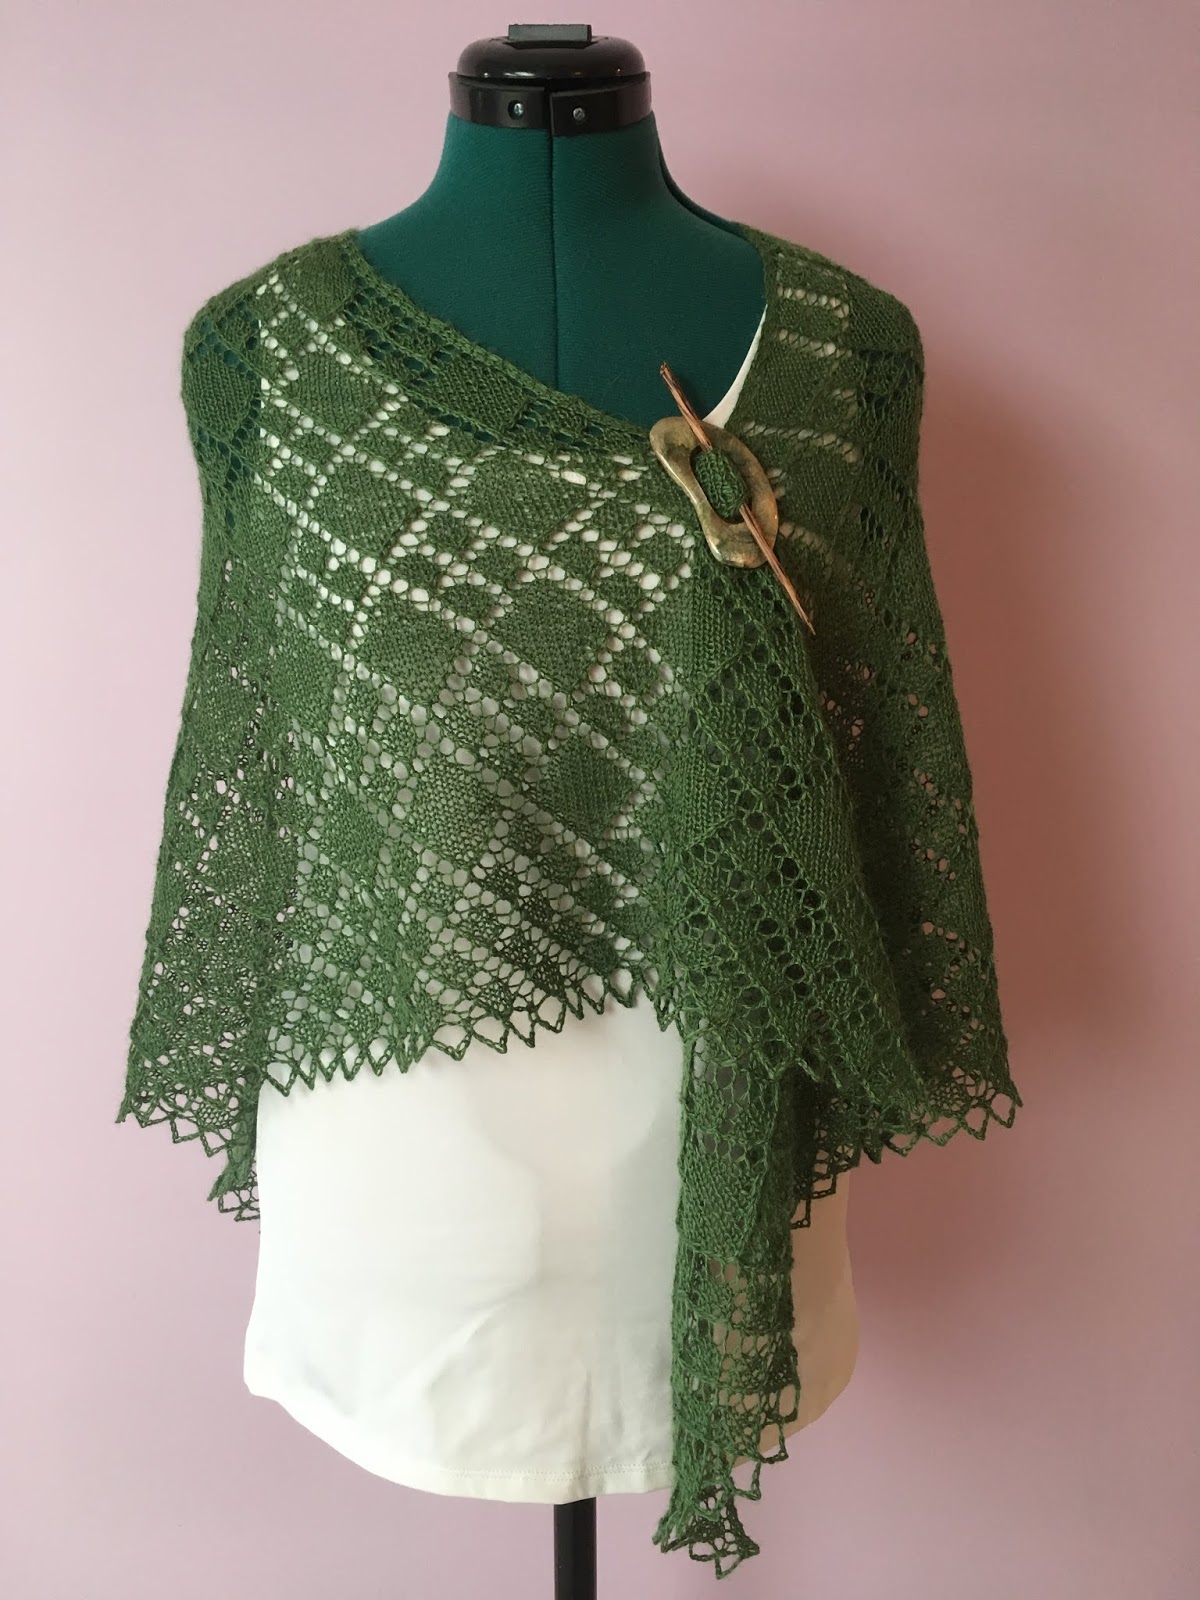
Hello hello! Today I come to you with a finished project: my argyle lace shawl! It's been knit, it's been blocked, and now it's ready for the spotlight! I've already introduced this project and shared my work in progress pictures, so let's cut to the chase and get to the main event, shall we?
Lovely, isn't it? I really couldn't be happier with how this shawl turned out. The argyle-esque pattern works so well in lace, and I love the way it looks in this color yarn, too! It drapes beautifully and looks good open in front or held closed with a shawl pin.
I will say, the shawl is a lot bigger than I imagined it would be. Its wingspan is probably close to six feet, though I haven't measured it precisely: that's a lot for a triangle shawl! When I put it on, the point at the bottom reaches to the back of my thighs! It's definitely a full-coverage type of shawl, and given that the yarn is alpaca, it should prove to be quite warm in the fall months. I think that doing one fewer repeats of the main lace pattern would also make a good shawl that's just a bit smaller.
My final verdict on the pattern itself is a bit mixed. Although I love the way the shawl looks when it's done right, it was tricky to figure out what "right" meant given the instructions. As I mentioned before, the pattern starts out with a vague comment on how the chart only shows "half" of each row, and that seven stitches are omitted from each row. I also had some trouble with the bind-off instructions, though when I went back to figure out exactly what I had trouble with, the instructions seemed clear enough. I'm not sure whether it's a case of hindsight being 20/20 or me misreading something the first time through. In either case, though, I'd recommend putting in a lifeline before attempting the bind off. You never know when your dad is going to sit on your project and pull out 30 stitches! Overall, I'd recommend it only to practiced knitters who already know their way around a shawl pattern. That way, you'll be able to make sense of murky instructions without tearing your hair out.
Now that this big project is out of the way, I want to make a smaller item or two before moving onto the next big thing. And I do have to get started on the Taako costume as well. So many crafts, so little time! Join me next week and I'm sure to have something new to show you. But until then, stay crafty!
Monday, April 15, 2019
Sweet as a Snail
Aah, sorry for forgetting to post last week! It was a very busy week, and honestly I'm still quite busy. So I think I'll have to go every other week for a little while, just so I can keep up with life stuff.
BUT that's not what I'm here to talk about! Whenever I get busy and stressed, I end up making cute softies, and this one is a whopper of a pattern. Let me introduce you to Laci:
Isn't she adorable? She's a banana split snail! Who even comes up with this stuff?
Apparently, Knot Bad does. His pattern is pretty darn good. It's got a lot of parts, but clear instructions and ample pictures make it fairly easy to put together. The one thing I will say is that this took more yarn than I expected it to, especially of the banana yellow color. Be careful of your yardage if you make it! That said, it's a super fun pattern with a super cute result. Laci sure brightened up my day when I finished her!
BUT that's not what I'm here to talk about! Whenever I get busy and stressed, I end up making cute softies, and this one is a whopper of a pattern. Let me introduce you to Laci:
Isn't she adorable? She's a banana split snail! Who even comes up with this stuff?
Apparently, Knot Bad does. His pattern is pretty darn good. It's got a lot of parts, but clear instructions and ample pictures make it fairly easy to put together. The one thing I will say is that this took more yarn than I expected it to, especially of the banana yellow color. Be careful of your yardage if you make it! That said, it's a super fun pattern with a super cute result. Laci sure brightened up my day when I finished her!
Monday, March 25, 2019
Craft 'em All!
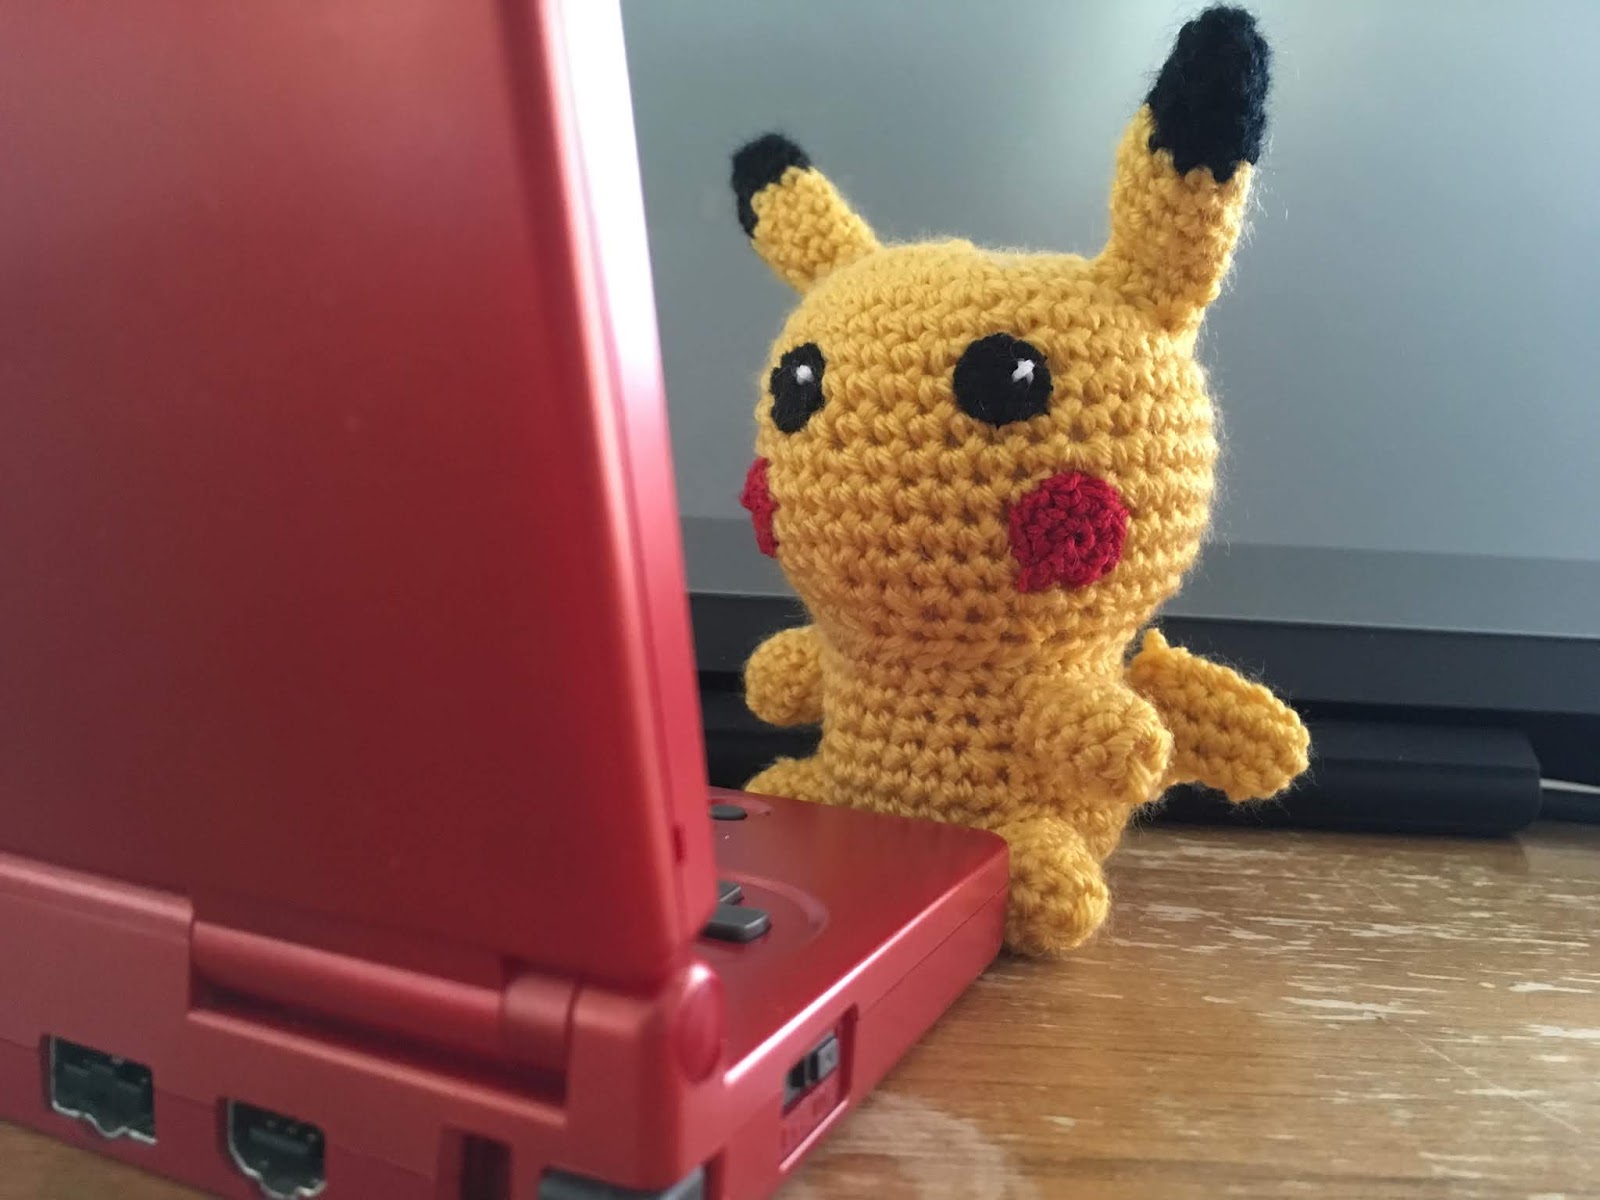
It may not surprise you to learn that I was a big fan of Pokémon as a kid. My first game was Emerald Version, and I logged a rather impressive number of hours in Diamond Version as well. I loved collecting all the different monsters, and to this day, I keep an eye on Pokémon news just to see the new designs (even if I don't actually play the games anymore). So it's no wonder that when I spotted a Pikachu crochet pattern from 53 stitches, I had to make it. I had to. My childhood self demanded it. And 53 stitches made it easy to give in with a clear pattern and plenty of photos. The tail was a bit tricky to pull off, but I got it after a couple tries. The result was certainly worth a few false starts.
And yes, I also had to pose it in front of my old Gameboy! I have to say, that thing is made tough: 14 years of use and no more than a few dead pixels to show for it. The game cartridges still work like a charm too!
"All right, now use thunderbolt!"
And yes, I also had to pose it in front of my old Gameboy! I have to say, that thing is made tough: 14 years of use and no more than a few dead pixels to show for it. The game cartridges still work like a charm too!
"All right, now use thunderbolt!"
Monday, March 18, 2019
It's In The Bag
Hello again! It's time for another entry in my quest to learn to sew properly.
A while ago, I made new pillow covers for my mom's living room. Around the same time, I also decided to try my hand at another simple sewn item: a project bag. A wise friend and fellow crafter once said that you can never have too many project bags, and I agree. So I decided to make her one!
I wanted something that would be easy to sew and big enough to carry a sweater-sized quantity of yarn, and after a bit of searching I came across this Market Purse tutorial from Fabricworm. Super cute! A quick dive into the fabric bins yielded some nicely patterned blue quilting cottons, and I was ready to start.
In all honesty, I forgot to take in-progress pictures on this one. But really, if you want that then go to the original tutorial: the pictures are plentiful and informative! I found it really easy to follow; I was even able to adjust the size a bit with no problems. Because I was using medium-weight cottons instead of canvas and batting, my project turned out a bit less structured than the original. But I think it's just as charming!
I'm not usually a huge fan of florals, but I like this understated pattern quite a lot. It's more interesting than a solid without looking like a bouquet!
The bag pattern also helpfully comes with a pocket! It's always nice to have a place to put odds and ends like buttons or stitch markers, so that you don't have to go rummaging around when you need them.
And as Mannie is so kind to demonstrate, it's quite spacious! It doesn't look too big because it's soft-sided, but there's a hefty skein of yarn in it in that picture, and you can't even see it. Not only that, but there was room for at least one, maybe two more skeins of a similar size!
Overall, I'd say this was a successful sewing endeavor. I gave it to my friend and she seemed to like it (I know you read these, so feel free to weigh in!), and it gave me the confidence to look for something a little more challenging next. I'll put the rest of my adventures here in due time, so stay tuned! After all, it is about time for me to begin Halloween planning, and sewing opens up a world of possibilities...
Until next time, stay crafty!
A while ago, I made new pillow covers for my mom's living room. Around the same time, I also decided to try my hand at another simple sewn item: a project bag. A wise friend and fellow crafter once said that you can never have too many project bags, and I agree. So I decided to make her one!
I wanted something that would be easy to sew and big enough to carry a sweater-sized quantity of yarn, and after a bit of searching I came across this Market Purse tutorial from Fabricworm. Super cute! A quick dive into the fabric bins yielded some nicely patterned blue quilting cottons, and I was ready to start.
In all honesty, I forgot to take in-progress pictures on this one. But really, if you want that then go to the original tutorial: the pictures are plentiful and informative! I found it really easy to follow; I was even able to adjust the size a bit with no problems. Because I was using medium-weight cottons instead of canvas and batting, my project turned out a bit less structured than the original. But I think it's just as charming!
I'm not usually a huge fan of florals, but I like this understated pattern quite a lot. It's more interesting than a solid without looking like a bouquet!
The bag pattern also helpfully comes with a pocket! It's always nice to have a place to put odds and ends like buttons or stitch markers, so that you don't have to go rummaging around when you need them.
And as Mannie is so kind to demonstrate, it's quite spacious! It doesn't look too big because it's soft-sided, but there's a hefty skein of yarn in it in that picture, and you can't even see it. Not only that, but there was room for at least one, maybe two more skeins of a similar size!
Overall, I'd say this was a successful sewing endeavor. I gave it to my friend and she seemed to like it (I know you read these, so feel free to weigh in!), and it gave me the confidence to look for something a little more challenging next. I'll put the rest of my adventures here in due time, so stay tuned! After all, it is about time for me to begin Halloween planning, and sewing opens up a world of possibilities...
Until next time, stay crafty!
Monday, March 11, 2019
Pining for Pineapples
Around this time of year, I really miss summer. Besides the obvious warmth, I miss long sunny days, getting wet without shivering, and sweet summer fruits. Sure, nowadays we can get fruits shipped from warmer climates year-round, but they're just not quite as good as when they're in season.
Great, now I'm thinking about fruit salad and getting hungry.
So, it shouldn't be surprising that a certain pattern caught my eye while I was scrolling through Ravelry a few weeks ago. I took a long look and decided that I had to make it. Immediately.
I mean, just look at it! The little face! The floppy leaves! The pattern, by Stephanie from All About Ami, is super easy to follow, and works up quickly. Shell stitch is surprisingly reminiscent of a pineapple's spines, so if you're an intermediate crocheter you probably already know every technique to use!
I don't have much else to say. Why wouldn't you want to carry your keys in a cute-faced fruit? Go! Go make this thing now! Maybe it'll make spring come a little faster!
Great, now I'm thinking about fruit salad and getting hungry.
So, it shouldn't be surprising that a certain pattern caught my eye while I was scrolling through Ravelry a few weeks ago. I took a long look and decided that I had to make it. Immediately.
I mean, just look at it! The little face! The floppy leaves! The pattern, by Stephanie from All About Ami, is super easy to follow, and works up quickly. Shell stitch is surprisingly reminiscent of a pineapple's spines, so if you're an intermediate crocheter you probably already know every technique to use!
I don't have much else to say. Why wouldn't you want to carry your keys in a cute-faced fruit? Go! Go make this thing now! Maybe it'll make spring come a little faster!
Sunday, January 20, 2019
Pattern Review: Arzote Top
It's finished! I've been working on this project on and off since July, and I'm finally done. So now you all get to see it!
In my endeavor to learn knitting faster than the average bear, I decided to take on a sweater six months in. Definitely not the craziest crafty thing I've dived into, but a sweater is still a big project. I had some dark green and multicolored yarn that I was itching to use for a garment, and they seemed like the perfect combination for a nice, simple striped sweater (cue Spongebob music).
One problem: I didn't have quite enough. I was short maybe a hundred yards. I would've just gotten another skein, but the yarn was a gift from over a year ago: no way the same dye lot would still be in stock. It seemed like the universe's goal was to thwart my plans! I was going to give up and search for another project, but I came across a lucky find in pattern form: Arzote by Berroco. It seemed like a pretty standard sweater... until you got to the short sleeves. I calculated my yardage and decided that I would indeed have enough yarn to make a striped, short-sleeved sweater.
I double-checked.
Yup, still enough.
As is tradition for first sweater (or almost-sweater) projects, I made my fair share of mistakes. One which I still can quite figure out ended up with me having a dozen mystery stitches on the front half of the shirt, with no evidence of mistaken increases in the fabric. I can only imagine that I missed decreases somewhere, though where exactly still escapes me. Fortunately, blocking hides a multitude of sins, and in my opinion, the top turned out pretty darn well! I blocked it straight onto Mannie Quinn in order to get the fit right.
All in all, it turned out well! I love these two yarns together: the colors work nicely off of one another. And despite my stitch counting mishap, the shirt fits well too! It's deceptively heavy for its size, since the fabric is so thick, but the yarns have lots of cotton and synthetic content in addition to wool, so it's not nearly as hot as it might seem. I'm looking forward to warmer months so that I can really show it off!
As for the pattern, I have a number of observations. Overall, I liked it. The instructions were clear and easy to follow, and it was simple enough for a novice sweater-knitter to understand. I didn't add a pocket because I didn't want it to clash with the stripes, but the original pattern includes a breast pocket that is very cute.
On the negative side of things, I did have a few issues with blocking and fit that I'm fairly certain weren't attributable to error on my part. The first is that there seemed to be a fair amount of extra stitches in the back when doing the ribbing for the collar. This extra ribbing stuck out from the neckline at odd angles and wouldn't lay flat against the back of my neck until I really forced it to with blocking. I'm usually trying to avoid stretched collars in my clothes, so starting out with one isn't that great. The other issue I have is with the shoulder seam construction. The fabric is quite thick, being made of worsted weight yarn, and that really influences the seams. While the side seams aren't that big of a deal, it becomes rather bulky in the shoulder and armpit area, which is a tad uncomfortable. More noticeable from the outside, the thick seams and fabric don't fold and stretch on themselves very much, so the shoulders of the shirt are kind of locked in an arms-down position. When I lifted my arms over my head, the shoulder area pops up to my ears, making the entire shirt ride up. I was using the recommended weight yarn and the correct gauge for this project, so I expect that it's not just my seam job that creates this problem.
All that being said, I still like the top. It's pretty, and it fits well as long as I don't raise my arms too high (and let's be honest, they're usually down at my lap with a craft project anyway). It's got some flaws, but if you're willing to deal with them, you'll get a nice looking product!
With my first sweater-ish project out of the way, I think it's time to set my sights on a new garment! Maybe this time I'll try a full-fledged sweater. In fingering weight. With lace. That won't take a million years to complete, right? Well, I'm going to dive through my pattern books. Until next time, stay crafty!
In my endeavor to learn knitting faster than the average bear, I decided to take on a sweater six months in. Definitely not the craziest crafty thing I've dived into, but a sweater is still a big project. I had some dark green and multicolored yarn that I was itching to use for a garment, and they seemed like the perfect combination for a nice, simple striped sweater (cue Spongebob music).
One problem: I didn't have quite enough. I was short maybe a hundred yards. I would've just gotten another skein, but the yarn was a gift from over a year ago: no way the same dye lot would still be in stock. It seemed like the universe's goal was to thwart my plans! I was going to give up and search for another project, but I came across a lucky find in pattern form: Arzote by Berroco. It seemed like a pretty standard sweater... until you got to the short sleeves. I calculated my yardage and decided that I would indeed have enough yarn to make a striped, short-sleeved sweater.
I double-checked.
Yup, still enough.
As is tradition for first sweater (or almost-sweater) projects, I made my fair share of mistakes. One which I still can quite figure out ended up with me having a dozen mystery stitches on the front half of the shirt, with no evidence of mistaken increases in the fabric. I can only imagine that I missed decreases somewhere, though where exactly still escapes me. Fortunately, blocking hides a multitude of sins, and in my opinion, the top turned out pretty darn well! I blocked it straight onto Mannie Quinn in order to get the fit right.
All in all, it turned out well! I love these two yarns together: the colors work nicely off of one another. And despite my stitch counting mishap, the shirt fits well too! It's deceptively heavy for its size, since the fabric is so thick, but the yarns have lots of cotton and synthetic content in addition to wool, so it's not nearly as hot as it might seem. I'm looking forward to warmer months so that I can really show it off!
As for the pattern, I have a number of observations. Overall, I liked it. The instructions were clear and easy to follow, and it was simple enough for a novice sweater-knitter to understand. I didn't add a pocket because I didn't want it to clash with the stripes, but the original pattern includes a breast pocket that is very cute.
On the negative side of things, I did have a few issues with blocking and fit that I'm fairly certain weren't attributable to error on my part. The first is that there seemed to be a fair amount of extra stitches in the back when doing the ribbing for the collar. This extra ribbing stuck out from the neckline at odd angles and wouldn't lay flat against the back of my neck until I really forced it to with blocking. I'm usually trying to avoid stretched collars in my clothes, so starting out with one isn't that great. The other issue I have is with the shoulder seam construction. The fabric is quite thick, being made of worsted weight yarn, and that really influences the seams. While the side seams aren't that big of a deal, it becomes rather bulky in the shoulder and armpit area, which is a tad uncomfortable. More noticeable from the outside, the thick seams and fabric don't fold and stretch on themselves very much, so the shoulders of the shirt are kind of locked in an arms-down position. When I lifted my arms over my head, the shoulder area pops up to my ears, making the entire shirt ride up. I was using the recommended weight yarn and the correct gauge for this project, so I expect that it's not just my seam job that creates this problem.
All that being said, I still like the top. It's pretty, and it fits well as long as I don't raise my arms too high (and let's be honest, they're usually down at my lap with a craft project anyway). It's got some flaws, but if you're willing to deal with them, you'll get a nice looking product!
With my first sweater-ish project out of the way, I think it's time to set my sights on a new garment! Maybe this time I'll try a full-fledged sweater. In fingering weight. With lace. That won't take a million years to complete, right? Well, I'm going to dive through my pattern books. Until next time, stay crafty!
Saturday, January 12, 2019
Frankenmittens
Ahhh, it feels nice to be back on a weekly schedule. I don't know about you, but I like a steady stream of crafts in my diet. And in the winter time, those crafts are mostly suited to the cold.
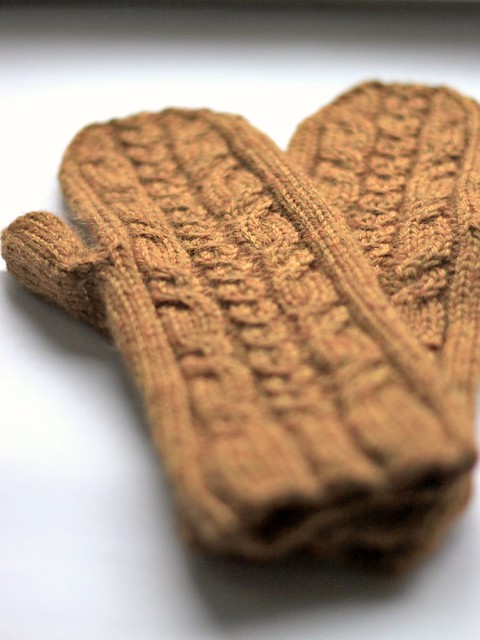
To be honest, I made these mittens a few months ago in preparation for winter. I've had so much other stuff to show you, though, that I haven't gotten around to photographing them until now. These are the creations that I've affectionately christened the Frankenmittens.
...Okay, so maybe the name isn't obvious. They're not green or patchy. They don't even have a bolt sticking out of them! The reason that I call them Frankenmittens is that they're actually an amalgamation of two different patterns. I really liked the cable pattern on these Dwarven Mittens, so I started out knitting those. The only problem? Well the pattern is.... okay I'm just going to be honest here, it's kind of terrible. The instructions weren't clear at all, and even as I was trying to figure them out, they didn't look like they'd make a very nice mitten shape. The only thing that was good about it was the cable chart. I frogged the project. I should really just find another pattern.
Ohhhh but I really liked that cable chart.
So I did a stupid thing. Not a stupid thing in general, for an experienced knitter who's made enough mittens to know her way around a thumb gusset, mind you. But I am not an experienced knitter. I've knitted exactly one pair of mittens in my life. You could count the number of knitting projects I've completed on your fingers. It would not be advisable for me personally to, say, combine two separate patterns to make my ideal mittens. But I'm not one to wait around for crafty qualifications, am I?
So I went ahead and did it. It would probably be easy for people with experience. I did not find it so easy, but I did do it! I used the base pattern from the Syänamaa Mittens that I made last winter, because I liked that pattern quite a lot back then. And I have to say, it worked really well! They're warm, they fit well, and they look nice to boot! I'm glad I took a chance making my Frankenmittens.
To be honest, I made these mittens a few months ago in preparation for winter. I've had so much other stuff to show you, though, that I haven't gotten around to photographing them until now. These are the creations that I've affectionately christened the Frankenmittens.
...Okay, so maybe the name isn't obvious. They're not green or patchy. They don't even have a bolt sticking out of them! The reason that I call them Frankenmittens is that they're actually an amalgamation of two different patterns. I really liked the cable pattern on these Dwarven Mittens, so I started out knitting those. The only problem? Well the pattern is.... okay I'm just going to be honest here, it's kind of terrible. The instructions weren't clear at all, and even as I was trying to figure them out, they didn't look like they'd make a very nice mitten shape. The only thing that was good about it was the cable chart. I frogged the project. I should really just find another pattern.
Ohhhh but I really liked that cable chart.
So I did a stupid thing. Not a stupid thing in general, for an experienced knitter who's made enough mittens to know her way around a thumb gusset, mind you. But I am not an experienced knitter. I've knitted exactly one pair of mittens in my life. You could count the number of knitting projects I've completed on your fingers. It would not be advisable for me personally to, say, combine two separate patterns to make my ideal mittens. But I'm not one to wait around for crafty qualifications, am I?
So I went ahead and did it. It would probably be easy for people with experience. I did not find it so easy, but I did do it! I used the base pattern from the Syänamaa Mittens that I made last winter, because I liked that pattern quite a lot back then. And I have to say, it worked really well! They're warm, they fit well, and they look nice to boot! I'm glad I took a chance making my Frankenmittens.
Tuesday, November 20, 2018
One for the Road
First off: sorry for the late post! I've been busy getting ready for holiday traveling. That being said, I wasn't too busy to get one more softie pattern off my chest, and this one's a real cutie.
It's a giraffe! Specifically a baby giraffe, designed by Courtchet. Isn't it just the cutest? I can't get over the adorable rounded shapes and babyish proportions of this softie. This is one of those projects that really works best with crochet, since the firmness of the fabric allows you to stuff the pieces to their full rounded potential without deforming them. And I made the fabric extra tight by using a 2.25 mm steel crochet hook on sport weight yarn (for reference, I would probably use a 3.5 mm hook on the same yarn in most other situations). Don't be afraid to go down a few hook sizes when making softies!
Okay, I've gotten my fill of cute animals for the moment. It's getting cold out here, so I need to shift focus to things that will keep my loved ones (and myself!) warm! Stay tuned for the adventures of Franken-mittens, the return of a favorite pattern, and my first attempt at a knitted top!
Monday, November 12, 2018
Plush Pals
Whew, it's been a busy week! I don't know about any of you, but November always seems to be the busiest month to me. And it's just about time to start on Christmas presents for my family...
...but before that, I need something cute and cuddly to get my spirits up. Or maybe more than one something. Enter, plushies!
Yes, whether you call them plushies, softies, amigurumi, stuffed animals, or something I haven't heard of, you'll probably agree that they're adorable. I've rounded up a few cuddly friends that I've made recently to share with you!
Bunnies are a plushie classic. Teddy bears may commandeer the number 1 spot on the list, but the lovable rabbit is a close second! Krawka's Bunny certainly does the animal justice with a cute, simplistic style that's just begging to be hugged. The pattern has a lot of pieces to juggle, but it's well written and easy to follow, so don't let that intimidate you too much!
Rabbits are a classic. Flamingoes... not so much. But maybe you have a quirky person in your life who would enjoy a large hot-pink bird plushie. Maybe you are that quirky person. Fair warning, Amigu Amigurumi's pattern is written in Dutch. Supposedly there's an English translation somewhere, but the site I was directed to looked so sketchy I was afraid to click on anything... If you're willing to brave a pattern in another language (or if you know Dutch), this is a wonderfully fun one to try! I'd recommend it if you have some experience with amigurumi crocheting, so that you can fill in the blanks when Google translate fails.
If you're not confident enough to pick through a pattern in a foreign language, maybe these chicks by the Enchanted Ladybug are more your speed. They're ridiculously quick to whip up, as they're crocheted in one piece. Just stuff, sew on eyes and a little beak, and be happy! If you're totally new to making plushies, this is a great pattern to test the waters. No big commitment in yarn or time, and if you like it you can make a whole family of chicks!
As you can see, I rather enjoy making plushies. It's quite a different experience from making a garment, and so the "rules" for doing it well are different as well. Here are a few tips if you're looking to start making plushies as well.
I'll readily admit that knitted fabric often feels better that crocheted fabric. It's much more supple and stretches better. But in a plushie, that's the opposite of what you want! Crocheted fabric's structure and stiffness makes it ideal for holding the shapes necessary to make softies, so if you want to learn a plushie-ready craft, try crochet over knitting. (You absolutely can knit plushies, it's just harder)
Pick a hook that's a few sizes smaller than you'd normally use with the weight of yarn you've chosen. Again, you want the fabric to be stiff enough to hold its shape, and tight enough to hold all the stuffing! By using a smaller hook, you can achieve this stiffness.
Learn how to start a project in the round with the magic ring crochet technique. If you've ever tried to start a project in the round, you'll notice that there's often a sizable hole at the center of the circle. While this is fine for a hat that you intend to put a pompom on anyway, it can be a problem with a plushie that has to be stuffed. The magic ring technique solves this problem, creating a very tight circle center with no hole at all. It looks much more professional, and no stuffing will fall out!
Finally, stuff generously! In order to give your plushies a nice rounded shape, you need to put a lot of stuffing into each piece as you put it together. It will be more than you expect initially. And while there is such a thing as overstuffing, a firmer plushie often feels better in the long run than an under-stuffed one. A good rule of thumb that I follow is that I should be struggling just a bit to keep all of the stuffing inside as I close up the hole.
Hopefully with this advice, you'll be able to go forth with confidence! Make plushies for the kids in your life. Make plushies for the adults in your life. Heck, make plushies for yourself while you're at it! We all need a little soft-and-cuddly love in our lives, after all!
Tuesday, October 9, 2018
A Bulky Break
I love lace, I really do. It's interesting to work, it's pretty, and there are so many options when it comes to making it!
That said, sometimes my poor fingers need a break.
After the copious amount of lacework I've done in the past few months, I thought I'd give myself a little change of pace with some thicker yarn. And since bulky stuff works up so quick, why not make a set of items?
Enter these beauties!
Cute, right? The patterns are the Dewey Decicowl and the Ana Beanie, adjusted slightly to accommodate the weight of the yarn. They're not supposed to be a set, per se, but I think they work really well together!
Both patterns are great for an intermediate crocheter. The general shape of cowl/hat should be familiar by that point, but each piece utilizes a number of less common stitches that add textural interest. The Ana Beanie uses a sideways construction to make the ribbing, which intermediate crocheters may not have seen before. That said, both patterns are quite easy once you get the hang of the new stitches, and the finished products are a fine addition to your fall/winter wardrobe! I think that I'll be using that hat pattern quite a bit in the near future, when I start to consider Christmas presents!
That said, sometimes my poor fingers need a break.
After the copious amount of lacework I've done in the past few months, I thought I'd give myself a little change of pace with some thicker yarn. And since bulky stuff works up so quick, why not make a set of items?
Enter these beauties!
Cute, right? The patterns are the Dewey Decicowl and the Ana Beanie, adjusted slightly to accommodate the weight of the yarn. They're not supposed to be a set, per se, but I think they work really well together!
Both patterns are great for an intermediate crocheter. The general shape of cowl/hat should be familiar by that point, but each piece utilizes a number of less common stitches that add textural interest. The Ana Beanie uses a sideways construction to make the ribbing, which intermediate crocheters may not have seen before. That said, both patterns are quite easy once you get the hang of the new stitches, and the finished products are a fine addition to your fall/winter wardrobe! I think that I'll be using that hat pattern quite a bit in the near future, when I start to consider Christmas presents!
Sunday, September 9, 2018
Pattern Review: Falling Water
I like making puns, and this pattern beat me to the punch! I had a skein of lovely bright turquoise fingering weight yarn from Mad Tosh that I needed a project for. The sensible thing to do would be to make myself a pair of socks, but socks are no fun. (Apologies to those who enjoy making socks). Plus then 70% of the pretty yarn would be hidden inside my shoes! No, I needed a project that let it all show, loud and proud! And I found that in the Falling Water scarf by Bonnie Sennot.
I'm a sucker for some lace, as I've probably demonstrated often enough, but I'm still not super well-versed in the ways of knitting. This pattern was a good compromise. It has a relatively simple lace pattern that is easy to understand and memorize, but the result is quite stunning. Take a look!
Isn't it pretty? The subtle variations in the yarn really emphasize the impression of waterfalls and flowing rivers. The scarf is just long enough for me to double up to wear, though of course with a repeated pattern like this, you can make it practically any length you like!
Cons are few and far between on this one. If you're looking for lace because you like to be challenged, this will be a little boring. The repeats are short, and so you need a lot of them to make a wearable scarf. And like any lace, it needed a good thorough blocking before the pattern could really shine, so don't work this pattern in a yarn that's hard to block. Other than that, it's a great little scarf pattern, especially for people looking for a first peek at lace!
Sunday, July 15, 2018
Sock it to Ya!
Socks are a staple of any knitting diet. Who doesn't like having toasty warm toes in the middle of winter? (Besides people who live in warm climates, that is!) That being said, I had never tried to knit a pair of socks before last month. Other projects just appealed to me so much more.
I got a chance to try it when my local knitting club started a sock-a-month knit-along, and I stumbled across a rather pretty skein of self-striping sock yarn. Perhaps fate was nudging me in the direction of knitted footwear? I took out my smallest set of circular needles and got started, and while it did take me a bit longer than a month, I came out of it with socks!
I have to say, I really like the striping pattern. It makes these plain stockinette socks look much more impressive than they actually are! As is traditional for first socks, they don't quite fit properly: I need to go up a couple shoe sizes to do much with them. Ah well, they'll be walking-around-the-house socks. I can show off the yarn more like that anyway! Let's look at those pretty stripes a little closer, shall we?
Aside from learning the joys of self-striping yarn, I did discover one other thing with this project. I do not like knitting socks!
Yeah, it's just not my thing. I'd much rather make mittens and scarves and sweaters, things that don't get hidden in you boot and pants cuff! That said, I'm glad I tried it, and I'll definitely get some use out of the ones that I have. Now onto another, non-footwear project!
I got a chance to try it when my local knitting club started a sock-a-month knit-along, and I stumbled across a rather pretty skein of self-striping sock yarn. Perhaps fate was nudging me in the direction of knitted footwear? I took out my smallest set of circular needles and got started, and while it did take me a bit longer than a month, I came out of it with socks!
I have to say, I really like the striping pattern. It makes these plain stockinette socks look much more impressive than they actually are! As is traditional for first socks, they don't quite fit properly: I need to go up a couple shoe sizes to do much with them. Ah well, they'll be walking-around-the-house socks. I can show off the yarn more like that anyway! Let's look at those pretty stripes a little closer, shall we?
Aside from learning the joys of self-striping yarn, I did discover one other thing with this project. I do not like knitting socks!
Yeah, it's just not my thing. I'd much rather make mittens and scarves and sweaters, things that don't get hidden in you boot and pants cuff! That said, I'm glad I tried it, and I'll definitely get some use out of the ones that I have. Now onto another, non-footwear project!
Monday, June 25, 2018
A Quiet Oasis
Hm, seems I've been slipping when it comes to my once a week rule... Sorry everyone, I'll try to keep the pace up! I'm excited to show this particular project, since it's a longer-term one that I had been planning for months.
On vacation last year, I stopped in a yarn shop and picked up a copy of Interweave Crochet on a whim. It had a lovely pattern called the Oasis Shell (link here), which I knew I had to try. I love lace guys, It's so pretty.
Look at that lace! And you know the best part?
On vacation last year, I stopped in a yarn shop and picked up a copy of Interweave Crochet on a whim. It had a lovely pattern called the Oasis Shell (link here), which I knew I had to try. I love lace guys, It's so pretty.
It continues all up the back! Seriously, it's so nice. And the body of the top is also pretty cool. It's Tunisian crochet, turned inside out for an interesting texture a little bit reminiscent of the wrong side of knitted stockinette. If you're looking to try Tunisian crochet, this would be a good pattern: lots of practice for the simple stitch! I'd recommend this pattern to anyone looking for a summery lacy top!
Saturday, June 2, 2018
To the Library!
No craft today, I just wanted to send some love to public libraries. I look a lot of things up online, but I wouldn't know about half the crafts I do if it weren't for my local libraries. Browsing the craft section (745 in the Dewey Decimal System -- yes I have this memorized) unearthed books about all sorts of crafts, mainstream and obscure alike. They let me read about and try new crafts as I pleased, without having to commit to buying the books first. I could explore freely without worrying if I was going to like it: if I didn't, I'd just return the book sooner and let someone else try! If there's a library nearby in your town/city, and I sincerely hope there is, please check out their craft section! I've been doing the same, and I currently have books checked out on: beaded jewelry, rug hooking, stamp carving, leatherworking, quilting, weaving, and silk painting. And that's not even counting the books I've read and returned this month! Seriously, go explore your public library. You might find something surprising there!
Thursday, April 19, 2018
Pattern Review: Sydänmaa Cabled Mittens
Cables! The quintessential knitting technique! Of course, I had to try them (and much sooner than anyone would recommend to a beginning knitter). I had a ball of Cascade 220 worsted in a lovely teal color, so I figured mittens would be a good idea. I came across this pattern, called Sydänmaa (link here), which I quite liked:
Don't fear the Finnish title: the pattern is available in English. For the curious, "Sydänmaa" means "heartland" in Finnish. I did try to learn the language a few years back at the behest of a friend, but languages just don't come easily to me. Unless we're talking the language of crafts! Speaking of, I took to a borrowed pair of double pointed needles to try Sydänmaa myself.
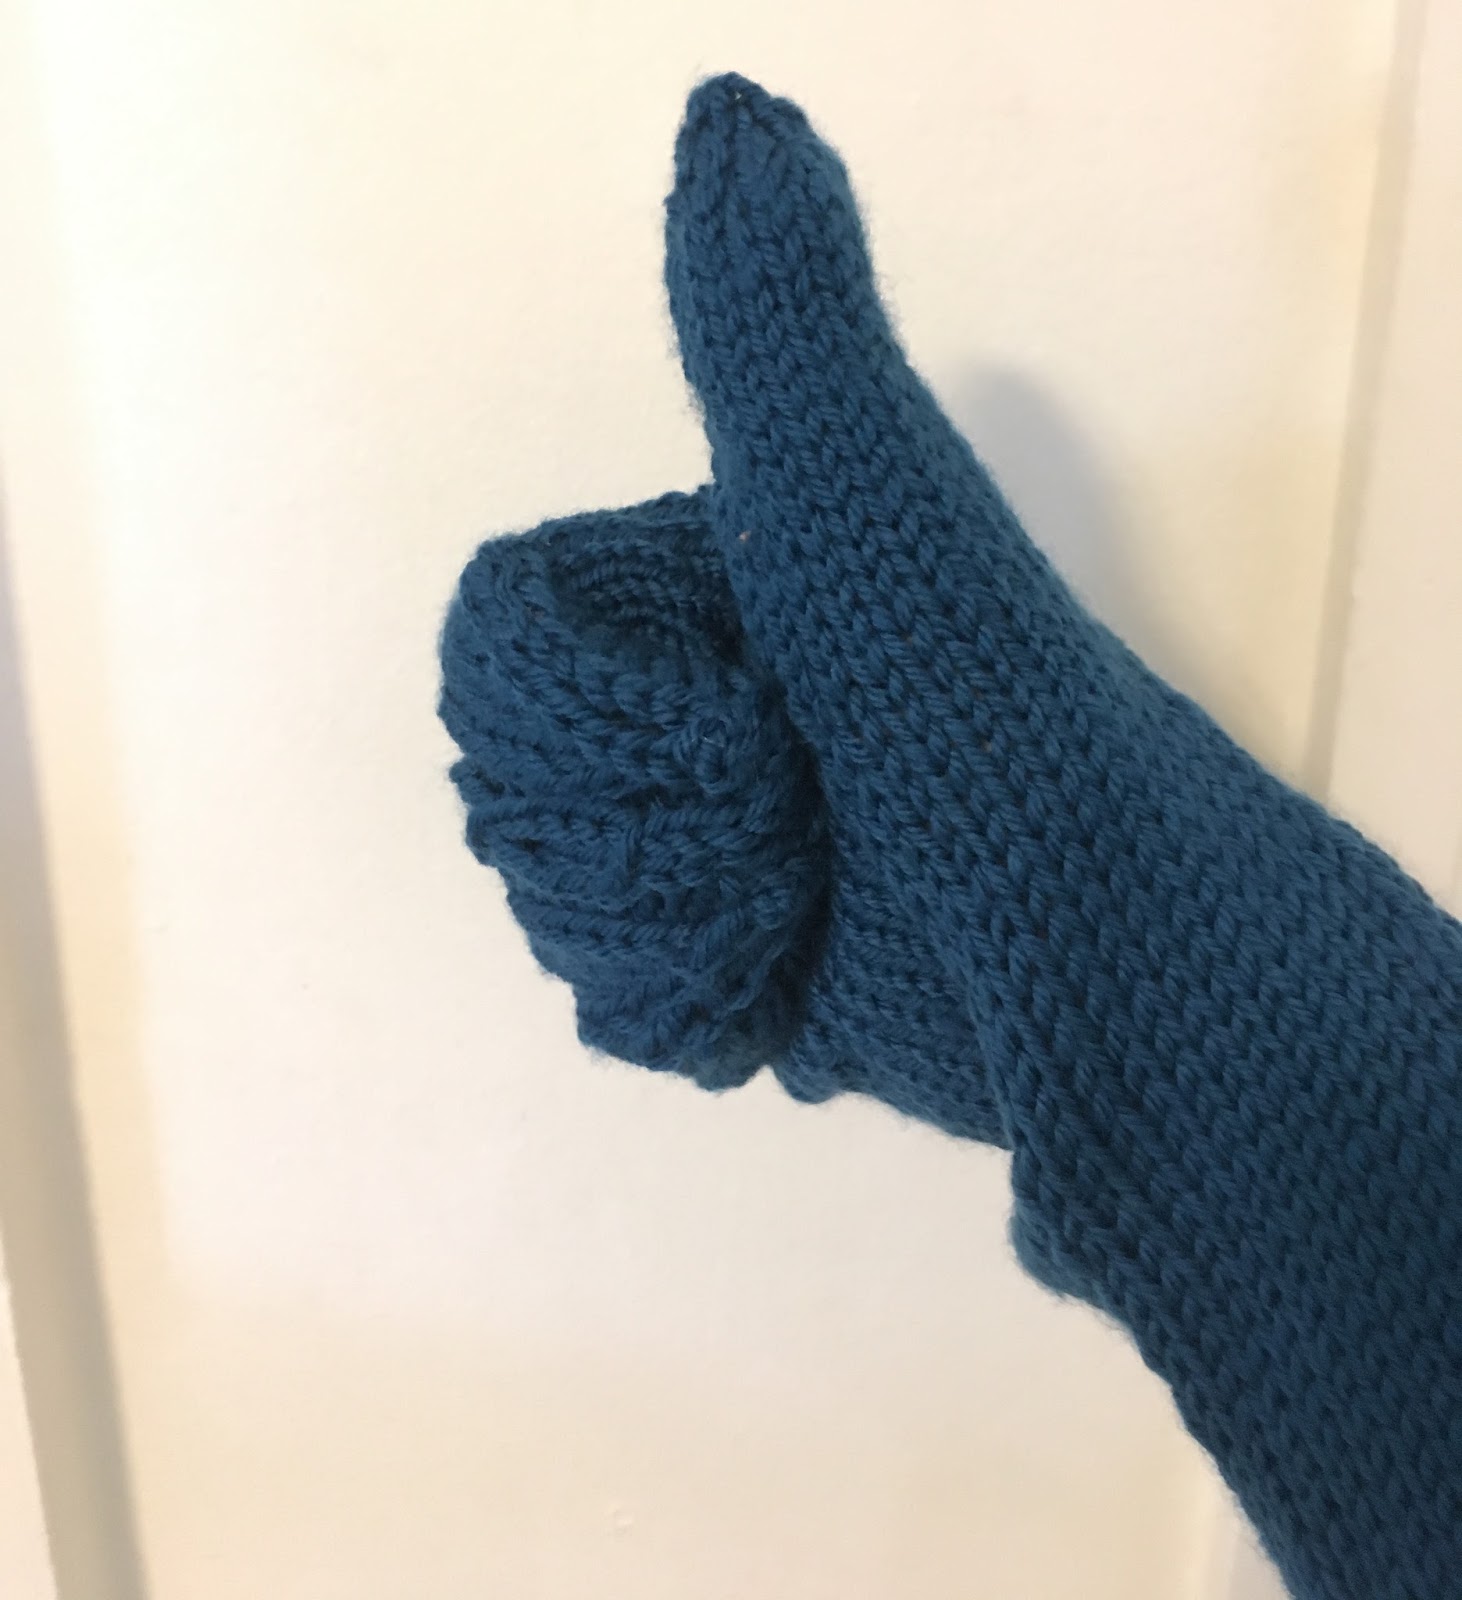
The results! These mittens were clearly made for someone with much longer fingers than mine. I cut out an entire pattern repeat and they still fit fine. I can't say that I'm a huge fan of how long the wrist sections are, either, but that's a personal stylistic choice rather than one of fit.
The charts were easy to read even for a beginner, and the shaping of the thumb fit my hand nicely once I corrected for length. I liked the style of the cables as well, though those could be changed fairly easily if you wanted to try something different on the backs.
Overall, apart from the length issue, it was a good pattern. Clear instructions made for a fine result that was easy to adjust to my hand. To conclude:
Thumbs up for Sydänmaa!
Don't fear the Finnish title: the pattern is available in English. For the curious, "Sydänmaa" means "heartland" in Finnish. I did try to learn the language a few years back at the behest of a friend, but languages just don't come easily to me. Unless we're talking the language of crafts! Speaking of, I took to a borrowed pair of double pointed needles to try Sydänmaa myself.
The results! These mittens were clearly made for someone with much longer fingers than mine. I cut out an entire pattern repeat and they still fit fine. I can't say that I'm a huge fan of how long the wrist sections are, either, but that's a personal stylistic choice rather than one of fit.
The charts were easy to read even for a beginner, and the shaping of the thumb fit my hand nicely once I corrected for length. I liked the style of the cables as well, though those could be changed fairly easily if you wanted to try something different on the backs.
Overall, apart from the length issue, it was a good pattern. Clear instructions made for a fine result that was easy to adjust to my hand. To conclude:
Thumbs up for Sydänmaa!
Thursday, April 12, 2018
Knitting: It's About Time!
I've been crafting for a long time, but in all those years, I never learned to knit. Oh sure, I have a pair of needles, and every few years I would clumsily attempt a cast-on and a few rows before losing interesting and ripping everything out again. My grandma taught me to crochet, my mother taught me to sew, and I taught myself tatting, papercutting, embroidery, weaving, and all the rest. I figured I didn't need knitting with all those other tools at my disposal!
But then, I just happened upon a book in the local bookstore on knitted lace on the bargain shelf. The patterns were, on the whole, beautiful, and the instructions were clear and well-written. Surely buying it couldn't hurt? Just to look at the pictures, to fill a space on my bookshelf. Then I started looking at patterns online. Pretty patterns. Stylish patterns. Knitting patterns. If I wanted to actually have any of those items, I would have to learn to knit. So I wiped the dust off of a pair of needles, made a few test squares, and got started.
Now, I am terrible at being a beginner. I hate the simplistic, plain crafting that's always suggested for a first project. It's. So. Boring. So whenever possible, I just... don't. I don't believe that your first project has to be some variation of a plain one-stitch rectangle. It takes a little longer to do, and you have to learn a handful more techniques at once, but you can absolutely start with a project like this:
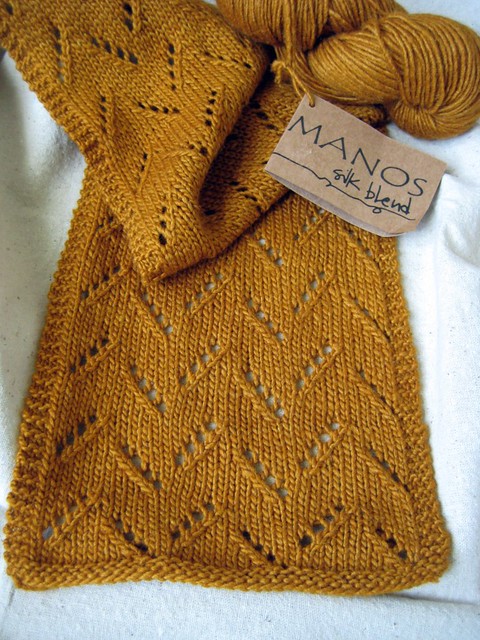
This is a free pattern called the Peaks and Valleys Scarf, available here. I liked it a lot: it was way more visually interesting than a plain garter stitch scarf, but not so complicated that I couldn't manage to figure it out. In fact, the instructions proper fit on less than half a page. I needed to learn a handful more techniques than I would have needed for garter stitch, but the repeating pattern gave me plenty of time to practice.
So I did! I knit and purled and made mistakes and fixed them. Many of the skills I knew from crocheting came in handy, and I learned new skills as well. The result was far from perfect, but I'm proud of it all the same!
The scarf curled pretty badly when I first knit it (It's the nature of stockinette), but a little steam blocking evened that right out. If you don't have a steamer, soak a pillowcase and lay it over your work before ironing right on top of the pillowcase. It does the trick nearly as well!
Now that I've finished a proper project with a proper pattern, I can officially call myself a knitter! I'm sure I'll be going on a knitting spree, making up for all those years I was too stubborn to try. If you want to learn how to knit too, I'll be posting a tutorials reference page soon. If you already know how to knit, share your tips (and your own first time projects) in the comments! And until next time, keep an open mind and stay crafty!
But then, I just happened upon a book in the local bookstore on knitted lace on the bargain shelf. The patterns were, on the whole, beautiful, and the instructions were clear and well-written. Surely buying it couldn't hurt? Just to look at the pictures, to fill a space on my bookshelf. Then I started looking at patterns online. Pretty patterns. Stylish patterns. Knitting patterns. If I wanted to actually have any of those items, I would have to learn to knit. So I wiped the dust off of a pair of needles, made a few test squares, and got started.
Now, I am terrible at being a beginner. I hate the simplistic, plain crafting that's always suggested for a first project. It's. So. Boring. So whenever possible, I just... don't. I don't believe that your first project has to be some variation of a plain one-stitch rectangle. It takes a little longer to do, and you have to learn a handful more techniques at once, but you can absolutely start with a project like this:
This is a free pattern called the Peaks and Valleys Scarf, available here. I liked it a lot: it was way more visually interesting than a plain garter stitch scarf, but not so complicated that I couldn't manage to figure it out. In fact, the instructions proper fit on less than half a page. I needed to learn a handful more techniques than I would have needed for garter stitch, but the repeating pattern gave me plenty of time to practice.
So I did! I knit and purled and made mistakes and fixed them. Many of the skills I knew from crocheting came in handy, and I learned new skills as well. The result was far from perfect, but I'm proud of it all the same!
The scarf curled pretty badly when I first knit it (It's the nature of stockinette), but a little steam blocking evened that right out. If you don't have a steamer, soak a pillowcase and lay it over your work before ironing right on top of the pillowcase. It does the trick nearly as well!
Now that I've finished a proper project with a proper pattern, I can officially call myself a knitter! I'm sure I'll be going on a knitting spree, making up for all those years I was too stubborn to try. If you want to learn how to knit too, I'll be posting a tutorials reference page soon. If you already know how to knit, share your tips (and your own first time projects) in the comments! And until next time, keep an open mind and stay crafty!
Subscribe to:
Posts (Atom)