This is it! The final piece of the costume! We’re nearly there (and not a moment too soon).

The observant might notice that there was no corset in my original costume sketch. To be truthful, that’s because corsets scare me. Not the wearing – I’ve watched enough Costube to understand that a well-fit, moderately laced corset shouldn’t be painful – but the making. This is a complicated garment with lots of curves, and not a lot of room for error. When I planned this costume, I didn’t think I was going to be ready to make one by the deadline.
I still don’t think I’m ready, but I went ahead anyway! Doing is the best way to learn, isn’t it?
The first challenge was finding a pattern to start with, because there was no way I was going to draft one from scratch. We should at least start this process with someone who knew what they were doing! I looked around at different styles of mid-late Victorian corsets and found myself drawn to a particular style of corded corset. These had very few bones: most of the support came from densely corded panels. I did a little digging and found a free Foundations Revealed article (though it seems to have since been removed) examining a corded corset from the 1880s, including a transcribed pattern! I loved the way this corset looked, and while it was a bit small waist-wise for me, the presumed height of the original wearer was close to mine. And I figured that adjusting the width would be easier than adjusting height.
(As it turns out, both are hard. But I’m getting ahead of myself.)
I made two mockups, each with different methods for fitting the pattern to me. For the first, I simply widened each panel by a fixed amount until it fit my hips. The problem, though, was that the bust and hips were way too big, even if I were to pad my figure out. It was downright cartoonish. I tried to size down the bust/hips, but ended up ruining all the nice curves of the panels. Back to the drawing board, then.

For the second mockup, I tried to grade the pieces to fit the major three measurements: bust, waist, and hips. I got lazy this time and didn’t actually cord the panels, opting instead to stiffen some scrap upholstery fabric just to get an idea of the shape.
It was also at this point that I realized something. I was making a corset for a (fictional) fairy, and fairies are hurt or repelled my iron in many stories. And corset busks are made of iron-containing steel.
Realistically, the Dream Fairy wouldn’t be able to wear the corset as I was making it.
The steel busk doesn’t touch the skin while being worn, but it would still present a problem when taking the garment on and off. And I imagine the Dream Fairy sewed her own clothes, in which case she wouldn’t have been able to insert the busk in the first place. I needed another solution.
All the antique corsets I’ve seen have had a busk, but plenty of modern corsets don’t. Sometimes they lace up the front. Sometimes they don’t have a front opening at all. Neither option is particularly accurate to the time period (as far as my very amateur knowledge goes), but hey, I’m making a costume for a fictional person belonging to a fictional species. I can afford not to be perfectly accurate. I liked the clean look of corsets sewn up the front, so I simply replaced the busk with a pair of bones in the second mockup.

…yeah I may have taken half of it apart before I remembered to snap a picture. But this one fit a lot better. It wasn’t as dramatic in silhouette as I wanted, but I was fast running out of time and needed to move on.
The stiffened upholstery fabric worked surprisingly well as a strength layer. I’m not going to claim it was as good as real coutil (it’s not), but it wasn’t bad. Because of how long it took to finish the mockups (and decide that yes, I really was going to go through with this), I was worried that I wouldn’t be able to buy coutil online in time to actually make my corset, so I made the executive decision to continue upcycling upholstery fabric in my final project. Isn’t that what a fairy would do, after all? She wouldn’t be able to go to the store and buy the perfect fabric, she’d use what she could find.
Anyway, back to the actual making of the thing. I cut panels, sewed coding channels, and inserted cords (which was not easy on the hands, let me tell you!) The cords are actually just some random cotton yarn from my stash. They show through the sheer outer fabric just a little, which surprised me, but I have to say I like the way it draws the eye to the curves of the corded panels.

Next, I sewed together the panels and felled the seams.

Eyelets were another brief point of contention. If I was forgoing the busk because it was steel, I couldn’t very well use steel eyelets. Brass I could justify, but the color wouldn’t work with the red-green-silver palette I had going. Fortunately, sewn eyelets are very much a thing. They might be a little old-fashioned for this style of corset (I’m not sure), but at this point we’re only vaguely gesturing towards historical accuracy so I didn’t care. Sewn eyelets it was.

What else is there to do? Oh right, boning. There are only three pairs of bones in this entire corset: two in the back supporting the eyelets, and one in the front replacing the busk. Historically these were made of whalebone (or steel, but obviously we’re not going that route), but nowadays we prefer to protect the whales, and use synthetic whalebone instead.
Admittedly, I didn’t have any synthetic whalebone. I didn’t even have any big zip-ties. But I did have some plastic folders!

Should I call this my trash corset? It’s made of a lot of stuff that would have wound up in the garbage otherwise. I cut a folder into strips and sandwiched a few together for a sturdier “bone”.

Maybe it’s my MacGyver corset instead. I didn’t actually use any duct tape or bobby pins, but I got close. Should I try to make a corset out of duct tape and bobby pins? Would that even work?
…I was in the middle of something else. Wacky hijinks can wait.
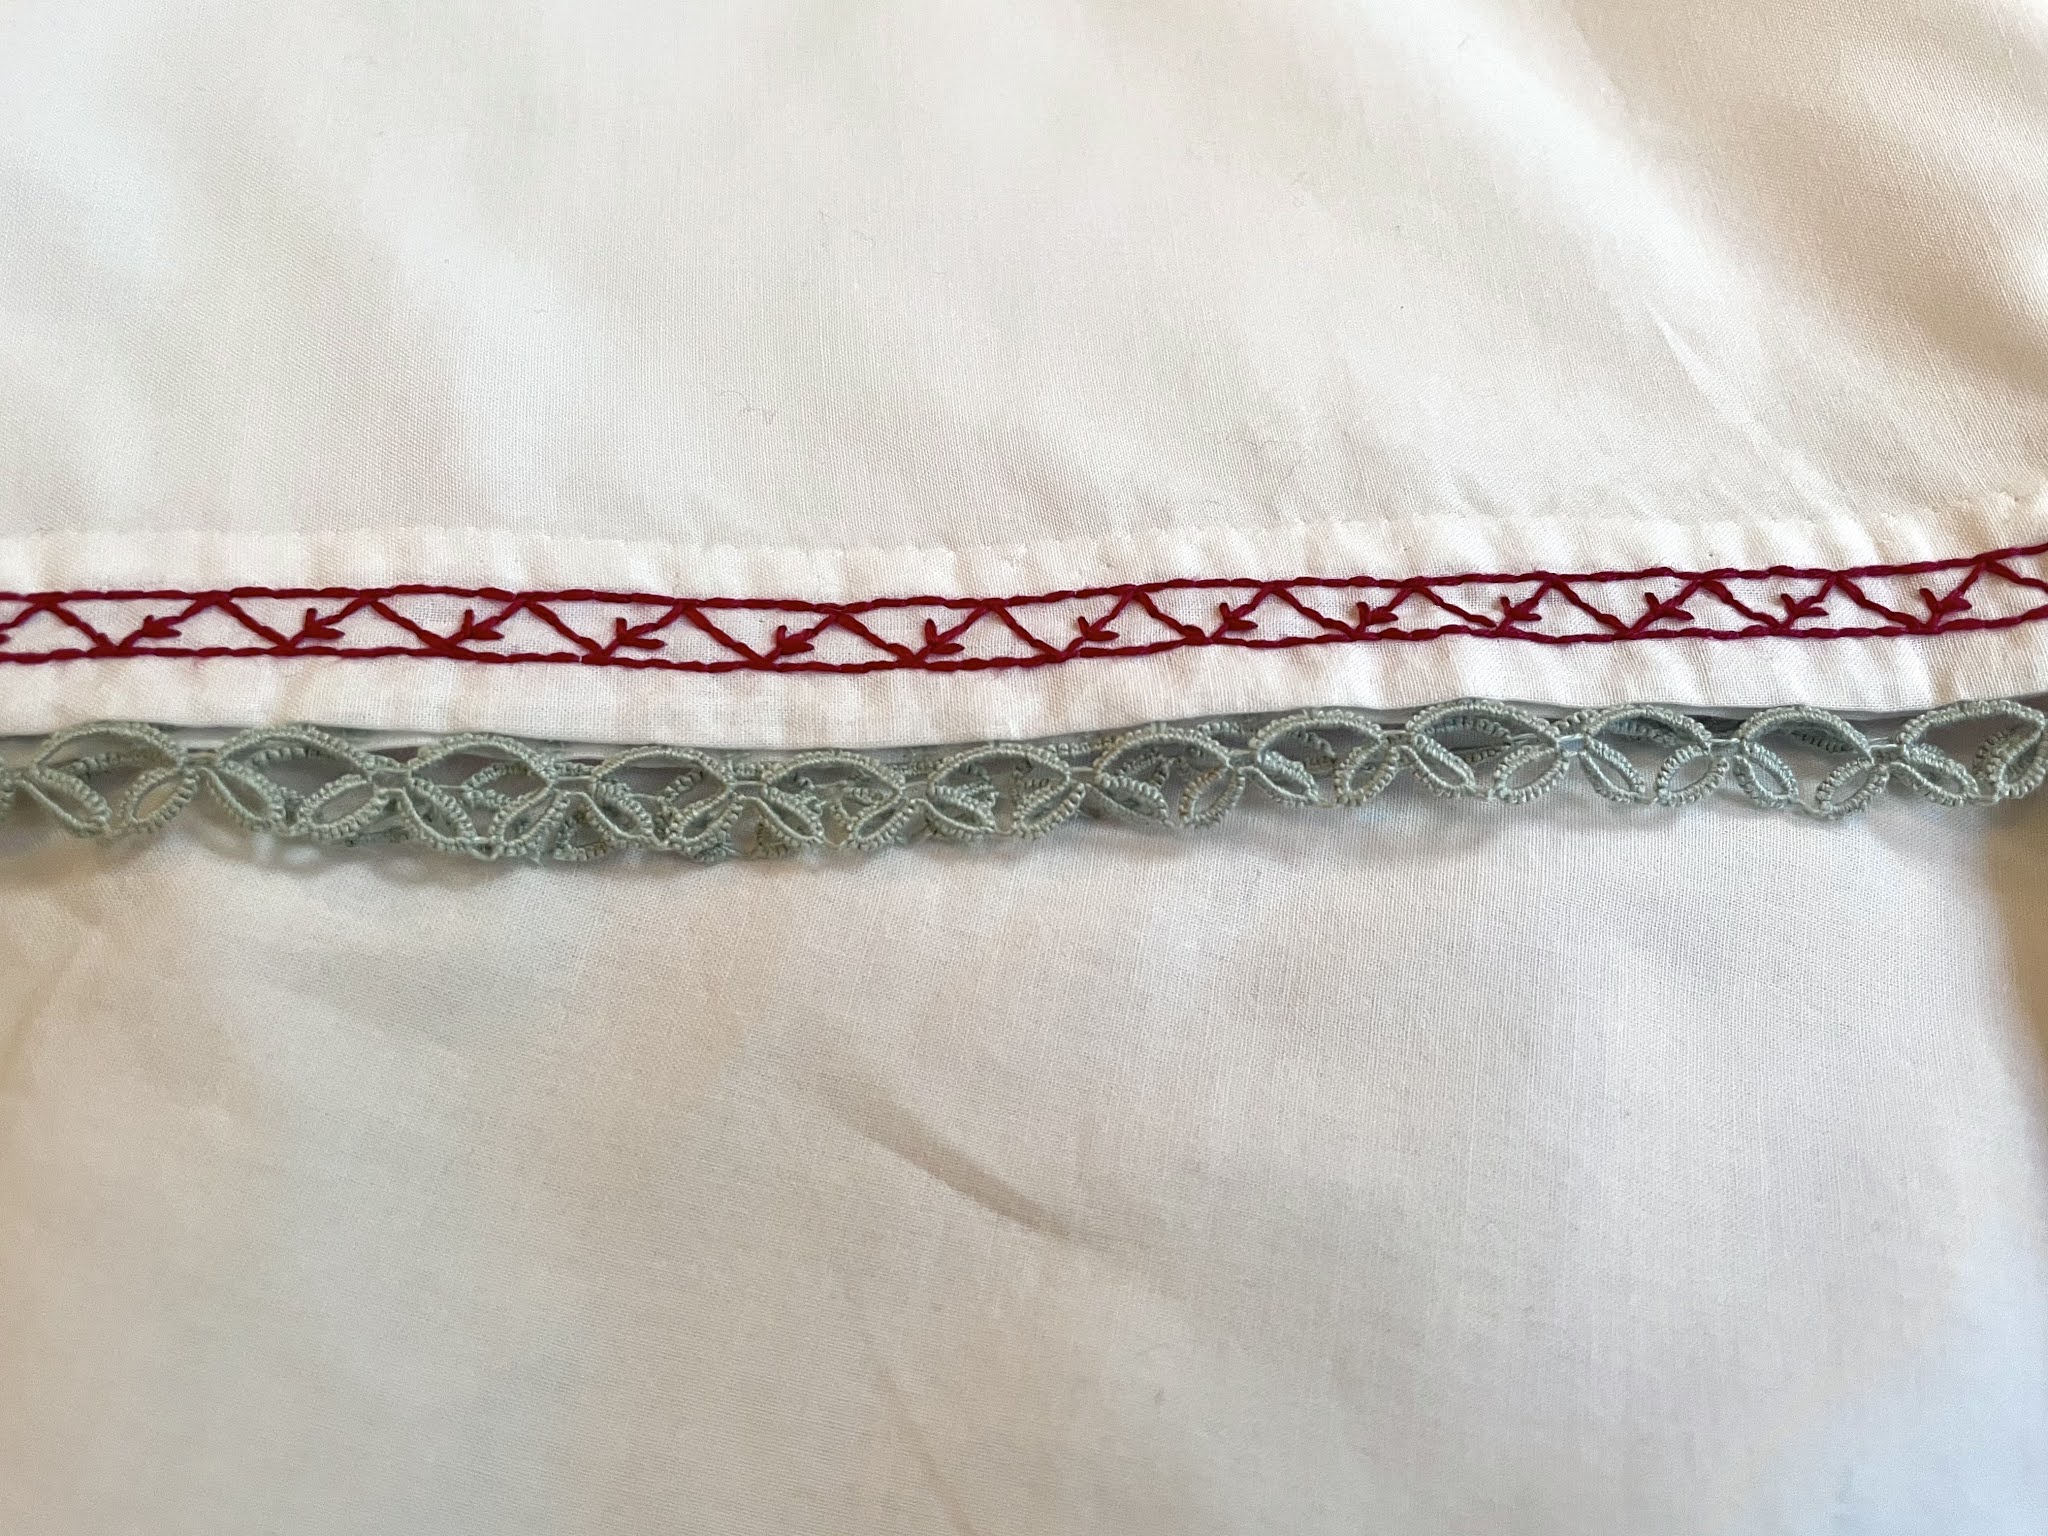
Step number I’ve-lost-count was to insert the bones into their respective channels and bind off the top and bottom edges, finally hiding all the raw edges in the garment. I used some red quilting cotton for the binding, and because I didn’t have a long enough piece to go along the whole edge, I pieced together two different patterns and made a design out of it. I think that bit worked rather nicely.

Now all the sewing’s done, and the fun part begins. Whenever you have boning, you need to do something to secure the ends of the bones so they don’t wear through the binding. Often, this was also an opportunity to add a bit of decoration to the corset. Yes, I’m talking about flossing! I found photos on the corset-making livejournal showing a flossing sampler, which was all the inspiration I needed. I did some functional flossing on the bones, of course, but I also had fun flossing the corded panels. These don’t serve a structural purpose; they just look pretty. Really pretty.


Does anyone else ever get a little nervous when using abstract designs? I’m always worried that I’ll accidentally copy a design with a symbolic meaning that I have no knowledge of. I hope these come off as regular little floral motifs.
By now the corset is perfectly functional, but there’s still something missing. What could it be…
Ah yes. There’s no lace. That won’t do.
I dove once again into my favorite archive.org resources and found yet another lovely bit of crocheted lace, this time from Crochet series No. 1-5 (link here). Crocheted lace works up much faster than any other type of lace I’ve yet to try, so it wasn’t long before I was blocking, pinning, and sewing it onto the form. I made a (very long) four-stranded round braid to act as the lacing, gave everything one last good press, and voila! A real-life corset!

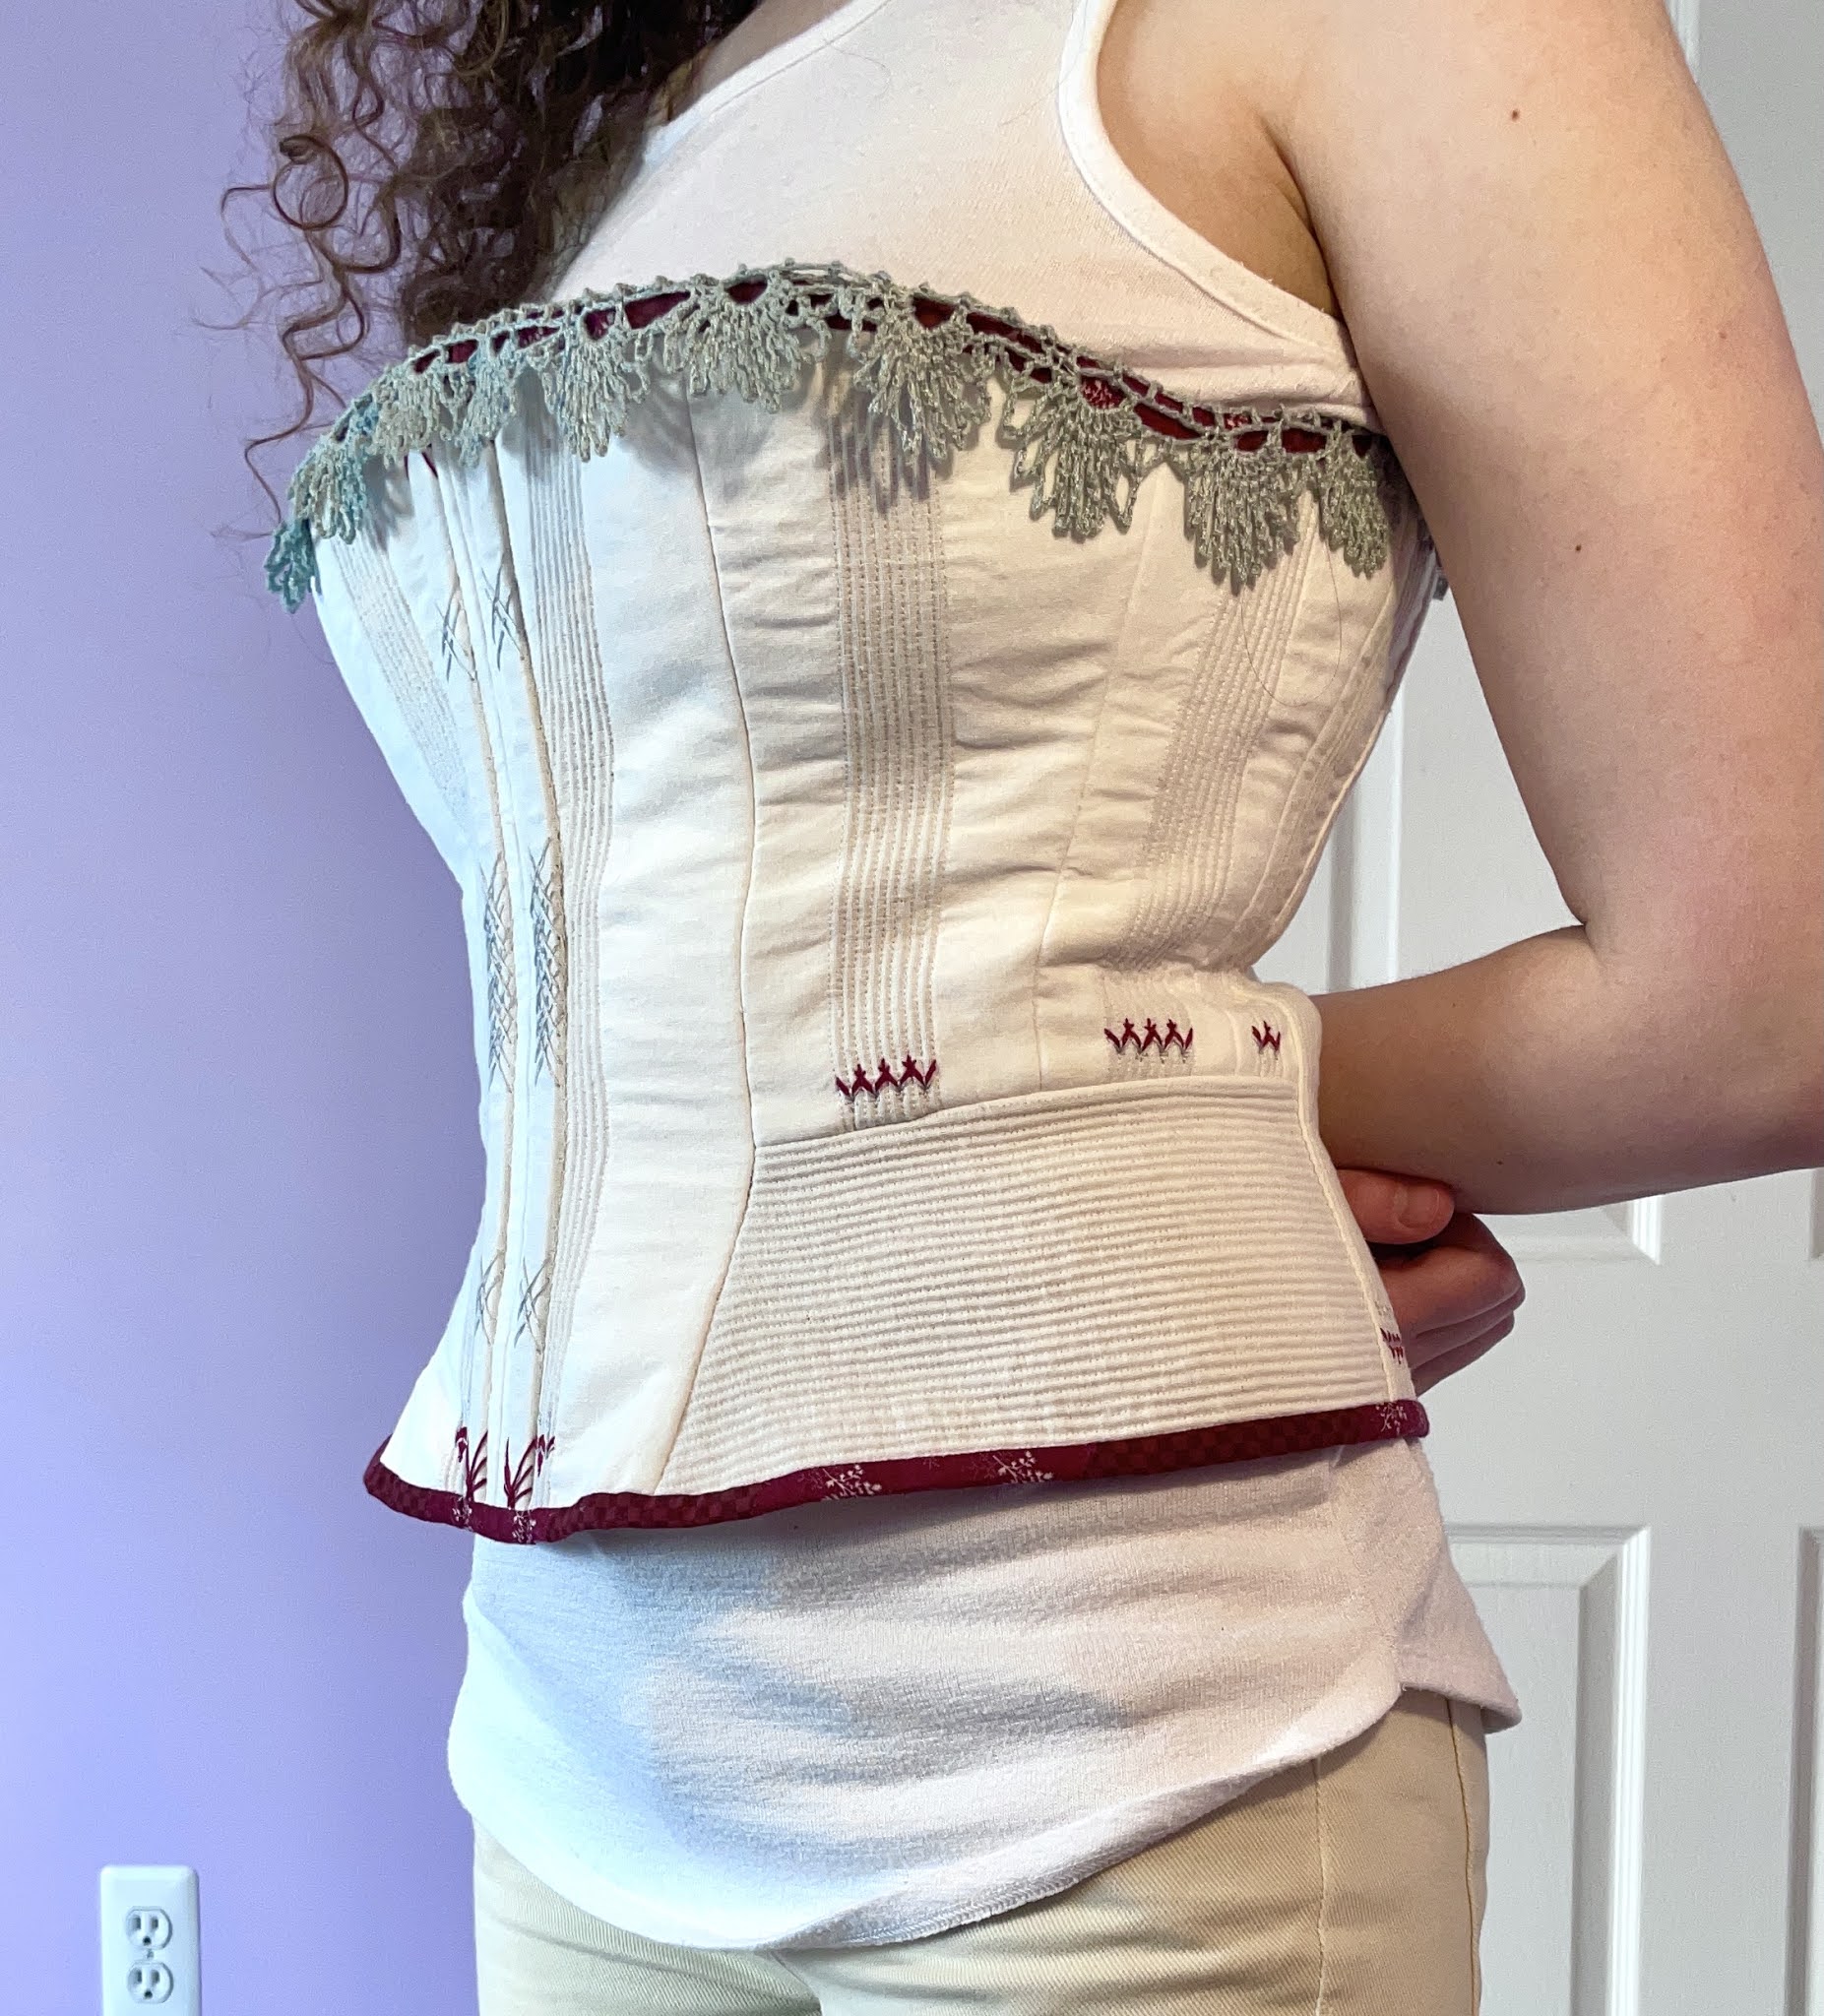

Well, it’s certainly a corset. I won’t say I’m entirely pleased with it. Despite my attempts at careful measuring, it’s a bit too big on me (would’ve been better if it was too small, but alas). I don’t think the silhouette is quite right for the era. There are some fit issues, especially in the back, that I was never able to get rid of.
But then, there are positives too. It fits me well enough to be comfortable and supportive. My experiment removing the busk worked pretty well. The embroidery and lace are pretty. For my first corset, and in fact my first fitted garment ever, I’d say it’s a good effort.
I won’t lie, I’m nervous to enter this into a competition. I don’t like to be judged on work that is so imperfect, and I know the judges will find even more wrong than I can see right now. But sharing and allowing for that vulnerability is how we grow. To do anything else is stagnation for the sake of security.
As scared as I am, I’m going to show this. I accept its flaws, but I’m proud of the things I did well. And next time, I’ll do even better.