Sunday, December 8, 2019

Pumpkin Pie

I love fall. I love the colors, I love the chill in the air and warm drinks and cuddling up in a blanket. My mom would always decorate for fall, too, in the months of October and November. Leafy garlands and wreaths dominated the mantlepiece, chrysanthemums stood sentry on the front porch. And, of course, there were gourds everywhere. Big pumpkins, little pumpkins, strange goose-neck-shaped pumpkins. All were welcome!

Now that I have my own space, I understand why my mom loved seasonal decorating so much. It brings what you love about autumn (or winter, or spring, or summer) into the house so you can see it all day long! I want decorations of my own, and where better to start with some fall gourds?

(I know it's edging into winter by this point, shh. Pretend it's still November!)

Enter this wonderful crocheted pumpkin pattern by PlanetJune. It's cute, quick, and easy as (pumpkin) pie for anyone who has a good grasp of crochet basics. Even if you've never crocheted "into the back loop only", as the pattern calls for, it's very easy to pick up.

The finished pumpkins are just about the same size and shape as those little mini pumpkins that you can get at the supermarket, which is wonderful! I personally love putting them on windowsills. And because these gourds are made of yarn and stuffing, they keep for many, many years. I made three to start off with, but I know I'll be adding to my collection as time goes on.


That's it for me this time! Christmas is looming ever closer, so I have to get a move on with my presents. Stick around in the coming weeks if you want to see how that turns out. And as always, stay crafty!

Tuesday, November 19, 2019

Finished Taako Cosplay

And now, folks, the moment you've all been waiting for! For once in my life, I've actually taken photos of a finished cosplay and posted them in a reasonable amount of time. So without further ado, I present to you: Taako!


Unfortunately, some of the images are a little grainy. It's difficult to take good photos of yourself when all you have is a phone camera and a bunch of textbooks playing the role of tripod. What can I say? If I waited for a better camera and an actual photographer, you all would be kept in suspense until next Halloween!


The perceptive among you might notice that I never made the corset belt that was in my original concept design. This wasn't an oversight: I actually did make a prototype belt, and it worked pretty well. However, when trying it on, I realized something: corset belts really accentuate your curves. Taako's a male elf and I'm a female human, so that detail wasn't really working in my favor, so I ended up scrapping it. Not that I went to huge lengths to crossplay in the first place... I basically just put on a sports bra...


Have I mentioned that Taako is super fun to cosplay? He's just so over the top! That's the opposite of how I act in real life, so it's really fun to pretend!


And that concludes Halloween 2019! Overall, I'd say I'm happy with it! If I had more time, there are some things I would have changed or added (like modifying the umbrella I bought, or coming up with a more interesting hairstyle), but those are mostly nitpicks. The project also taught me a lot of new skills, especially working with foam. Maybe for my next cosplay, I'll experiment more with foam and prosthetics!

With that being said, I think I'm going to wait a while before I start a new cosplay. As fun as they are, they're a big crafting commitment, and I'd like to do some smaller projects to recharge. Hopefully, that means my schedule will become a bit more predictable again. No promises just yet, but stay tuned and we shall see. And until next time, stay crafty!

Sunday, November 17, 2019

Brace Yourself

I'm back again with the final DIY piece of the Taako puzzle. Much like the hat, this accessory is one of the few things we know Taako wears in canon: it's the Bureau of Balance bracer! All of the members of the Bureau are issued one, and since they don't exactly come off, we can safely assume that Taako, Magnus, and Merle are all wearing theirs throughout the story. I have to imagine that Taako wasn't thrilled to have to restyle his wardrobe around a permanent accessory, but what else are you gonna do?

Enough chatter, let's get right to it! For this project, I decided to go with foam. It's a common cosplay substitute for armor and the like, since it can easily be painted to resemble metals without carrying all the weight and rigidity of actual armor.

Looking back, it seems I forgot to take pictures for the bracer, so this post is going to be a little light on process photos. There are plenty of cosplay armor tutorials out there, though, so if you're looking for something instructive you should be able to find it elsewhere.

A forearm is essentially just a tapered cylinder, so it was simple enough to measure and cut a corresponding shape out of craft foam. I put two layers of foam together to give a sturdier bracer, making sure to glue them together while they were curved around my arm so that they would hold their shape better. In order to secure the bracer, I used hot glue to attach velcro to the inside.


Then it was onto the detailing. I used scrap strips of foam to create a raised rim around the top and bottom openings, and then set to making the BoB symbol on the front of the bracer. Originally, I figured I would draw the insignia on in hot glue in order to get a sort of embossed effect. That didn't work out too well.


As you can see, the hot glue lines were far from the smooth embossed look I had intended. As it turns out, it's very difficult to get a perfectly even, straight hot glue line! Painting the bracer only made it look worse, so I tore off the hot glue and went back to the drawing board.

It occurred to me that the rim details I made out of foam had actually turned out quite nice, so I decided to try a similar tactic for the symbol. It was fiddly to cut and glue so many thin strips of foam, but in the end, I was much more satisfied with the result.


I covered the whole thing in a few coats of silver paint, and then dry-brushed some black paint into the crevices for a tarnished-metal feel. Then, a coat or two of glossy mod podge sealed everything in and brought out the shine.


There are definitely things I would do differently if I were to make this again, but overall I'm happy with it. It's comfortable enough to wear for a day out cosplaying, and durable enough to withstand it. It won't fool anyone into thinking it's actual metal, but some better paint and thicker foam might be more convincing. And most importantly, it reminded me not to give up if something doesn't work the first time. None of us are perfect crafters, and sometimes we need to try multiple techniques before we find the one that works.

And with that, I've finished all the DIY aspects of this costume. Tune in soon for the reveal of the full thing! (I promise that this time, I'll take pictures of the cosplay sometime this year!) Until then, though, stay crafty!

I'm All (Elf) Ears

Hello again, crafters! In my endeavor to dress up as the entirety of the TAZ cast, I've been working on completing my Taako cosplay. Or, well. It's already finished, I wore it for Halloween and stuff. But I haven't finished writing about it here, so for all intents and purposes, it's not done yet. I've made quite a few things in order to embody this elf wizard, but I'm missing some key components. He's an elf wizard, so I need elf ears!
I've never dipped my proverbial toe into the world of prosthetics, so the first order of business was to do some research. How are they made? Are there multiple techniques? And can I do any of them at home, on a grad student budget?
Well, most of your professional grade prosthetics are made from latex, molded to the shape of the wearer's ears and kept on with special adhesives and whatnot. This is definitely the most natural looking option, though due to a combination of the skills required to make them and the supplies I'd need, it was out of the question for me. I also saw lots of stylized, wire ears. These aren't meant to look realistic at all, just pretty. That was more in my skillset, since I have some experience with wirework from jewelry, but it wasn't quite the look I wanted. So I turned to the third option: clip-ons.
This class of ear prosthetics differs from the professional variety in that they're not meant to fit perfectly over the wearer's ear, leaving no seam. Instead, they clip over the ear like a cuff, or onto the hair, and are worn that way. They might be made of silicone, latex, even fabric or cardboard. Because they don't require precise fitting, I felt like this type of ear was doable. I planned to wear a wig that would hide the clips (and my actual ears) anyway, so a bit of disconnect wasn't an issue. After fiddling around with techniques for a bit, I came up with an inexpensive, easy pair of ears to DIY for my costume!
Because this is a construction method I came up with myself (only very loosely inspired by things I saw online), I'll do my best to provide a tutorial that you can follow along with yourself. Assuming you already have a hot glue gun and some spare paint lying around, you can make a few pairs of these ears in a few days for under $4. So go forth, and make yourself some ears!

Speaking of supplies, here's what you'll need:

  • One 12" x 18" sheet of craft foam, preferably in something close to your skin tone
  • Acrylic paint, in your skin tone
  • Two pairs of clip-on earring backs (note: it might be possible to use regular post earring backs if you have piercings in the right places, but as I don't have pierced ears, I couldn't test that out)
  • Hot glue
  • Regular craft glue
  • Scissors
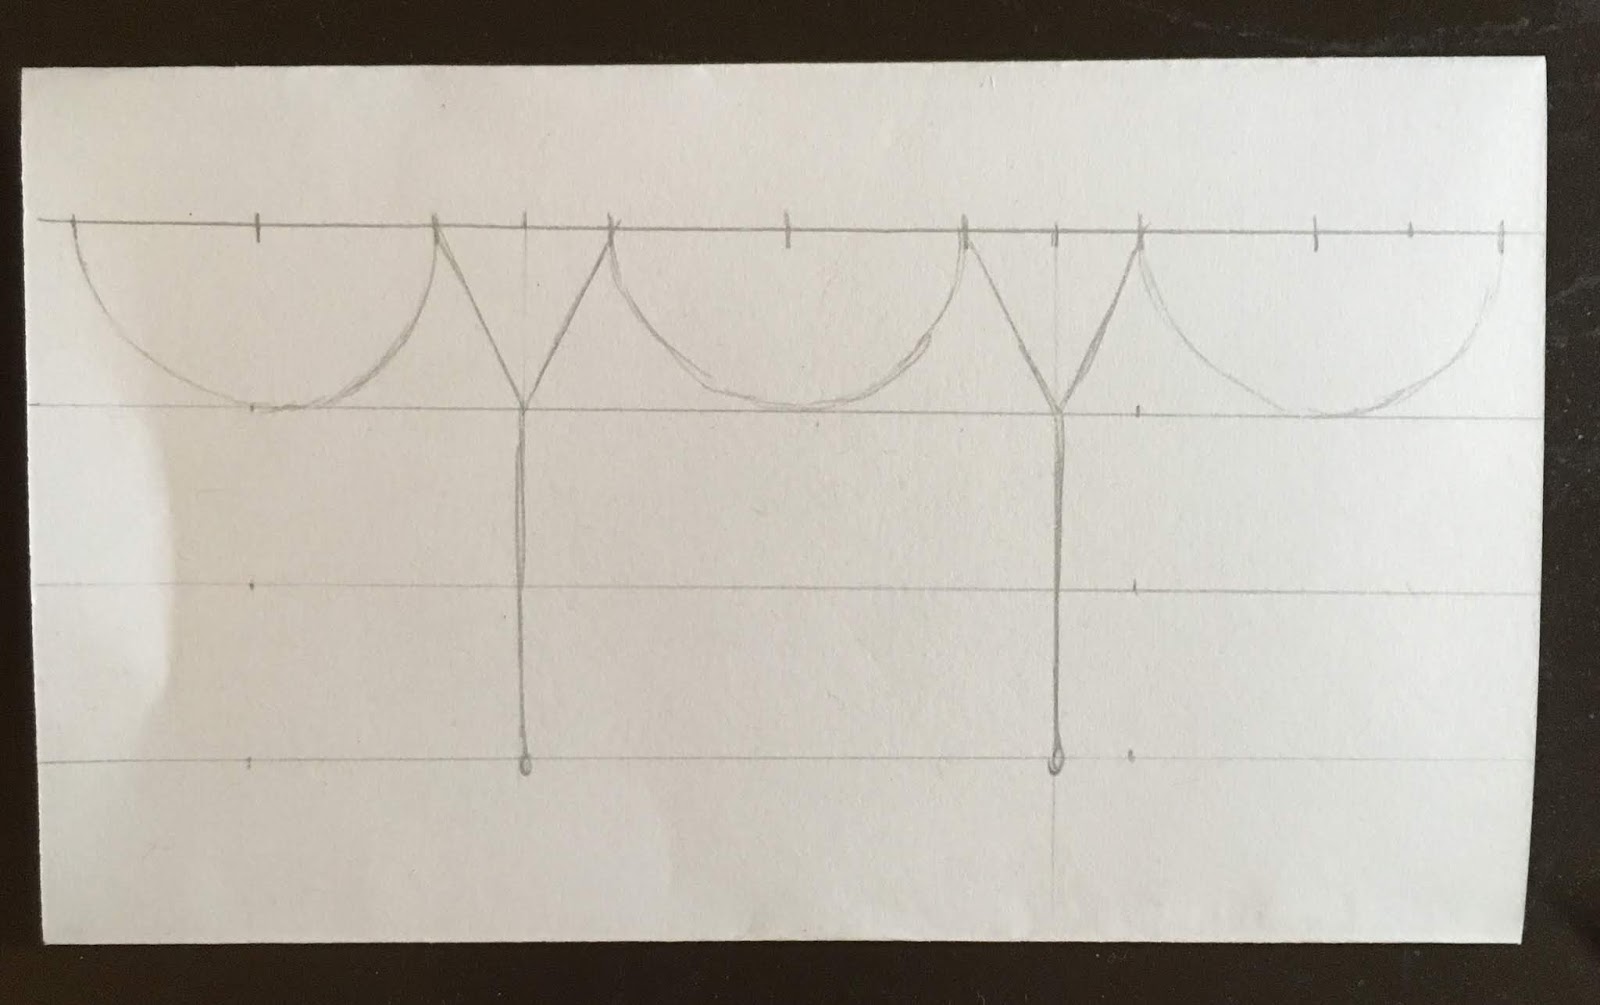
First, in order to make your ears, you need to know what shape your ears will be. Take a piece of paper and draw out your ideal ear, making sure that the base of the ear (the part closest to your head) is just about as tall as your actual ear. This project works best with the large, exaggerated ears. In order to get a more realistic shape, you can plan out a few layers of depth in your drawing. Ears have an outer rim that give them a cupped shape, and then they funnel in towards the head. In my drawing below, I've labeled the three layers that I'm going to use with numbers. Each layer will have its own piece of foam.


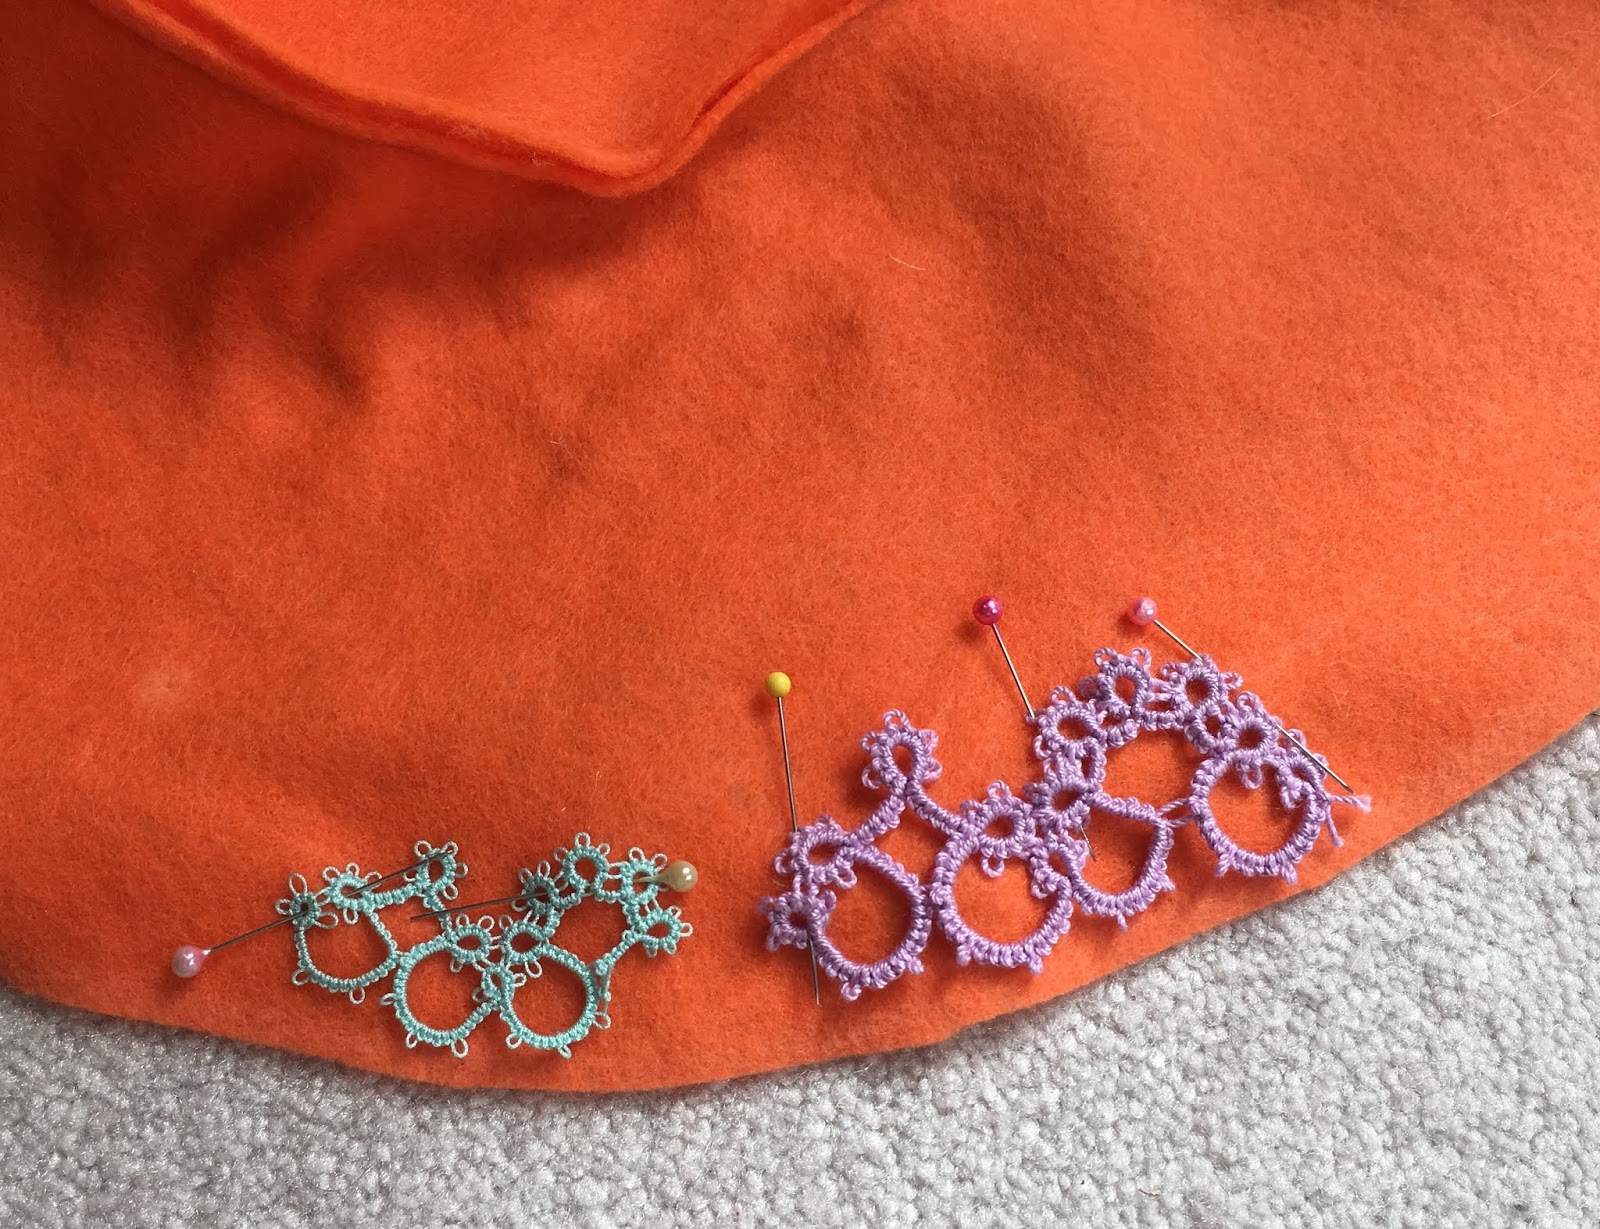
Now, use your paper pattern to cut out your foam. If you want two ears, don't forget to cut each layer out twice! Here you can see the three layers I've made, showing the differences in depth. The outer rim is most raised, and the inner part near the head is the deepest. Notice also that I put a slight curve in the foam at the base of the ear. This is to match the curve of my head, when I put the fake ear behind my real ear (like where you hand goes when you cup your ear to hear better). The better your foam ear fits into this groove, the better it will stay on overall.


Now, glue your pieces together and let them dry completely. I used regular craft glue for this, but you could try hot glue if you're in a hurry. Just make sure it doesn't ooze out of the seams too much.


All right, it's looking like an ear! If you want things to look a little less boxy, you can take a pair of scissors and round out the edges of the ears. 

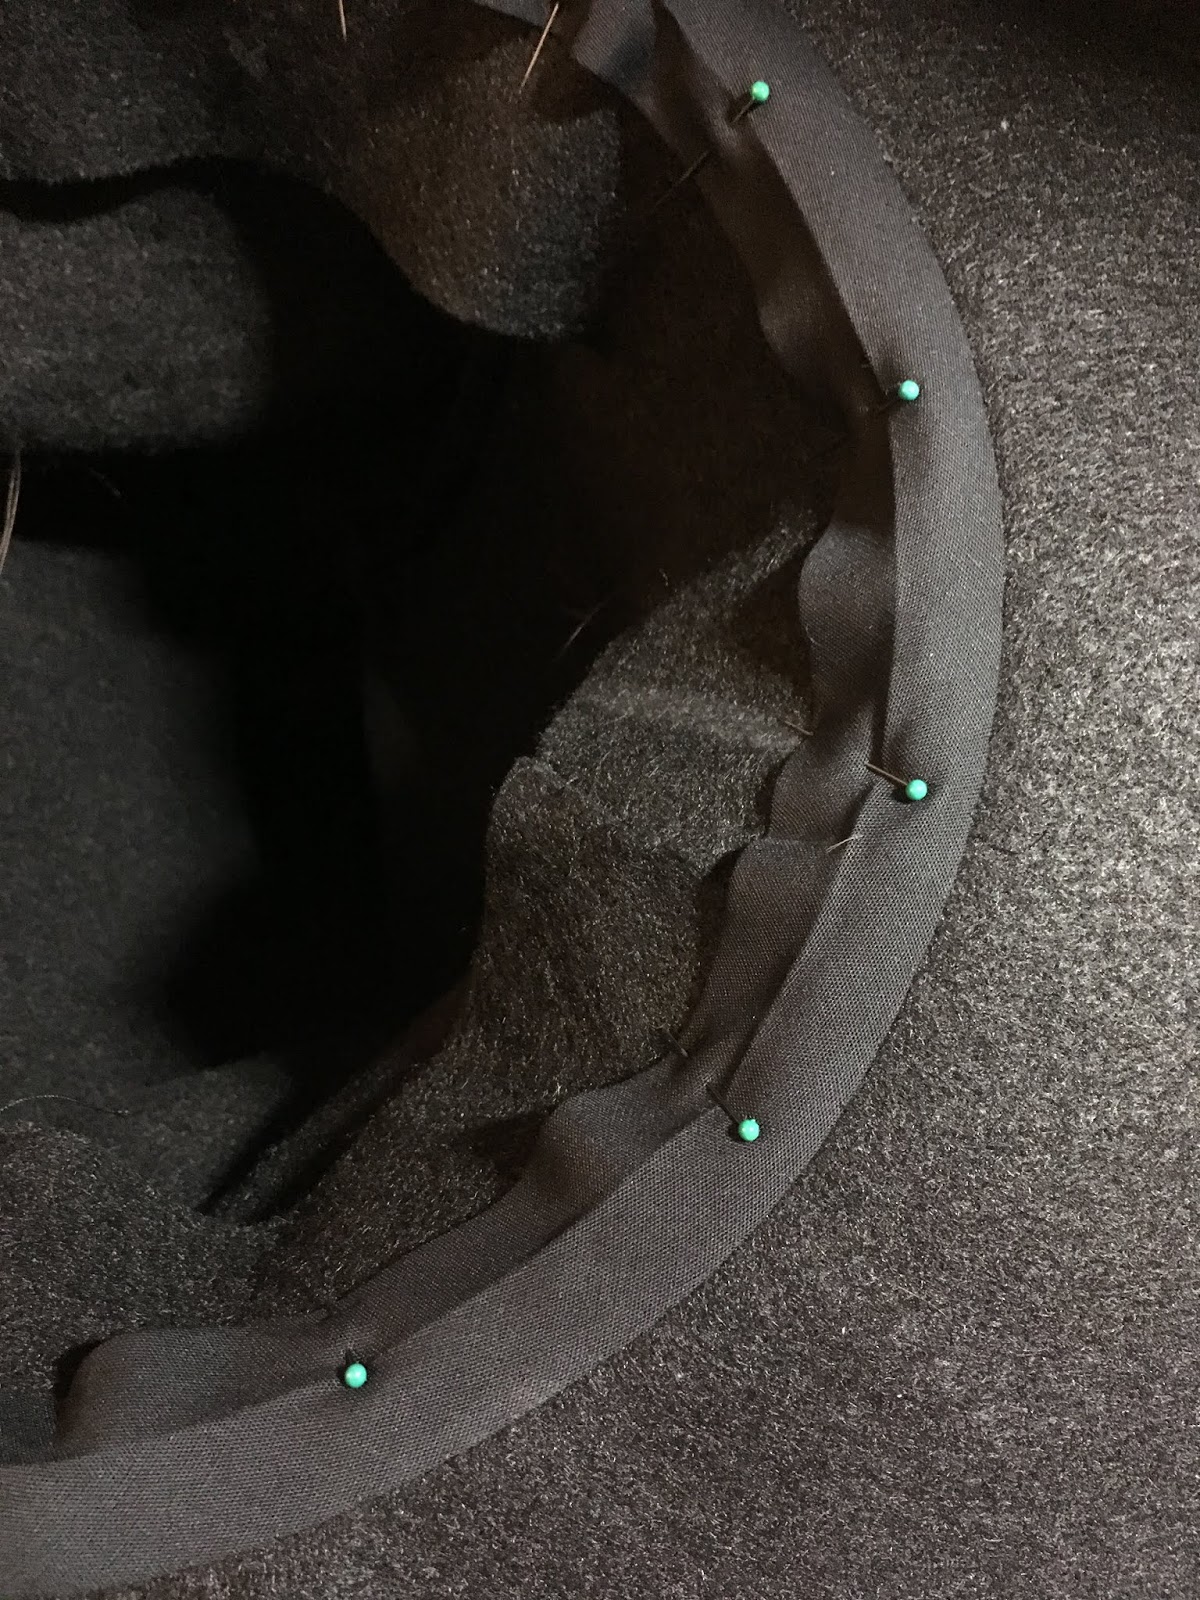
Now, here comes the hard part. In order to get these things to stay on, we're going to use clip-on earring backs, two for each ear. The first will clip onto the earlobe, in the same place as most vanilla ear piercings are. The second will clip to the very top of the ear (this is why it's important that your foam ear is the same height as your actual ear). Put a dab of hot glue onto the back of the foam ear and place your earring backs and the bottom and top of the ear, orienting them so that they will clip over both the foam ear and your actual ear, sandwiching them between the two pars of the earring. Look at the pictures for help. Once the glue is dry, check to see that the earring backs are actually in the right position to clip onto your ear. It may take several tries. Fortunately, you can easily pop the earring backs out of the glue, re-melt it with the nozzle of the glue gun, and try again. When you're satisfied with the positioning, put another dab of hot glue onto the earring back to keep it from coming off. (Please ignore that I already painted these, you're going to want to save the painting until the end. I just forgot to photograph the next few steps before painting.)

(This view is of the back of the ear. Note the hot glue keeping the earring back in place)


(And here's a front view. The earring back clips over the edge of the ear.)

(When worn, the earring backs clip over both the foam ear and your real ear, pinning the two together. If you spend time positioning them right, this can be quite a sturdy arrangement!)

The ears are now perfectly functional. But if you're like me, you couldn't find any foam that really matched your skin tone. Fortunately, foam is paintable! Grab one or more acrylic paints that match your skin, mix them together if needed, and give your foam ears a few coats of paint! Since the foam is porous, you'll need multiple coats: 3 should do the trick. Then let them dry completely (unless you want paint in your hair), and you're done!


I have to say, I'm pretty proud of these. For a first time prosthetic-maker, I think they turned out well! They're not the most comfortable things in the world to wear (if you've ever worn clip-on earrings, you know the feeling), and they're not quite sturdy enough to survive something like a LARP session, but they certainly stay on well enough to walk around a convention! And if you have a wig or long hair to hide the hardware, they actually look pretty convincing from a distance! I'm seriously considering getting another sheet of foam and making myself a whole set of wacky-shaped ears. Who knows, maybe I'll use them for next Halloween!

With this project in the bag, I inch ever closer to the completing of the Taako look. If you're interested in seeing more of that, stay tuned, and stay crafty!

Tuesday, October 22, 2019

Hat Trick

Okay, back to our regularly scheduled programming here! Even if it won't be, you know, regularly scheduled, I'm still determined to finish showing you all my process for this Taako cosplay. I actually went to the live show last Thursday, and just barely managed to finish in time, so I've got a lot of stuff to catch up on here. First and foremost, let's get that all-important wizard hat finished, shall we?

A few months ago, I rescued a piece of red sequin fabric from the scrap bin of the sewing class I took. It was actually a cast-off from one of my friend's projects, in fact, another TAZ cosplay! I knew I wanted to incorporate it into my costume somehow, since the two characters we were cosplaying as have a very special relationship. It didn't take me long to strike upon the idea of using it as a hat band! I straightened out the sides of the scrap and came up with a rectangle just long enough to wrap around the base of my hat.


Look at it! How could I pass this stuff up? It was rather stretchy, though, and didn't want to hold any sort of shape. So, I basted a piece of woven cotton fabric to the back, just to give it some structure.


Now, we have a little bit of a problem. This piece of fabric is straight, but if you've ever tried to wrap something around a cone, you'll know that you actually need a curved strip in order to make a nice straight-looking stripe. I didn't have enough fabric to make the proper curve, so I had to improvise. After fitting the strip around the base of the hat, I clipped lines down from the top end, so that I could bring it flush to the slant of the cone. It's a bit difficult to describe in words, I'll admit. 


...And it's also difficult to photograph, with this sequin fabric. In this photo, I'm holding a flap of fabric that I cut so that I could overlap both sides. That way, the straight strip of fabric fits around both the larger circumference of the base of the hat, and the smaller circumference a few inches up. From there, it was just a matter of stitching everything down with an inconspicuous thread. 

Next, I did a bit more finishing work. The seam on the inside of the brim, where the hat sits on the head, was looking a little bit untidy. I took the rest of the bias tape I used to bind the outer edge of the brim, and bound the inner edge in just the same way.


This isn't something that people can really see from the outside, but it makes me feel better to know that the seams are neatly tucked away. 

Finally, I couldn't leave the tip of the hat without some decoration. Just a little bead and wire decoration to top it off!


And with that, the hat is finished! I'm quite happy with how it turned out. It's very large, and very ostentatious. Perfect for Taako! I'll admit to strutting around my apartment with it on, reveling in how dramatic it is. Just once or twice! (Or, every time I picked it up to work on it...)


This is a really fun project, and it has so many costume uses. Make a hat for your own witch or wizard costume. Make a hat just to wear to feel powerful! Decorate it however you like! The possibilities are endless. Go forth, and until next time, stay crafty!

Sunday, October 13, 2019

Cosplay with a Chorus

Hello! Time for some actual content, hooray! And rather different, special content as well. For you see, today I have a video for you.

It occurred to me that I never actually showed you my completed Aubrey Little cosplay from last Halloween. I did complete it, and I had a great time dressing up as the Lady Flame for a friend's small costume party, but I never went and photographed it. But as those of you who follow the Adventure Zone know, they recently finished their second main story, the one with Aubrey in it. It's very bittersweet to let those characters go, even though I'm excited for what's in store for us next.

That was enough on its own to get me thinking I should break out my cosplay for another spin, but then I was listening to Shmanners. This is yet another podcast in the McElroy empire, and it happens to be co-hosted by Travis, the very man who plays Aubrey in TAZ. A few weeks ago, he mentioned hearing a rendition of the John Denver song "Country Roads" while on a trip, and it making him very emotional and nostalgic for his childhood home in West Virginia. TAZ: Amnesty is also set in West Virginia, coincidentally enough, and the wheels started turning. I have a ukulele. I have an Aubrey costume. I could, just maybe, make a video of "Aubrey" playing an ode to the place that played such a big role in her life.

I've been hesitant to post it though. Truth be told, it doesn't live up to my normal standards of what I share, such as they are. I don't have any recording equipment, for sound or video, other than my cell phone, and nowhere to do it but in my living room (overlooking a fairly busy street, no less). I also have no formal voice or ukulele training whatsoever. And probably most importantly, I have a deep aversion to being on camera. It's actually why I didn't get around to sharing photos of the cosplay: I didn't forget, I just found excuses not to. Something about looking at myself (or hearing myself in videos) just doesn't sit right with me. That said, this idea hit me so powerfully, and I didn't see anyone else try it. If it's going to exist in the world, it's going to be me, I guess.

Enough hedging my bets. I don't like looking at it personally, but I do hope you enjoy!


Sunday, September 29, 2019

An Update

Hey everyone. Long time no see!

...About that.

Things have been a little rough over here. I mentioned moving before, but I've also just started graduate school. It's a big change, to say the least. I knew that the whole process was going to make crafting a posting difficult for a while, but even after settling in, I'm not back to full power. Too many changes have me feeling drained, I guess. As a result, I haven't had much of anything to share with you all, or energy to write up any posts.

I feel bad about falling behind on my weekly posting during all this. I have no idea if anyone reads this blog regularly, but if there's even one person who does, I'm sorry I wasn't able to keep up my schedule. I'd rather be kind to myself than put myself down over past failings though.

All of this is a long-winded way of telling you that, for the time being, I'm not going to be posting on any sort of schedule. I'll still share projects when I finish them, of course (hopefully Taako will appear in time for Halloween), but I'm not going to push myself to have something every single week. If and when I feel like I can keep a schedule again, you'll be the first to know.

Thanks for understanding. Stay crafty.

Thursday, September 12, 2019

No Rabbits in This Hat

With the Spring of Sewing out of the way, I'd say it's time I got back to my Taako cosplay, wouldn't you? Last we left off, I had just made a rather large black wizard hat. Big and in-your-face it was, but it wasn't very fancy, and anyone who's listened to the Adventure Zone knows that Taako would appreciate some bling. Plus, it would give me a great opportunity to break out one of my less-used crafty skills - shuttle tatting!

For those who don't know, shuttle tatting is a form of lacemaking that was popular from the 19th century into the early 20th century. A shuttle wound with thread is used to make rings and chains out of consecutive knots and loops (called picots) which can be joined to one another to form a design. It's a very sturdy type of lace, since it's literally made up of hundreds on individual knots that don't unravel easily. And while it can be a little tricky to get started with, it's pretty easy to do once you have the basics down. If you're interested in learning, I recommend videos or in-person lessons above anything else: the knotting technique can be really hard to understand unless you can see it in action.

I wanted make a nice tatted edging to go on the inner edge of my hat brim, to give it a pop of color when seen from below. The first step was finding a good pattern, which for me meant looking through all my books and then surfing Pinterest.

I eventually came across the top edging pattern in this post. It looked lovely, and easy enough to make lots of. I'd love to give credit to the original pattern-maker, but the site that the post links to is in Russian, and I had no clue how to navigate it to figure out what book the pattern is from. If anyone happens to know who this pattern belongs to, please let me know so I can give credit where credit is due!


But I digress. I tried out the edging in a few different thread sizes to see what works best, and settled on the smaller one. I like the more delicate look it has when it's small. I liked the color of the thinner thread as well: it matched what I had in mind for the shirt I'd be wearing for this costume. So, I set to work making the edging.

I tatted.

And tatted.

And tatted some more.

As it turns out, when you have a big hat with a big brim, it takes a lot of yardage to go around. Almost five feet, in fact! That's a lot of lace to make, and it took me quite a while to actually get it all done. But finally, I had enough to work with.


As with any lace, tatting looks best when it's blocked, so I did all that first. No need to stiffen or starch it, because it would be laying flat against a piece of fabric. Then it was a simple matter of pinning it into place and sewing it down.


The hat's already looking better! But I think we can add even more to the brim. My next thought went to fringe, especially beaded fringe. I had seen a few pieces of fanart where Taako's outfit was modeled after the aesthetic of the goddess Istus, and many of them included such a fringe. I liked the look. I wanted it. And because all of this is within my power to control, that's exactly what I did.


After a little trial and error, I made up a fringe design that I thought would work well. It's a bit understated compared to some of the fanart, but for the purposes of wearability, that was going to have to be the case! The beads I chose were some that I've had in my stash for a long time now: a whole mix of assorted blue seed and tube beads. I marked out the spacing of each fringe loop on the hat with chalk before I started so that I knew I'd be able to keep things even, and then I set to work!

Tip: if you're making beaded fringe/edging like this, with lots of freestanding loops, knot the thread each time you stitch through the fabric. It keeps the tension of the loops more constant, making them hang better. Also, don't pull the thread too tight! If you want the fringe to swing and sway about, there needs to be some give with the thread.

The beading process actually went very quickly once I started: just two evenings and I was all the way around. It ended up looking really cool, especially with the tatted edging peeking through from the bottom!


This is the state of the hat at the moment. I think the added detailing really elevates it from basic costume hat to elaborate cosplay accessory, but it's not quite done yet. I still need to add a snazzy hat band, after all! Stay tuned to see that process, and the rest of this cosplay endeavor. And until next time, stay crafty!

Thursday, September 5, 2019

Spring of Sewing #3

Whew! Moving is finally over (mostly). I have furniture, I have food, and most importantly, all my craft supplies seem to have survived the trip. I'm stoked to get on with my many projects, but until I can fully get back into the swing of things, here's the third and final project from the sewing class I took.

So, it may not surprise you to learn that, just like last year, I began planning my Halloween-time escapades far in advance. I wasn't totally sure about design for a long time, but even in the spring, I knew I wanted to be Taako, and I knew he was going to be wearing a fashionable capelet. It just seemed like the sort of thing he'd be into. So when planning for the final project came around, I had a very specific idea in mind. 


That seemed pretty straightforward to me! All I had to do was find a capelet pattern and I'd be set. So I searched through the class's library... and found nothing. 

I searched online... and found nothing. 

Catalog after catalog, nobody seemed to have a pattern for the kind of capelet I had envisioned. I was actually kind of surprised; it didn't seem to me like my design was particularly unique. But for whatever reason, I couldn't find something to match. I could have scrapped the idea and gone for a more accessible pattern. But we all know I didn't.

Having almost no experience pattern drafting, I wasn't prepared to make a garment this complicated (not that it's even that complicated) without some help. In a bid to use as much of a commercial pattern as possible, I came up with a pretty neat trick. Find a coat pattern with a nice collar, and use its design from the shoulders up. Then, draft the shoulders down into a cape instead of sleeves and a body. That way, I could avoid making all the complicated bits, and I only had to come up with the easy stuff! I chose this lovely coat as my template:


A few rounds of mockups and tweaks gave me a pretty good idea of how to make a good capelet, so I set off looking for fabric. I knew the general color scheme I wanted to work with -- various shades of blue with accents of red and black -- and it wasn't hard to find a nice dusty blue wool to serve as the outside. I came up with some lovely red lining fabric that has a subtle rose brocade as well. I'm particularly fond of the red lining, both because the fabric is pretty and for some character-relevant reasons that are extremely spoilery. On the off chance that anyone is reading this while in the middle of listening to TAZ: Balance, I won't elaborate, but those of you who have finished it should recognize the significance of red outerwear. 

Anyway, back to the garment itself. Construction was fairly easy, since the instructions from the original pattern were still mostly relevant. Soon enough, it was time to show off the finished product!


See what I mean about that lining fabric? It's such a subtle fancy element. And I love how the red is almost completely hidden (save for buttons) while the cape is closed, but can burst out whenever the wearer moves their arms. Not to mention, it's quite practical and warm thanks to the wool! I think this will make an excellent component of Taako's ensemble come October. 

Here ends the saga of sewing class for me. I thought it was a fantastic experience, especially as someone who hadn't sewn clothes before. Now, I'm confident enough to take on most commercial patterns, and even try my hand at making my own! This adventure may be over, but the journey of cosplay is still very much active. If you'd like to continue to hear about that, then be sure to come back in (hopefully) a few days, where I should have another update. Until then, stay crafty!

Sunday, August 25, 2019

Spring of Sewing #2

Hello everyone! I'm sorry I skipped a week: moving has been even more time-intensive than I imagined it would be. I'm still not done, but I have gotten the all-important crafting supplies out of their moving-box prisons, so I'm here for another post! Since I didn't really have time to make anything after all that moving, we'll continue on with an exploration of the things I made for my spring sewing class.

As you may remember, the class was focused on costume making, especially for theatrical productions. Usually, that meant we were making garments to wear, but costumes aren't all shirts and pants. Accessories are just as important! For my second project, I decided that I'd be making an accessory, in the form of a large tote bag.

I wasn't about to make just any old tote, though. It was supposed to be part of a theoretical costume, after all, so I had to put some thought into it. I looked around for inspiration (read: dug through the available fabrics) until an idea came to me. I was going to make a tote bag inspired by the look of the leaf mimic butterfly, Kallima inachus.

(Photo from Australian Geographic)

It looks... like a leaf! Shocking, I know. You may be wondering why I would want to design anything based off of this drab insect, but this is only half the story. For you see, while the outside of the butterfly's wings are brown and leafy, the insides are much more striking.

(Photo from Wikipedia)

Now that's a pretty butterfly! I liked the idea of making a bag that was drab on the outside, but had a bright, colorful lining fabric, just like this butterfly's wings. I imagine it could be used by a character who's usually a wallflower, but has some sort of wild hobby or secret.

Unfortunately, I don't have any planning or process pictures for this bag. I used a pattern from a book, but it was borrowed, and I didn't think to write the name down for future reference. Truth be told, the book's pattern wasn't very clear: it had me put pieces together in the wrong order, and even included pieces that were totally unnecessary. I could have drafted out a simple flat-bottom bag pattern myself and saved a headache. 

Back to the design, though, I picked out a number of fabrics in order to achieve the butterfly effect I desired. I chose a flower-camo print canvas for the outside of the bag. It was dull enough to be unassuming, and I liked the added detail of the camouflage shapes being flowers instead of the usual blobs. For the lining fabric, I picked a really nice satiny teal lining. I would have liked to get closed in color to the actual butterfly's wings, but I couldn't find anything that quite fit, and the teal was just too pretty to pass up. I also used the lining fabric to create straps. Next, in order to bring in some of the contrasting yellow-gold color on the butterfly's wings, I found some metallic ribbon trim, which I added to the straps and around the inner edge of the bag. I sewed it all together, and viola!


Don't let this tote's understated outside fool you. Just like the leaf butterfly, it's got a colorful secret inside! The bag was perfectly complete as it was, but as you might have noticed, I decided to pay a little extra homage to the butterfly that inspired it in the form of some cross stitching. It was my first time doing cross stitch on linen instead of canvas, but I think it turned out pretty well regardless!


And there we have project number two of my spring series. Stay tuned for the grand finale, which will hopefully be out on time next week. Until then, stay crafty everyone!