Showing posts with label softies. Show all posts

Sunday, December 8, 2019

Pumpkin Pie

I love fall. I love the colors, I love the chill in the air and warm drinks and cuddling up in a blanket. My mom would always decorate for fall, too, in the months of October and November. Leafy garlands and wreaths dominated the mantlepiece, chrysanthemums stood sentry on the front porch. And, of course, there were gourds everywhere. Big pumpkins, little pumpkins, strange goose-neck-shaped pumpkins. All were welcome!

Now that I have my own space, I understand why my mom loved seasonal decorating so much. It brings what you love about autumn (or winter, or spring, or summer) into the house so you can see it all day long! I want decorations of my own, and where better to start with some fall gourds?

(I know it's edging into winter by this point, shh. Pretend it's still November!)

Enter this wonderful crocheted pumpkin pattern by PlanetJune. It's cute, quick, and easy as (pumpkin) pie for anyone who has a good grasp of crochet basics. Even if you've never crocheted "into the back loop only", as the pattern calls for, it's very easy to pick up.

The finished pumpkins are just about the same size and shape as those little mini pumpkins that you can get at the supermarket, which is wonderful! I personally love putting them on windowsills. And because these gourds are made of yarn and stuffing, they keep for many, many years. I made three to start off with, but I know I'll be adding to my collection as time goes on.


That's it for me this time! Christmas is looming ever closer, so I have to get a move on with my presents. Stick around in the coming weeks if you want to see how that turns out. And as always, stay crafty!

Saturday, June 15, 2019

Prideful!

Hello everyone! As you may be aware, it's Pride Month, and I wanted to celebrate with a craft. I actually had this idea a year ago, but it didn't materialize in time. Fortunately, June comes around just about every year, so I had another chance to make it happen.

I like sewing, and I like making the most of my scraps. Oftentimes, this means stuffed animals. This time, I used my collection of vibrant fleeces and felts to make a veritable rainbow of little friends!


Little mouse friends, to be exact! I don't usually care for mice roaming around my home, but I'll make an exception for these guys.


They come in every color of the rainbow, and then some! I love how each one is a bit different, even though I cut them from the same pattern. Just like people, the mice have their own quirks and unique traits!


Green Mouse was willing to be a model so you all can see the details of the construction. The pattern comes from the book Countryside Softies by Amy Adams. She's got a whole host of adorable, scruffy-looking critters to sew. I'm seriously considering making a set of animals in as many pride flag palettes as I can manage! Maybe that'll be my annual pride project.

For now, I'm going to get back to my ongoing projects. It's about time I start thinking about Halloween, too...

Well, until then, stay crafty!

Monday, April 15, 2019

Sweet as a Snail

Aah, sorry for forgetting to post last week! It was a very busy week, and honestly I'm still quite busy. So I think I'll have to go every other week for a little while, just so I can keep up with life stuff.

BUT that's not what I'm here to talk about! Whenever I get busy and stressed, I end up making cute softies, and this one is a whopper of a pattern. Let me introduce you to Laci:


Isn't she adorable? She's a banana split snail! Who even comes up with this stuff?

Apparently, Knot Bad does. His pattern is pretty darn good. It's got a lot of parts, but clear instructions and ample pictures make it fairly easy to put together. The one thing I will say is that this took more yarn than I expected it to, especially of the banana yellow color. Be careful of your yardage if you make it! That said, it's a super fun pattern with a super cute result. Laci sure brightened up my day when I finished her!

Monday, March 25, 2019

Craft 'em All!

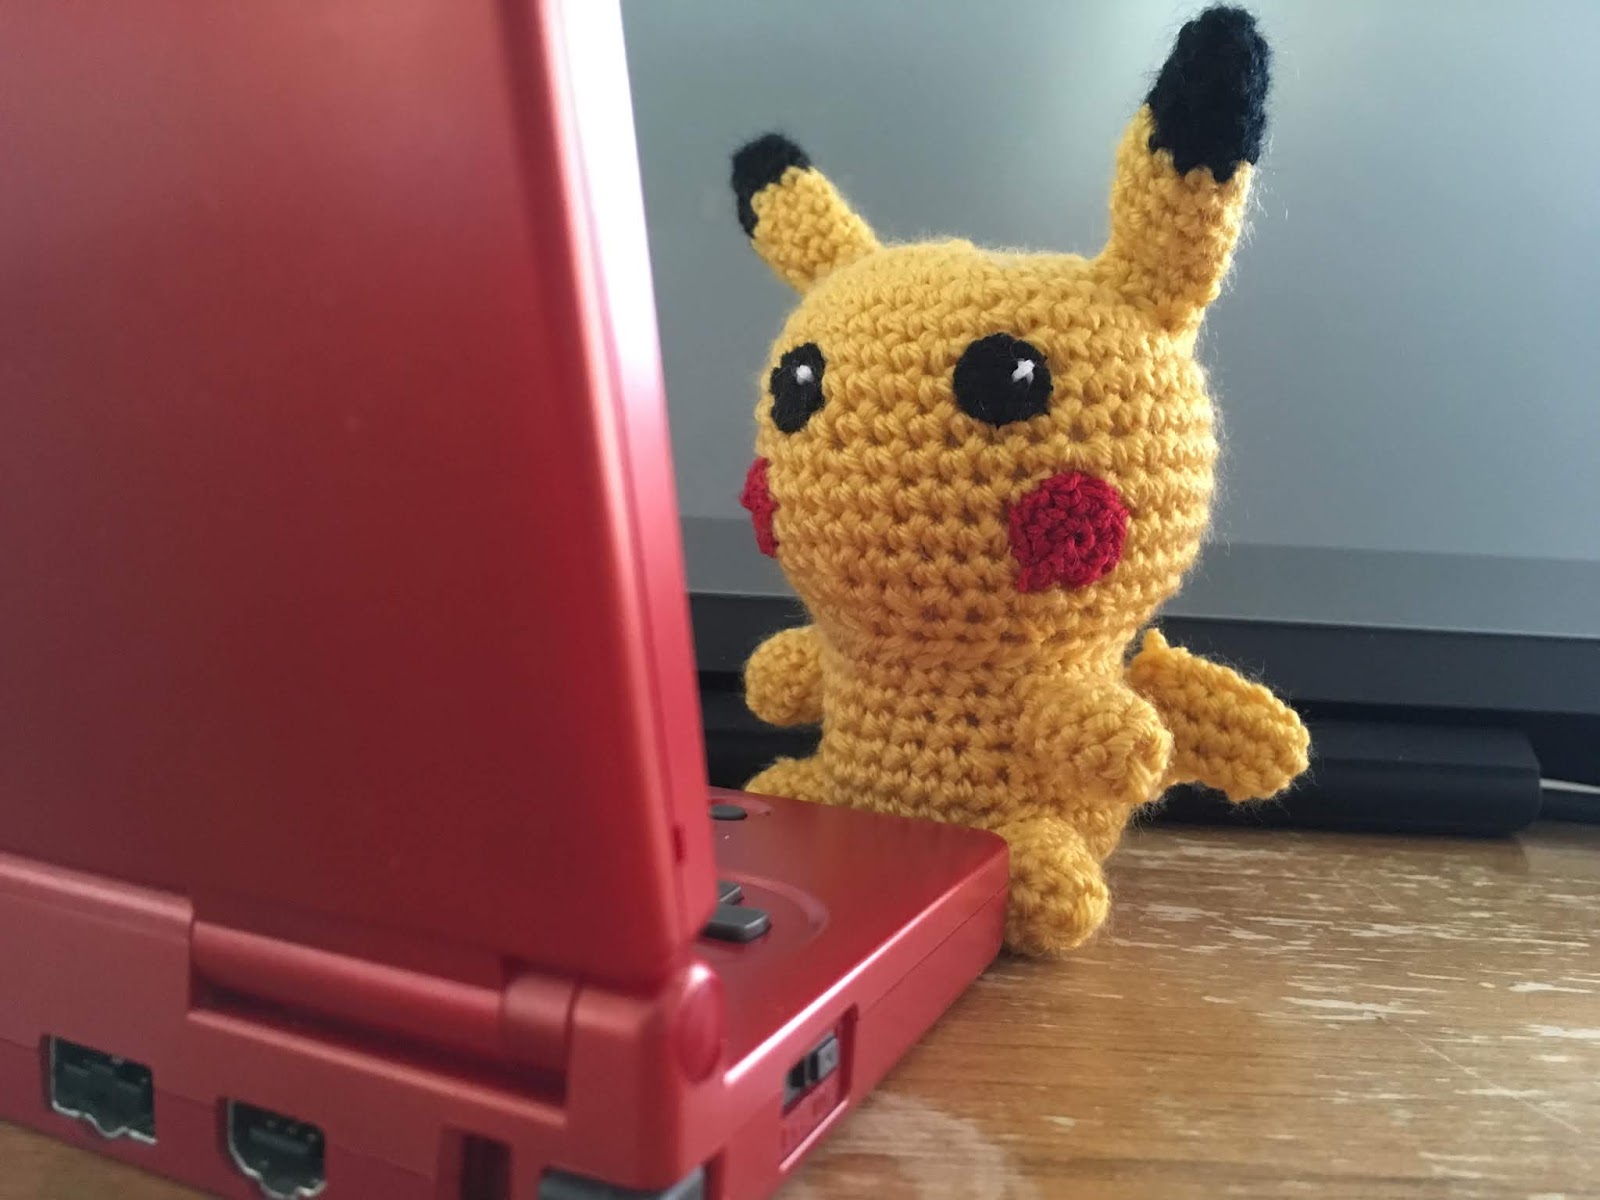
It may not surprise you to learn that I was a big fan of Pokémon as a kid. My first game was Emerald Version, and I logged a rather impressive number of hours in Diamond Version as well. I loved collecting all the different monsters, and to this day, I keep an eye on Pokémon news just to see the new designs (even if I don't actually play the games anymore). So it's no wonder that when I spotted a Pikachu crochet pattern from 53 stitches, I had to make it. I had to. My childhood self demanded it. And 53 stitches made it easy to give in with a clear pattern and plenty of photos. The tail was a bit tricky to pull off, but I got it after a couple tries. The result was certainly worth a few false starts.


And yes, I also had to pose it in front of my old Gameboy! I have to say, that thing is made tough: 14 years of use and no more than a few dead pixels to show for it. The game cartridges still work like a charm too!


"All right, now use thunderbolt!"

Monday, March 11, 2019

Pining for Pineapples

Around this time of year, I really miss summer. Besides the obvious warmth, I miss long sunny days, getting wet without shivering, and sweet summer fruits. Sure, nowadays we can get fruits shipped from warmer climates year-round, but they're just not quite as good as when they're in season.

Great, now I'm thinking about fruit salad and getting hungry.

So, it shouldn't be surprising that a certain pattern caught my eye while I was scrolling through Ravelry a few weeks ago. I took a long look and decided that I had to make it. Immediately.


I mean, just look at it! The little face! The floppy leaves! The pattern, by Stephanie from All About Ami, is super easy to follow, and works up quickly. Shell stitch is surprisingly reminiscent of a pineapple's spines, so if you're an intermediate crocheter you probably already know every technique to use!

I don't have much else to say. Why wouldn't you want to carry your keys in a cute-faced fruit? Go! Go make this thing now! Maybe it'll make spring come a little faster!

Tuesday, November 20, 2018

One for the Road

First off: sorry for the late post! I've been busy getting ready for holiday traveling. That being said, I wasn't too busy to get one more softie pattern off my chest, and this one's a real cutie.


It's a giraffe! Specifically a baby giraffe, designed by Courtchet. Isn't it just the cutest? I can't get over the adorable rounded shapes and babyish proportions of this softie. This is one of those projects that really works best with crochet, since the firmness of the fabric allows you to stuff the pieces to their full rounded potential without deforming them. And I made the fabric extra tight by using a 2.25 mm steel crochet hook on sport weight yarn (for reference, I would probably use a 3.5 mm hook on the same yarn in most other situations). Don't be afraid to go down a few hook sizes when making softies!

Okay, I've gotten my fill of cute animals for the moment. It's getting cold out here, so I need to shift focus to things that will keep my loved ones (and myself!) warm! Stay tuned for the adventures of Franken-mittens, the return of a favorite pattern, and my first attempt at a knitted top!

Monday, November 12, 2018

Plush Pals

Whew, it's been a busy week! I don't know about any of you, but November always seems to be the busiest month to me. And it's just about time to start on Christmas presents for my family...

...but before that, I need something cute and cuddly to get my spirits up. Or maybe more than one something. Enter, plushies!

Yes, whether you call them plushies, softies, amigurumi, stuffed animals, or something I haven't heard of, you'll probably agree that they're adorable. I've rounded up a few cuddly friends that I've made recently to share with you!


Bunnies are a plushie classic. Teddy bears may commandeer the number 1 spot on the list, but the lovable rabbit is a close second! Krawka's Bunny certainly does the animal justice with a cute, simplistic style that's just begging to be hugged. The pattern has a lot of pieces to juggle, but it's well written and easy to follow, so don't let that intimidate you too much!


Rabbits are a classic. Flamingoes... not so much. But maybe you have a quirky person in your life who would enjoy a large hot-pink bird plushie. Maybe you are that quirky person. Fair warning, Amigu Amigurumi's pattern is written in Dutch. Supposedly there's an English translation somewhere, but the site I was directed to looked so sketchy I was afraid to click on anything... If you're willing to brave a pattern in another language (or if you know Dutch), this is a wonderfully fun one to try! I'd recommend it if you have some experience with amigurumi crocheting, so that you can fill in the blanks when Google translate fails. 


If you're not confident enough to pick through a pattern in a foreign language, maybe these chicks by the Enchanted Ladybug are more your speed. They're ridiculously quick to whip up, as they're crocheted in one piece. Just stuff, sew on eyes and a little beak, and be happy! If you're totally new to making plushies, this is a great pattern to test the waters. No big commitment in yarn or time, and if you like it you can make a whole family of chicks!

As you can see, I rather enjoy making plushies. It's quite a different experience from making a garment, and so the "rules" for doing it well are different as well. Here are a few tips if you're looking to start making plushies as well.

I'll readily admit that knitted fabric often feels better that crocheted fabric. It's much more supple and stretches better. But in a plushie, that's the opposite of what you want! Crocheted fabric's structure and stiffness makes it ideal for holding the shapes necessary to make softies, so if you want to learn a plushie-ready craft, try crochet over knitting. (You absolutely can knit plushies, it's just harder)

Pick a hook that's a few sizes smaller than you'd normally use with the weight of yarn you've chosen. Again, you want the fabric to be stiff enough to hold its shape, and tight enough to hold all the stuffing! By using a smaller hook, you can achieve this stiffness. 

Learn how to start a project in the round with the magic ring crochet technique. If you've ever tried to start a project in the round, you'll notice that there's often a sizable hole at the center of the circle. While this is fine for a hat that you intend to put a pompom on anyway, it can be a problem with a plushie that has to be stuffed. The magic ring technique solves this problem, creating a very tight circle center with no hole at all. It looks much more professional, and no stuffing will fall out!

Finally, stuff generously! In order to give your plushies a nice rounded shape, you need to put a lot of stuffing into each piece as you put it together. It will be more than you expect initially. And while there is such a thing as overstuffing, a firmer plushie often feels better in the long run than an under-stuffed one. A good rule of thumb that I follow is that I should be struggling just a bit to keep all of the stuffing inside as I close up the hole. 

Hopefully with this advice, you'll be able to go forth with confidence! Make plushies for the kids in your life. Make plushies for the adults in your life. Heck, make plushies for yourself while you're at it! We all need a little soft-and-cuddly love in our lives, after all!

Monday, October 22, 2018

Doctor Bunny

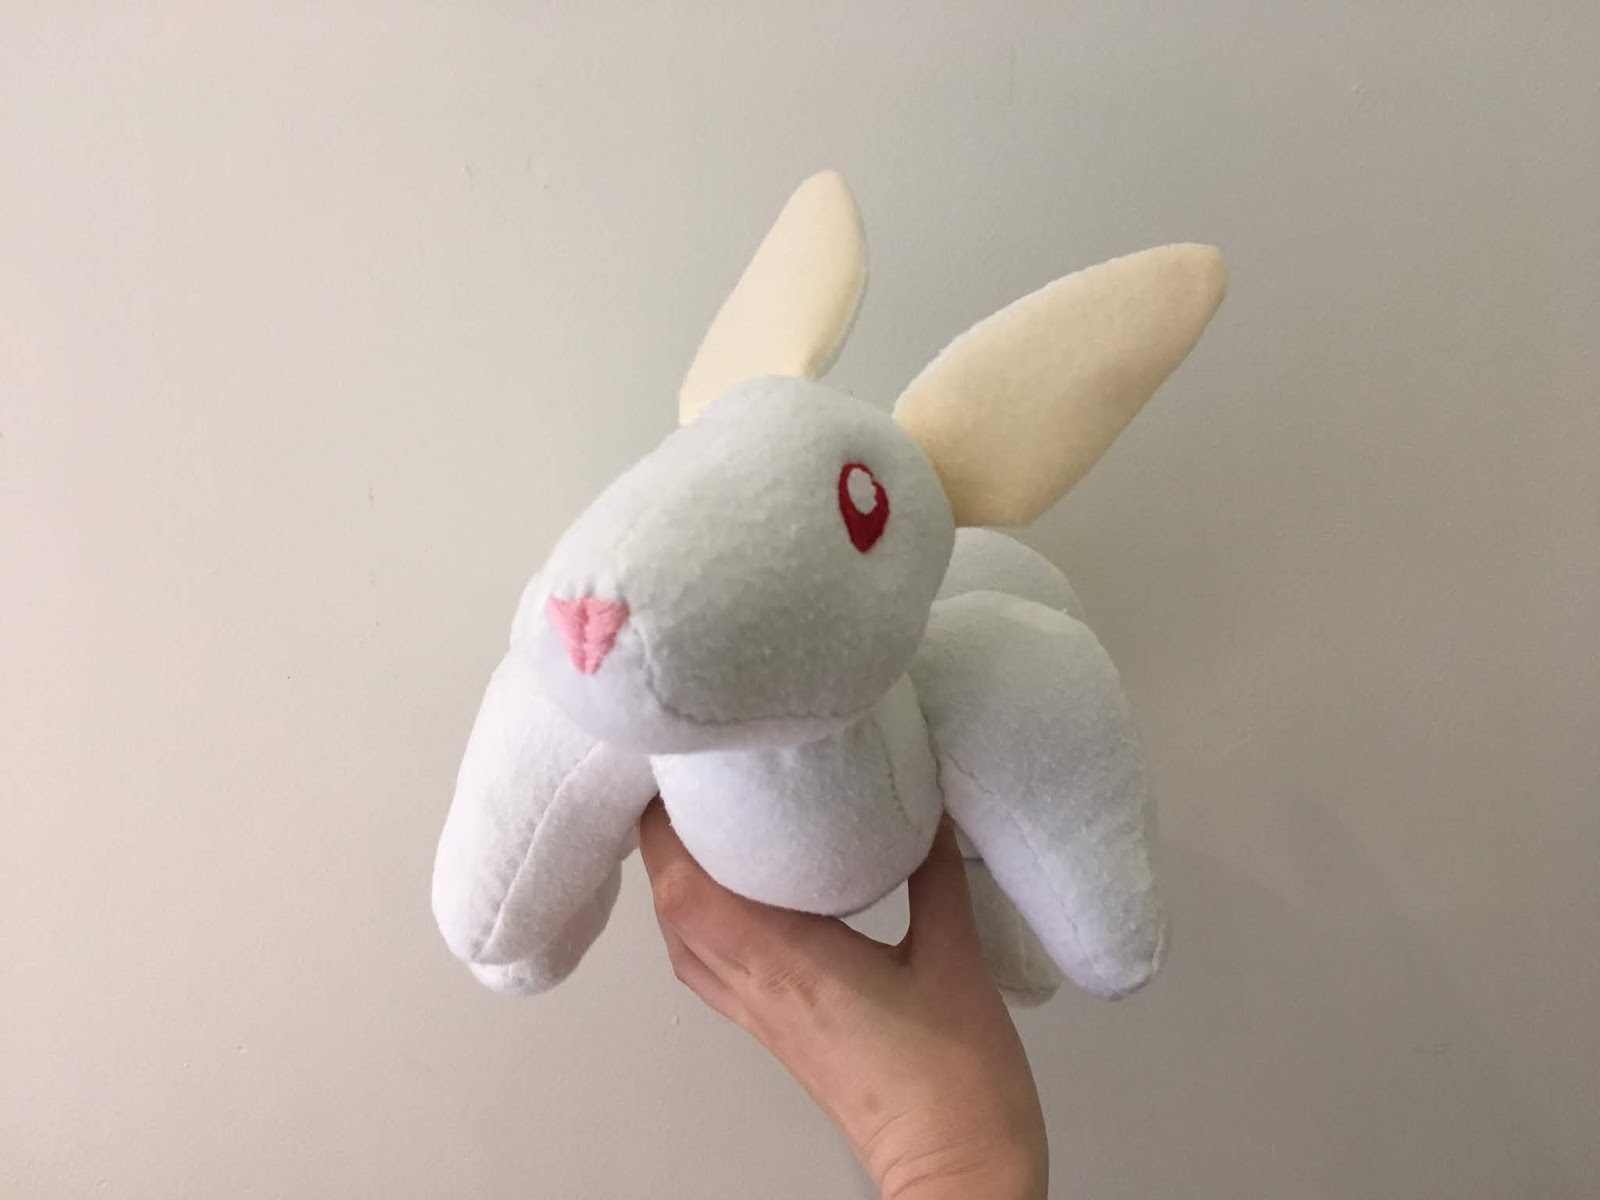
As Halloween moves ever nearer, I really need to pick up the pace on this costume. Now I've checked off yet another box on my list, in that I now have her beloved furry companion! Dr. Harris Bonkers is described as a New Zealand white rabbit, so this is what I'm trying to emulate. Cute, right?

I debated between my list of craft proficiencies while deciding how exactly to bring Dr. Bonkers to life. Crochet is a great vehicle for stuffed animals, and there are always a million knitting patterns. But sewing would work as well. After failing to find any good yarn-based patterns for a semi-realistic rabbit, I went with the latter craft. I thought I'd try my hand at pattern-drafting as well. It's not something I'm accustomed to, so I was prepared to fail! (Such is the nature of experimentation). The few times I've done it before, I've started by piecing paper together like so:


Okay, that's roughly rabbit-shaped! I found about half a yard of white flannel that I had lying around and cut out the pieces with about a quarter inch of seam allowance. If you work with light fabrics, I really recommend grabbing yourself a water-soluble fabric marker: it does wonders when trying to trace and label pattern pieces! Chalk works similarly for darker fabrics.


All pinned and set to sew! I did most of my sewing by hand just because I have limited access to a sewing machine around this time (sad, I know!). It was quicker for me to do by hand than to go through the work to borrow a machine. Since there were so many small pieces to this amateur pattern, I really made use of my marker for labelling.


leg. 
So detailed. So useful.

Individual components got sewn, stuffed, and attached to the main body. Next up was to add the detail work, with some felt eyes and an embroidered bunny nose.

He's really looking like a rabbit! But wait...


Does something look... off to you?


I can't quite put my finger on it...


...oh. Maybe it's that this bunny is seriously buff. Dr. Bonkers, have you been experimenting with steroids??? It seems that in making the paper pattern, I failed to take into account the stuffing, which makes the pieces considerably... bulkier than the paper suggests. Hence the ripped rabbit.

Well this just won't do. I have no problem with Dr. Bonkers refuting the dichotomy between brains and brawn, but this is just ridiculous. Time to do a little emergency surgery to reduce this bunny's bodybuilder physique.


I removed a considerable amount of stuffing and took in a lot of the fabric on the legs. This is where a stitch like the ladder stitch comes in handy: it's nigh-invisible on the front of a project if done well! It's a really useful stitch for finished stuffed animals and the like, and well worth learning. Anyway, back to the rabbit. Let's look at a side-by-side comparison of the back leg size, before and after.


Ohhh much better. Let's finish the job, shall we? We can't have a lopsided bunny!


Now that's a rabbit! He's still a bit muscular if you ask me, but that's okay. Dr. Bonkers believes that a sound body and a sound mind compliment each other. He listens to news podcasts while he lifts (with a spotter present, of course). I should probably follow his example.


Jokes aside, I'm really proud of how this rabbit turned out! Pretty good for an amateur pattern, eh? He's about the right size for a rabbit, too. There's just one thing missing, though...


Now that's a handsome rabbit!