Showing posts with label pattern. Show all posts

Sunday, January 3, 2021

Winging It

Happy New Year!

(Insert a paragraph about how 2020 has been terrible and 2021 is going to be so much better, blah blah blah. You’ve heard it before, you can fill in the rest.)

The deadline for the Foundations Revealed competition is fast approaching, which means I really need to finish my costume. So the next piece I decided to tackle was the wings! If you remember from a few months ago, I made a mockup fairy wing out of wire and crocheted mesh. It looked good, but I ran into trouble developing a harness. The wire was just too flimsy, and I couldn’t source the right wire for the job. Alas, the design had to be scrapped, and I started over. To avoid the wire issue, I wanted to make a shawl to give the impression of wings, rather than attempting another standalone structure. It wouldn’t look as “realistic,” but I figure that a fairy visiting people’s houses would probably use some sort of illusion or glamour on herself anyway.

The poor original wing just couldn’t stand up to the pressure of use (or as it turns out, having boxes collapse on it in my closet...)

Since this costume is inspired by the Dream Fairy poem, there were a few requirements for Wing Design 2.0. The colors and shape should be reminiscent of a Luna moth’s wings, and it also needed “silver spots”. At first I tried to make my own design, but that just wasn’t working out (props to all the pattern designers out there) so I turned to my favorite source of historical patterns instead: archive.org. Soon enough, I happened upon a half-square shawl from the 1885 book Knitting and crochet. A guide to the use of the needle and the hook (available here). To me, the lozenge shapes look like a stylized version of the veins and scales of a butterfly’s wings, and it wasn’t hard to lengthen the half-square shape to better reflect the Luna moth’s long trailing tails. I picked out some lace yarn in pale green and burgundy and set to work.


This pattern was actually pretty quick and easy to work up. It’s colorwork, but you only use one color per row so there’s no need to worry about carrying strands. And since it’s mostly garter stitch, it was perfect for mindless knitting while watching TV. The original pattern called for a crocheted border on top and tassels along the sides, but I extended the border all the way around and just used tassels on the ends. The edges needed that extra bit of stability, in my opinion. And it turned out sooooooo long! It feels so dramatic and elegant to wear, I love it.

The last step was to add the “silver spots upon her wings” like the poem says. In keeping with the fantastical themes of this project, I interpreted the spots as small flowers crocheted with silver thread. I couldn’t figure out a good way to incorporate them into the knitting, so I opted to applique onto the finished product. This has the added bonus of being easily removable once the contest is over; I want to be able to wear the shawl in my everyday outfits without it feeling like too much of a costume.


And there we have it: one more piece of the puzzle down! There’s lots more to do but I’m almost finished with the chemise and drawers, so expect those soon. And until next time, stay crafty!

Saturday, July 11, 2020

Simple Dice Bags with Lining

All dice need a home. Why not make them one yourself?


(Let’s all conveniently ignore the fact that these dice bags are not holding dice. I misplaced my set and haven’t got around to ordering new ones because all the games I play are online anyway!)


This pattern comes in two sizes: medium and large.


The medium bag will comfortably hold a single set of dice, plus or minus a few pieces. Do you have just one set of dice that you use for everything? Maybe you have many sets, but you prefer to keep them nicely organized. Or perhaps one of your dice sets is so special it needs its own handmade container. If so, this is the bag for you.


On the other hand, are you a DM who routinely needs to make five initiative rolls at once? Are you the player that everyone looks to when the warlock casts Circle of Death and deals 8d6 damage to 6 creatures simultaneously? Or perhaps you just love dice, and don’t care whether or not they’re sorted by color. If so, you may want the large bag, which easily holds 5+ sets of loose dice.


Materials


25-75 yards (23-70 meters) of lace weight yarn or size 10 crochet thread.

Scrap of quilting cotton or other medium-weight woven fabric, for lining (optional)

Thread matching the fabric color


Supplies


US size 1 steel crochet hook (2.35 mm)

Stitch marker (optional, to mark beginning of round)

Tapestry/yarn needle

Sewing needle, for lining (optional)


Abbreviations


(Note: this pattern uses US crochet terminology)

sc: single crochet

hdc: half double crochet

inc: increase

ch: chain

sl st: slip stitch

st: stitch

tbl: through back loop


Instructions- Size Medium


Base


Round 0: sc 6 in magic circle. Do not join. (6 sts)

Round 1: inc each st around (12 sts)

Round 2: *1 sc, inc* around (18 sts)

Round 3: *2 sc, inc* around (24 sts)

Round 4: *3 sc, inc* around (30 sts)

Round 5: *4 sc, inc* around (36 sts)

Round 6: *5 sc, inc* around (42 sts)

Round 7: *6 sc, inc* around (48 sts)

Sl st into next st


Sides


Note: You can substitute any other stitch you want for hdc in rounds 2-14. Work your rounds until the sides measure 2.5” (6.5 cm) tall, then proceed to round 15. Some stitch patterns may benefit from joining at the ends of rounds, instead of continuous rounds as written. In this case, at the end of each round, sl st to first stitch in round, and ch 1-3, depending on the height of your chosen stitch.


Round 1: sc tbl, *hdc tbl* around

Round 2-14: hdc around

Round 15: *2 hdc, ch1, skip 1 st, 3 hdc* around (8 ch1 spaces)

Round 16-18: hdc around

sc 1, sl st 1, tie off yarn, weave in ends


Instructions- Size Large


Base


Round 0: sc 6 in magic circle. Do not join. (6 sts)

Round 1: inc each st around (12 sts)

Round 2: *1 sc, inc* around (18 sts)

Round 3: *2 sc, inc* around (24 sts)

Round 4: *3 sc, inc* around (30 sts)

Round 5: *4 sc, inc* around (36 sts)

Round 6: *5 sc, inc* around (42 sts)

Round 7: *6 sc, inc* around (48 sts)

Round 8: *7 sc, inc* around (54 sts)

Round 9: *8 sc, inc* around (60 sts)

Round 10: *9 sc, inc* around (66 sts)

Round 11: *10 sc, inc* around (72 sts)


Sl st into next st


Sides


Note: You can substitute any other stitch for hdc in rounds 2-25. Work your rounds until the sides measure 4.5” (10 cm) tall, then proceed to round 26. Some stitch patterns may benefit from joining at the ends of rounds, instead of continuous rounds as written. In this case, at the end of each round, sl st to first stitch in round, and ch 1-3, depending on the height of your chosen stitch.


Round 1: sc tbl, *hdc tbl* around

Round 2-25: hdc around

Round 26: *2 hdc, ch1, skip 1 st, 3 hdc* around (12 ch1 spaces)

Round 27-31: hdc around

sc 1, sl st 1, tie off yarn, weave in ends


Drawstring – Both Sizes


The drawstring for this bag can be made of many things. Shown  above are an I-cord (small white bag), a ribbon (large bag), and a braid (small pink bag). Drawstrings should measure approximately 10” (25 cm) long for the medium bag, or 14” (35 cm) long for the large bag.


To insert the drawstring, weave one end into and out of the holes produced in round 15/26. The ends of the drawstring should end up outside the bag.


Lining (Optional) – Both Sizes


A fabric lining can easily be sewn into these dice bags for added strength and stability. Recommended fabrics are any medium-weight woven fabric, especially quilting cottons. A ¼” (0.5 cm) seam allowance is used throughout.


For the medium size, cut out a circle measuring 3” (7.5 cm) in diameter and a 3.5” x 8.25” (9 x 21 cm) rectangle. For the large size, cut out a circle measuring 4” (10 cm) in diameter and a 6” x 11.5” (15.25 x 29.25 cm) rectangle.


With right sides facing, sew the short sides of the rectangle together by machine or by hand. Optionally, press the seam open using an iron.


Using a pencil, fabric marker, or chalk, make 4 equidistant marks on the edge of the circle, separating it into equal quarters. Do the same thing with one of the long raw edges of the rectangle (now a tube).


Using a long stitch, sew a gathering stitch around the circle about ⅛” (0.25 cm) from the edge. Pull on the thread to gather the edges. Insert the circle into the tube, with right sides facing. Match up the marks on the circle to the marks on the tube and pin in place. Then, add pins to the area between each mark, adjusting the easing as necessary to fit the curves to each other. Sew together, by machine or by hand.


Trim the excess fabric of the new seam to about ⅛” (0.25 cm), and clip the seam to allow the bottom to lie flat. Be careful not to cut your stitches! Finally, fold the top raw edge over ¼” (0.5 cm) on the wrong side (you may find it helpful to press this fold in with an iron). Insert the lining into your crocheted bag so that the right side of the fabric faces inwards (aka, the part you will see when you open the bag) and use a whipstitch to secure the top edge to the top edge of the crocheted bag.


And there you have it: your very own dice bag! It's a great way to use up leftover bits of yarn, and this pattern is very easy to riff on, so feel free to make your own. If you do, comment below with pictures, or head over to my Ravelry (MeadowlarkLace) or my Instagram (@_meadowlarklace_) and show me there. And until next time, stay crafty my friends!


Friday, June 19, 2020

Antique Lace Adventures

Today, I am in a lace mood.

If we're being completely honest, I've been in a lace mood for weeks. And nothing satiates my hunger for lace like some good shuttle tatting. In the interest of working on my Dream Fairy costume, I thought I'd look for some nice antique tatting patterns to use as edgings. Due to the pandemic, I can't go browse the stacks of my university's library like I'd like to, but archive.org is really just as good an option. There are dozens of handcraft/needlecraft books available there in the time period I'm interested in, so needless to say I was in heaven searching through it all. 

One of the books I found most interesting was Beeton's Book of Needlework, an instructional guide for knitting, crochet, tatting, netting, and embroidery published in the year 1870. The instructions are quite detailed, and it has dozens of patterns for each craft. I tried out four of the tatted edging patterns, to see if any would be appropriate for my costume.


Friends, I don't know if you've ever read 150-year-old instructions for anything before, but things change. Especially the terminology. Most of the techniques (for tatting at least) are pretty similar to what I've learned as a 21st-century crafter, but I had to relearn a lot of the terms in order to read these patterns. Plus, the Victorians were not shy about mixing crafts. Something like half of the tatting patterns have you grab a crochet hook at one point or another.

Not that I mind that. I always have my hooks handy!

In the interest of making these beautiful old patterns more accessible to modern tatters, I've written up my own interpretations of them below. BIG DISCLAIMER: I am not a historian, and I have no expertise whatsoever in interpreting historical patterns. I am, in fact, a computational biologist, which I'm pretty sure is about as far removed from historical lacemaking as anything conceivably could be. So if you care about historical accuracy, take my interpretations with a big grain of salt. With that said, let's get on to the patterns. 

Note: All samples were worked in Lisbeth size 40 cotton thread. A 0.75 mm hook was used for the crochet sections. Crochet instructions use US terminology.

No 3 – Lace Edging in Tatting


Tatting Section:


Wind shuttle, and do not cut thread from ball.


*R 10 ds, p, 10 ds, cl r. Turn work.

Ch 8 ds, p, 8 ds. Turn work.

R 10 ds, j to p of previous ring, 10 ds, cl r. *


Repeat until edging is desired length, then cut and tie.


Crochet Section:


Ch 1, sc into picot of first tatted chain, * ch 6, sc into picot of next tatted chain*


Repeat between * until all picots have been worked. Tie off. Weave in ends.


No 4 – Lace Edging in Tatting


Tatting Section:


Wind shuttle, and do not cut thread from ball.


* R 10 ds, p, 10 ds, cl r.

R 10 ds, p, 10 ds, cl r. Turn work.

Ch 12 ds, p, 4 ds, j to p of previous ring, 4 ds, p 12 ds. Turn work.

R 10 ds, j to p of previous ring (the same p that you just joined the chain to), 10 ds, cl r.

R 10 ds, j to p of the first ring, 10 ds, cl r. *


Repeat until edging is desired length, then cut and tie.


Crochet Section:


Ch 1, sc into picot of first tatted chain, ch 4, sc into picot of second tatted chain, * ch 6, sc into picot of next tatted chain, ch 4, sc into picot of next tatted chain *


Repeat between * until all picots have been worked. Tie off. Weave in ends.


No 5 – Border in Tatting with Crochet Edging


Tatting Section:


Wind shuttle, and cut thread.


R 9 ds, cl r. Turn work.

Leave approx. 1/6 in (0.4 cm) between previous ring and next ring.

R 4 ds, p, 3, ds, p, 3 ds, p, 3 ds, p, 3 ds, p, 4 ds, cl r. Turn work.

* Leave approx. 1/6 in (0.4 cm) between previous ring and next ring.

R 9 ds, cl r. Turn work.

Leave approx. 1/6 in (0.4 cm) between previous ring and next ring.

R 4 ds, j to last p of previous large ring, 3, ds, p, 3 ds, p, 3 ds, p, 3 ds, p, 4 ds, cl r. Turn work. *


Repeat between * until edging is the desired length, then cut and tie.


Crochet Section:


Row 1: Ch 1, sc into first small tatted ring, *ch 6, sc into next small tatted ring* Repeat between * until all rings have been worked. Ch 2, turn work.

Row 2: Dc into first st of previous row * ch 1, skip st, dc into next st * Repeat between * until end of row. Ch 2, turn work.

Row 3: Repeat the Decorative Edge Stitch (see below) to the end of the row, ending on a dc.


Tie off. Weave in ends.


No 6 – Border in Tatting and Crochet


Tatting Section:


Wind shuttle, and cut thread.


R 4 ds, p, 3 ds, p, 3 ds, p, 3 ds, p, 3 ds, p, 4 ds. Close ring partially, leaving about 1/8 in (0.3 cm) open.

* Leave approx. 1/8 in (0.3 cm) between previous ring and next ring.

R 3 ds, j to last p of previous ring, 3 ds, j to second to last p of previous ring , 4 ds, p, 4 ds, p, 3 ds, p, 3 ds, cl r.

Leave approx. 1/8 in (0.3 cm) between previous ring and next ring.

R 4 ds, j to last p of previous ring, 3 ds, j to second to last p of previous ring, 3 ds, p, 3 ds, p, 3 ds, p, 4 ds. Close ring partially, leaving about 1/8 in (0.3 cm) open. *


Repeat between * until edging is the desired length, then cut and tie.


Crochet Section:


Row 1: Ch 1, 3 sc into first partially closed ring, * 3 sc into next space between rings, 3 sc into next space between rings, 3 sc into next partially closed ring * Repeat between * until all rings and spaces have been worked. Ch 2, turn work.

Row 2: Dc into first st of previous row * ch 1, skip st, dc into next st * Repeat between * until end of row. Ch 2, turn work.

Row 3: Repeat the Decorative Edge Stitch (see below) to the end of the row, ending on a dc.


Tie off. Weave in ends.


Decorative Edge Stitch:


Dc into next stitch.


Remove hook, leaving a live loop.


Without picking up live loop, insert hook into next stitch and draw up a loop.


Chain 1.


Note: It is possible for the dropped loops to unravel if pulled. To prevent this, thread a piece of scrap string/yarn through each loop after the stitch is completed. When attaching the edging, make sure that each loop is secured to the base fabric.


Thursday, September 5, 2019

Spring of Sewing #3

Whew! Moving is finally over (mostly). I have furniture, I have food, and most importantly, all my craft supplies seem to have survived the trip. I'm stoked to get on with my many projects, but until I can fully get back into the swing of things, here's the third and final project from the sewing class I took.

So, it may not surprise you to learn that, just like last year, I began planning my Halloween-time escapades far in advance. I wasn't totally sure about design for a long time, but even in the spring, I knew I wanted to be Taako, and I knew he was going to be wearing a fashionable capelet. It just seemed like the sort of thing he'd be into. So when planning for the final project came around, I had a very specific idea in mind. 


That seemed pretty straightforward to me! All I had to do was find a capelet pattern and I'd be set. So I searched through the class's library... and found nothing. 

I searched online... and found nothing. 

Catalog after catalog, nobody seemed to have a pattern for the kind of capelet I had envisioned. I was actually kind of surprised; it didn't seem to me like my design was particularly unique. But for whatever reason, I couldn't find something to match. I could have scrapped the idea and gone for a more accessible pattern. But we all know I didn't.

Having almost no experience pattern drafting, I wasn't prepared to make a garment this complicated (not that it's even that complicated) without some help. In a bid to use as much of a commercial pattern as possible, I came up with a pretty neat trick. Find a coat pattern with a nice collar, and use its design from the shoulders up. Then, draft the shoulders down into a cape instead of sleeves and a body. That way, I could avoid making all the complicated bits, and I only had to come up with the easy stuff! I chose this lovely coat as my template:


A few rounds of mockups and tweaks gave me a pretty good idea of how to make a good capelet, so I set off looking for fabric. I knew the general color scheme I wanted to work with -- various shades of blue with accents of red and black -- and it wasn't hard to find a nice dusty blue wool to serve as the outside. I came up with some lovely red lining fabric that has a subtle rose brocade as well. I'm particularly fond of the red lining, both because the fabric is pretty and for some character-relevant reasons that are extremely spoilery. On the off chance that anyone is reading this while in the middle of listening to TAZ: Balance, I won't elaborate, but those of you who have finished it should recognize the significance of red outerwear. 

Anyway, back to the garment itself. Construction was fairly easy, since the instructions from the original pattern were still mostly relevant. Soon enough, it was time to show off the finished product!


See what I mean about that lining fabric? It's such a subtle fancy element. And I love how the red is almost completely hidden (save for buttons) while the cape is closed, but can burst out whenever the wearer moves their arms. Not to mention, it's quite practical and warm thanks to the wool! I think this will make an excellent component of Taako's ensemble come October. 

Here ends the saga of sewing class for me. I thought it was a fantastic experience, especially as someone who hadn't sewn clothes before. Now, I'm confident enough to take on most commercial patterns, and even try my hand at making my own! This adventure may be over, but the journey of cosplay is still very much active. If you'd like to continue to hear about that, then be sure to come back in (hopefully) a few days, where I should have another update. Until then, stay crafty!

Sunday, January 27, 2019

Back to Lace

You all know I can't stay away from lace for too long, right? It's so pretty and delicate and interesting to look at... I might be in love. Which is good, because I have at least five lace/fingering weight projects lined up, and plenty more on the wishlist.

The only problem with lace is the time it takes to make. So many stitches to make! Which means that if I want a lace item for a particular event, I really have to start early. As it happens, just such an event will be happening this spring.

I'm not going to share details because it would give away my location (and I'm not keen on letting everyone who can access a webpage know where I live), but come late spring, I'll need a yellow shawl or other accessory. I don't happen to own many yellow things, so I sensed a prime opportunity coming my way. I could certainly make myself a yellow shawl, couldn't I?

I knew I had to start as soon as possible, so shortly after New Year's, I found a pattern and got to work. There are a whole host of lovely shawl patterns to be found online, and after some deliberation, I went with the Frosty Apples Shawlette by Lyubov Shalnaya. I've never made a crescent shawl before, so I thought this might be a good introduction. Some new techniques, some beading, lots of pictures and charts to direct me. Here's my progress so far!


These top-down shawls start out so tiny!


But it gets wide pretty quickly! Took me quite a while to get to the end of the plain stockinette section.


Pro-tip: always use lifelines. Seriously, I put this in before I started the lace pattern and was almost immediately rewarded, as I messed up the first lace row and was able to rip back with no trouble whatsoever.


There are two lace charts in this pattern: the border and the edge. The border is the transition between the stockinette base and the edge lace, and as of right now, that's the part I have finished.


Lace doesn't look like too much when it's all scrunched up like this, but you can sort of get a feel for the pattern's shape (if you squint). It's almost magical when it all blocks out! But that's a ways away still.

I'm determined to get this project done with time to spare, so expect to see it again soon! Until next time!

Sunday, January 20, 2019

Pattern Review: Arzote Top

It's finished! I've been working on this project on and off since July, and I'm finally done. So now you all get to see it!

In my endeavor to learn knitting faster than the average bear, I decided to take on a sweater six months in. Definitely not the craziest crafty thing I've dived into, but a sweater is still a big project. I had some dark green and multicolored yarn that I was itching to use for a garment, and they seemed like the perfect combination for a nice, simple striped sweater (cue Spongebob music).

One problem: I didn't have quite enough. I was short maybe a hundred yards. I would've just gotten another skein, but the yarn was a gift from over a year ago: no way the same dye lot would still be in stock. It seemed like the universe's goal was to thwart my plans! I was going to give up and search for another project, but I came across a lucky find in pattern form: Arzote by Berroco. It seemed like a pretty standard sweater... until you got to the short sleeves. I calculated my yardage and decided that I would indeed have enough yarn to make a striped, short-sleeved sweater.

I double-checked.

Yup, still enough.

As is tradition for first sweater (or almost-sweater) projects, I made my fair share of mistakes. One which I still can quite figure out ended up with me having a dozen mystery stitches on the front half of the shirt, with no evidence of mistaken increases in the fabric. I can only imagine that I missed decreases somewhere, though where exactly still escapes me. Fortunately, blocking hides a multitude of sins, and in my opinion, the top turned out pretty darn well! I blocked it straight onto Mannie Quinn in order to get the fit right.


All in all, it turned out well! I love these two yarns together: the colors work nicely off of one another. And despite my stitch counting mishap, the shirt fits well too! It's deceptively heavy for its size, since the fabric is so thick, but the yarns have lots of cotton and synthetic content in addition to wool, so it's not nearly as hot as it might seem. I'm looking forward to warmer months so that I can really show it off!

As for the pattern, I have a number of observations. Overall, I liked it. The instructions were clear and easy to follow, and it was simple enough for a novice sweater-knitter to understand. I didn't add a pocket because I didn't want it to clash with the stripes, but the original pattern includes a breast pocket that is very cute.

On the negative side of things, I did have a few issues with blocking and fit that I'm fairly certain weren't attributable to error on my part. The first is that there seemed to be a fair amount of extra stitches in the back when doing the ribbing for the collar. This extra ribbing stuck out from the neckline at odd angles and wouldn't lay flat against the back of my neck until I really forced it to with blocking. I'm usually trying to avoid stretched collars in my clothes, so starting out with one isn't that great. The other issue I have is with the shoulder seam construction. The fabric is quite thick, being made of worsted weight yarn, and that really influences the seams. While the side seams aren't that big of a deal, it becomes rather bulky in the shoulder and armpit area, which is a tad uncomfortable. More noticeable from the outside, the thick seams and fabric don't fold and stretch on themselves very much, so the shoulders of the shirt are kind of locked in an arms-down position. When I lifted my arms over my head, the shoulder area pops up to my ears, making the entire shirt ride up. I was using the recommended weight yarn and the correct gauge for this project, so I expect that it's not just my seam job that creates this problem.

All that being said, I still like the top. It's pretty, and it fits well as long as I don't raise my arms too high (and let's be honest, they're usually down at my lap with a craft project anyway). It's got some flaws, but if you're willing to deal with them, you'll get a nice looking product!

With my first sweater-ish project out of the way, I think it's time to set my sights on a new garment! Maybe this time I'll try a full-fledged sweater. In fingering weight. With lace. That won't take a million years to complete, right? Well, I'm going to dive through my pattern books. Until next time, stay crafty!

Friday, January 4, 2019

Return of an Old Favorite

Okay, so when I say old, I mean from a couple of months ago. This blog hasn't been around for that long yet!

This is the last of the Christmas presents I have left to share, this one for my mom (and thank goodness I won't have to think about gift-giving on that scale again for another 10 months). She actually requested the pattern specifically after seeing it from another project. Yes, once again it's the Ana Beanie!


Last time, I was using bulky yarn, but this one was crocheted tightly with worsted weight. I think it gives the hat a pleasing squishiness! And I made the faux-fur pompom myself, again at the request of mom. If you also like the fur pompom style, don't ever bother buying them from the store: it's easy and way cheaper to make your own. Five minutes, a patch of fur-fabric, and some stuffing is really all you need.

After finishing the hat, I was left with about half a skein of yarn, which was begging to be crocheted into something matching. So I drew on another previously-used pattern - the Dewey Decicowl - to whip it up. Unfortunately, there wasn't enough yarn for the button tab, but I think it looks good regardless!


Well, that just about wraps up Christmas 2018. It's been fun, but I'm excited to work on some personal projects for a while! I'm going to go back to my once-per-week schedule now, so expect this deluge of crafts to slow to a steady drip. And as always, stay crafty!

Tuesday, November 20, 2018

One for the Road

First off: sorry for the late post! I've been busy getting ready for holiday traveling. That being said, I wasn't too busy to get one more softie pattern off my chest, and this one's a real cutie.


It's a giraffe! Specifically a baby giraffe, designed by Courtchet. Isn't it just the cutest? I can't get over the adorable rounded shapes and babyish proportions of this softie. This is one of those projects that really works best with crochet, since the firmness of the fabric allows you to stuff the pieces to their full rounded potential without deforming them. And I made the fabric extra tight by using a 2.25 mm steel crochet hook on sport weight yarn (for reference, I would probably use a 3.5 mm hook on the same yarn in most other situations). Don't be afraid to go down a few hook sizes when making softies!

Okay, I've gotten my fill of cute animals for the moment. It's getting cold out here, so I need to shift focus to things that will keep my loved ones (and myself!) warm! Stay tuned for the adventures of Franken-mittens, the return of a favorite pattern, and my first attempt at a knitted top!

Monday, November 12, 2018

Plush Pals

Whew, it's been a busy week! I don't know about any of you, but November always seems to be the busiest month to me. And it's just about time to start on Christmas presents for my family...

...but before that, I need something cute and cuddly to get my spirits up. Or maybe more than one something. Enter, plushies!

Yes, whether you call them plushies, softies, amigurumi, stuffed animals, or something I haven't heard of, you'll probably agree that they're adorable. I've rounded up a few cuddly friends that I've made recently to share with you!


Bunnies are a plushie classic. Teddy bears may commandeer the number 1 spot on the list, but the lovable rabbit is a close second! Krawka's Bunny certainly does the animal justice with a cute, simplistic style that's just begging to be hugged. The pattern has a lot of pieces to juggle, but it's well written and easy to follow, so don't let that intimidate you too much!


Rabbits are a classic. Flamingoes... not so much. But maybe you have a quirky person in your life who would enjoy a large hot-pink bird plushie. Maybe you are that quirky person. Fair warning, Amigu Amigurumi's pattern is written in Dutch. Supposedly there's an English translation somewhere, but the site I was directed to looked so sketchy I was afraid to click on anything... If you're willing to brave a pattern in another language (or if you know Dutch), this is a wonderfully fun one to try! I'd recommend it if you have some experience with amigurumi crocheting, so that you can fill in the blanks when Google translate fails. 


If you're not confident enough to pick through a pattern in a foreign language, maybe these chicks by the Enchanted Ladybug are more your speed. They're ridiculously quick to whip up, as they're crocheted in one piece. Just stuff, sew on eyes and a little beak, and be happy! If you're totally new to making plushies, this is a great pattern to test the waters. No big commitment in yarn or time, and if you like it you can make a whole family of chicks!

As you can see, I rather enjoy making plushies. It's quite a different experience from making a garment, and so the "rules" for doing it well are different as well. Here are a few tips if you're looking to start making plushies as well.

I'll readily admit that knitted fabric often feels better that crocheted fabric. It's much more supple and stretches better. But in a plushie, that's the opposite of what you want! Crocheted fabric's structure and stiffness makes it ideal for holding the shapes necessary to make softies, so if you want to learn a plushie-ready craft, try crochet over knitting. (You absolutely can knit plushies, it's just harder)

Pick a hook that's a few sizes smaller than you'd normally use with the weight of yarn you've chosen. Again, you want the fabric to be stiff enough to hold its shape, and tight enough to hold all the stuffing! By using a smaller hook, you can achieve this stiffness. 

Learn how to start a project in the round with the magic ring crochet technique. If you've ever tried to start a project in the round, you'll notice that there's often a sizable hole at the center of the circle. While this is fine for a hat that you intend to put a pompom on anyway, it can be a problem with a plushie that has to be stuffed. The magic ring technique solves this problem, creating a very tight circle center with no hole at all. It looks much more professional, and no stuffing will fall out!

Finally, stuff generously! In order to give your plushies a nice rounded shape, you need to put a lot of stuffing into each piece as you put it together. It will be more than you expect initially. And while there is such a thing as overstuffing, a firmer plushie often feels better in the long run than an under-stuffed one. A good rule of thumb that I follow is that I should be struggling just a bit to keep all of the stuffing inside as I close up the hole. 

Hopefully with this advice, you'll be able to go forth with confidence! Make plushies for the kids in your life. Make plushies for the adults in your life. Heck, make plushies for yourself while you're at it! We all need a little soft-and-cuddly love in our lives, after all!

Monday, October 22, 2018

Doctor Bunny

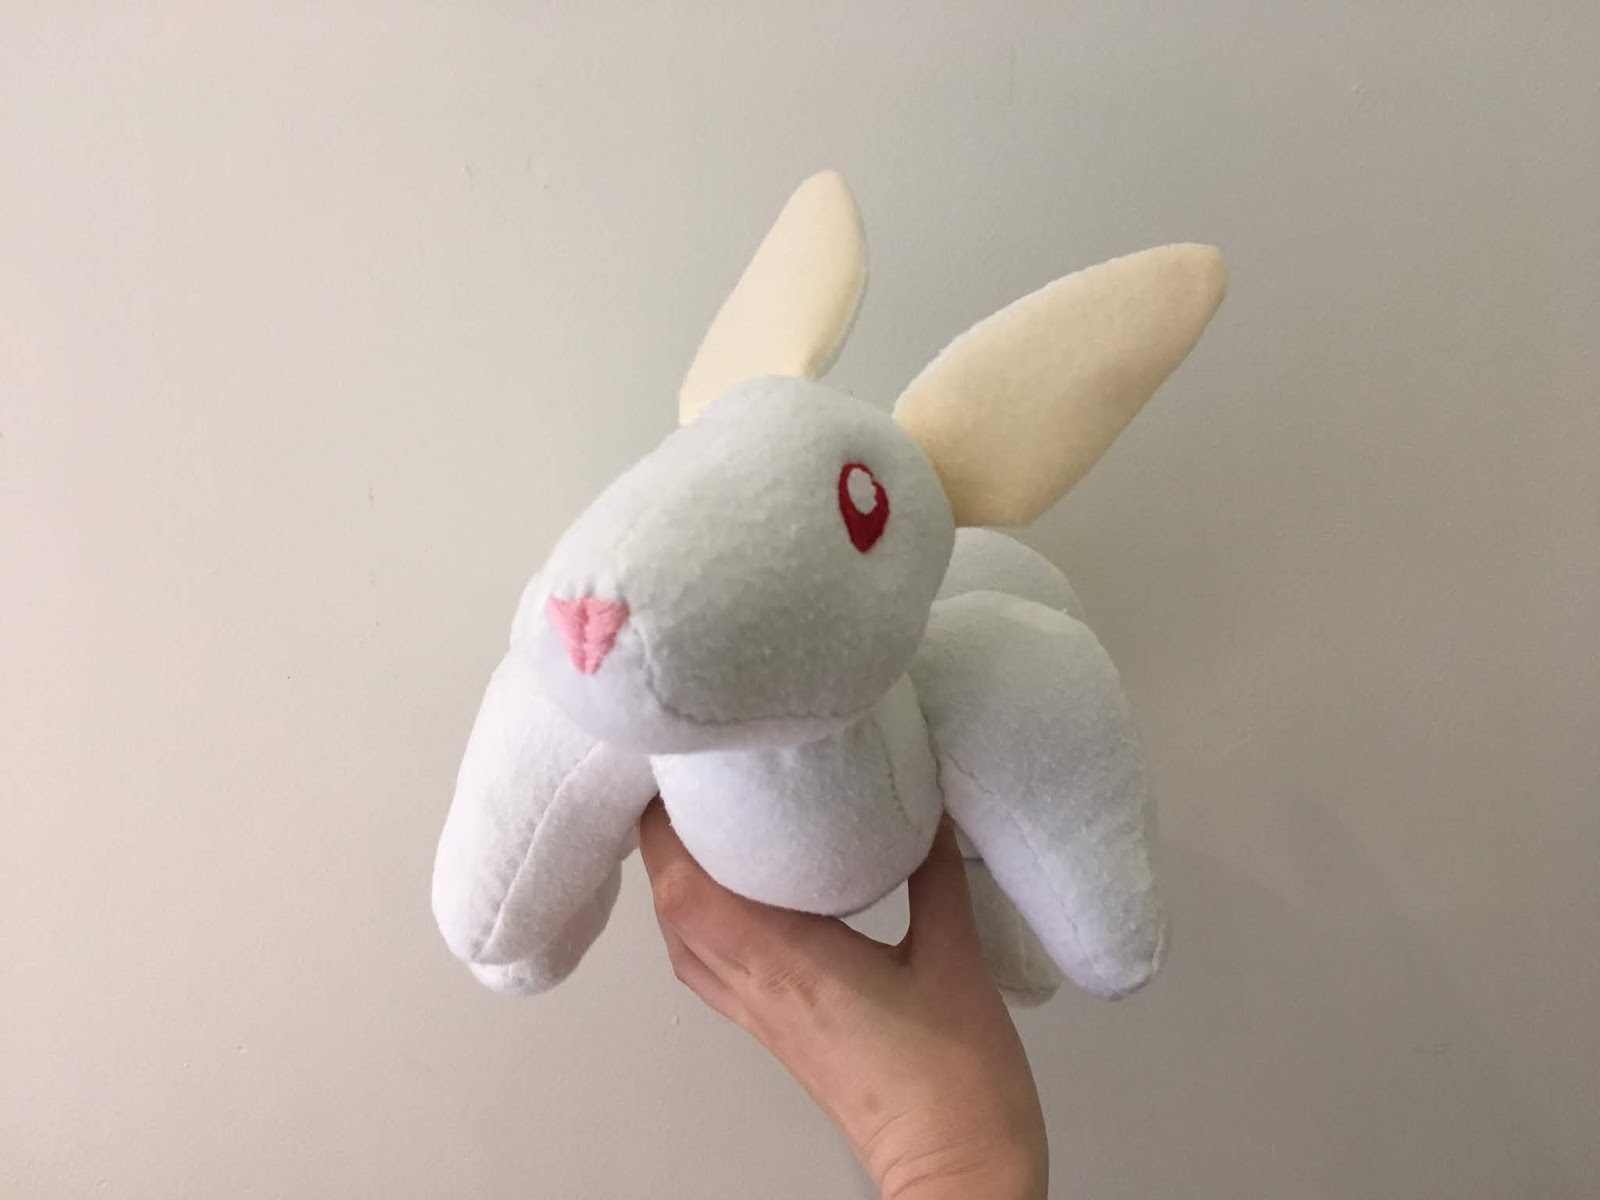
As Halloween moves ever nearer, I really need to pick up the pace on this costume. Now I've checked off yet another box on my list, in that I now have her beloved furry companion! Dr. Harris Bonkers is described as a New Zealand white rabbit, so this is what I'm trying to emulate. Cute, right?

I debated between my list of craft proficiencies while deciding how exactly to bring Dr. Bonkers to life. Crochet is a great vehicle for stuffed animals, and there are always a million knitting patterns. But sewing would work as well. After failing to find any good yarn-based patterns for a semi-realistic rabbit, I went with the latter craft. I thought I'd try my hand at pattern-drafting as well. It's not something I'm accustomed to, so I was prepared to fail! (Such is the nature of experimentation). The few times I've done it before, I've started by piecing paper together like so:


Okay, that's roughly rabbit-shaped! I found about half a yard of white flannel that I had lying around and cut out the pieces with about a quarter inch of seam allowance. If you work with light fabrics, I really recommend grabbing yourself a water-soluble fabric marker: it does wonders when trying to trace and label pattern pieces! Chalk works similarly for darker fabrics.


All pinned and set to sew! I did most of my sewing by hand just because I have limited access to a sewing machine around this time (sad, I know!). It was quicker for me to do by hand than to go through the work to borrow a machine. Since there were so many small pieces to this amateur pattern, I really made use of my marker for labelling.


leg. 
So detailed. So useful.

Individual components got sewn, stuffed, and attached to the main body. Next up was to add the detail work, with some felt eyes and an embroidered bunny nose.

He's really looking like a rabbit! But wait...


Does something look... off to you?


I can't quite put my finger on it...


...oh. Maybe it's that this bunny is seriously buff. Dr. Bonkers, have you been experimenting with steroids??? It seems that in making the paper pattern, I failed to take into account the stuffing, which makes the pieces considerably... bulkier than the paper suggests. Hence the ripped rabbit.

Well this just won't do. I have no problem with Dr. Bonkers refuting the dichotomy between brains and brawn, but this is just ridiculous. Time to do a little emergency surgery to reduce this bunny's bodybuilder physique.


I removed a considerable amount of stuffing and took in a lot of the fabric on the legs. This is where a stitch like the ladder stitch comes in handy: it's nigh-invisible on the front of a project if done well! It's a really useful stitch for finished stuffed animals and the like, and well worth learning. Anyway, back to the rabbit. Let's look at a side-by-side comparison of the back leg size, before and after.


Ohhh much better. Let's finish the job, shall we? We can't have a lopsided bunny!


Now that's a rabbit! He's still a bit muscular if you ask me, but that's okay. Dr. Bonkers believes that a sound body and a sound mind compliment each other. He listens to news podcasts while he lifts (with a spotter present, of course). I should probably follow his example.


Jokes aside, I'm really proud of how this rabbit turned out! Pretty good for an amateur pattern, eh? He's about the right size for a rabbit, too. There's just one thing missing, though...


Now that's a handsome rabbit!