I love
wreaths. Indoor or outdoor, on windows or doors or simply hung over the mantle,
they always add a nice touch to the decor. Most wreaths are made of foliage and
intended for the fall and winter months. But when we have the power to make our
own, why limit ourselves to that style? Wreaths can be made of almost anything,
and can decorate at any time of year.
So why am I
making a pompom wreath? The explanation requires a little bit of story time.
You see, I have pretty curly hair, and when I was a teenager it was fairly
short. This caused it to stick out from my head in a consistent orb of fluff.
It was... well, it was definitely a look. And among my friends, that look
earned me the nickname “Pompom.” I eagerly embraced my pompomness
(pompomosity?) by changing all my profile pictures to photos of fluffy yarn
balls. Eventually I grew my hair out of the orb-shape, but even now, a few of
my accounts have pompom avatars. I have a fondness for pompoms. And I can’t
think of a softer, friendlier way to decorate my front door!

If you too would like a poofy door decoration, these wreaths
are super easy and quick to make. The materials you’ll need are:
- Pompoms
- Cardboard
- Cardstock, in a similar color to the pompoms (optional)
- Scrap of ribbon
- Craft glue (optional)
- Hot glue
Once you’ve gathered all your materials, it’s time to
determine the size of your wreath. I found it useful to pile my pompoms into a
rough donut, in order to get a feel for how much space I could fill. From that
shape, I measured the inner and outer diameter of the ring. Make your
dimensions a little bit smaller than you think you have the pompoms for: a
small dense wreath will look nicer than a large, sparse one.
(Note: your wreath doesn’t have to be circular. Experiment
with other shapes too!)
Once you have the size of the wreath, trace the inner and
outer circle onto a piece of cardboard, and cut out the ring. It should look
something like this:

As an optional step, you can trace the same ring onto a
piece of cardstock and glue that onto the cardboard. This will prevent the
color of the cardboard from peeking through if your pompoms aren’t densely
packed enough. If you’ve got plenty of pompoms to cover the area, though, the
cardstock won’t be seen, and you can skip it. I erred on the side of caution
and covered my wreath base with some pale pink cardstock.

Next is the fun part: the pompoms! Get a bunch of pompoms in
a variety of sizes and colors. My pompoms happen to be sort of sherbet-colored,
which I love, and they came in multi-size packs. You may find it helpful to
sort them by size before you start.

Turn on your hot glue gun, and spread your workspace with
newspaper or something else to catch glue drips. (Trust me, it’s worth the
extra minute of setup!) While it heats up, take the biggest pompoms you have
and space them evenly around your base. I had eight large pompoms, but the
exact number isn’t crucial: what is important is covering the wreath as evenly
as possible.
When your glue gun is ready, it’s time to start attaching
the pompoms. If you’ve used a glue gun before, you know the drill. Put a dab of
glue on the pompom...

And press it to the wreath where you want it to stick.

Alternatively, you can put the glue on the wreath first, and
then place the pompom. I switched between the two over the course of the
project, and both methods work fine.
Once you’ve gotten your biggest pompoms glued down, move on
to the medium-sized ones. Here, your goal is to fill in the spaces left between
the big pompoms. I found it helpful to arrange each round of pompoms before
gluing them down, in order to space them well.


Continue using smaller and smaller pompoms to fill in the
spaces. Don’t be afraid to squeeze pompoms into small crevices! That’s what
will give the wreath its plush look and texture. Most pompoms will be glued
directly to the base, but you can also stack pompoms on top of one another to
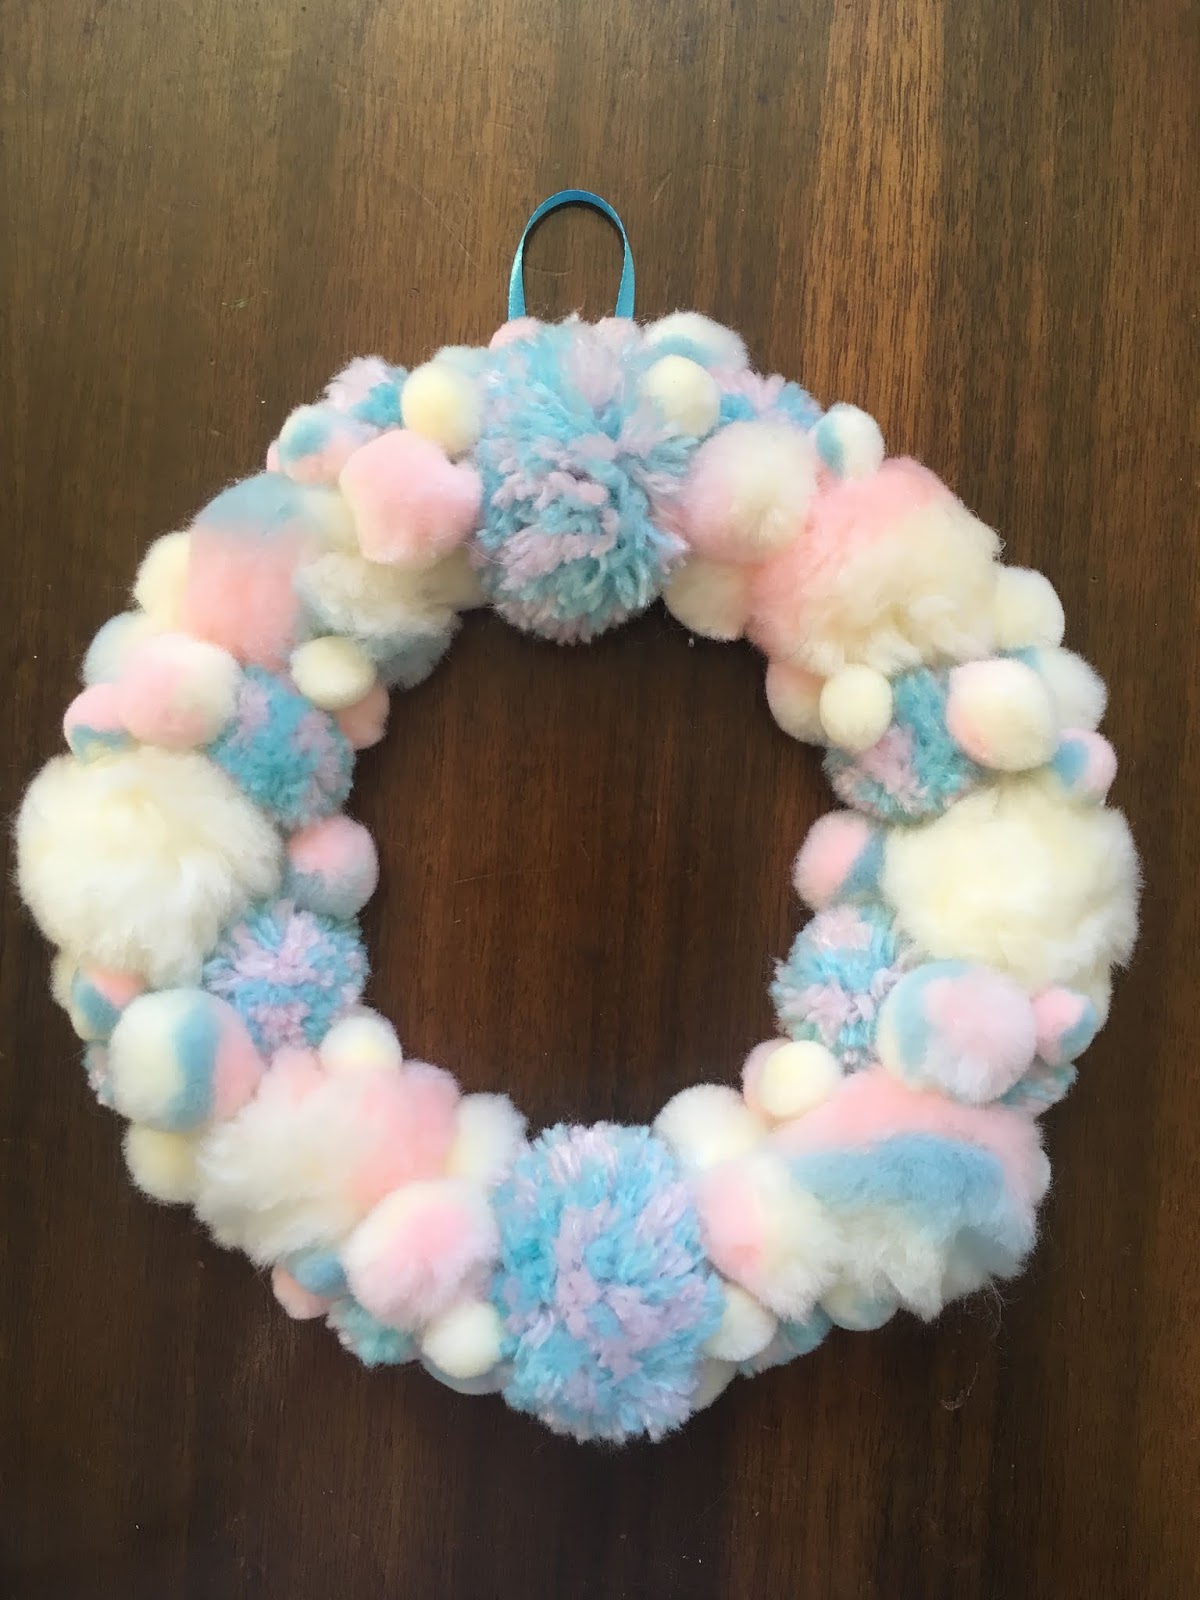
round out the shape. When you’ve added your last pompom, the wreath should look
something like this:

(Yes, it is as soft as it looks)
Finally, we need some way to hang our creation up. Take a
small scrap of ribbon (a few inches long will work), fold it in half, and hot
glue it to the back of the cardboard base, at the top of the wreath.

And there you have it! A fluffy cuddly pompom wreath to
decorate any door or window you like!
The colors of my wreath would make it a good Easter
decoration (though it’s a bit early for that), but your wreath can be any
color, or any combination! Make a bunch of wreaths for every season. Make a
wreath for each day of the week, and swap them out each morning! With how quick
these are to whip up, the possibilities really are endless. In fact, I think I’ll
pick up some more pompoms next time I’m at the craft store...
Well, it seems I have some shopping to do, so until next
time, stay crafty!