Monday, October 22, 2018

Doctor Bunny

As Halloween moves ever nearer, I really need to pick up the pace on this costume. Now I've checked off yet another box on my list, in that I now have her beloved furry companion! Dr. Harris Bonkers is described as a New Zealand white rabbit, so this is what I'm trying to emulate. Cute, right?

I debated between my list of craft proficiencies while deciding how exactly to bring Dr. Bonkers to life. Crochet is a great vehicle for stuffed animals, and there are always a million knitting patterns. But sewing would work as well. After failing to find any good yarn-based patterns for a semi-realistic rabbit, I went with the latter craft. I thought I'd try my hand at pattern-drafting as well. It's not something I'm accustomed to, so I was prepared to fail! (Such is the nature of experimentation). The few times I've done it before, I've started by piecing paper together like so:


Okay, that's roughly rabbit-shaped! I found about half a yard of white flannel that I had lying around and cut out the pieces with about a quarter inch of seam allowance. If you work with light fabrics, I really recommend grabbing yourself a water-soluble fabric marker: it does wonders when trying to trace and label pattern pieces! Chalk works similarly for darker fabrics.


All pinned and set to sew! I did most of my sewing by hand just because I have limited access to a sewing machine around this time (sad, I know!). It was quicker for me to do by hand than to go through the work to borrow a machine. Since there were so many small pieces to this amateur pattern, I really made use of my marker for labelling.


leg. 
So detailed. So useful.

Individual components got sewn, stuffed, and attached to the main body. Next up was to add the detail work, with some felt eyes and an embroidered bunny nose.

He's really looking like a rabbit! But wait...


Does something look... off to you?


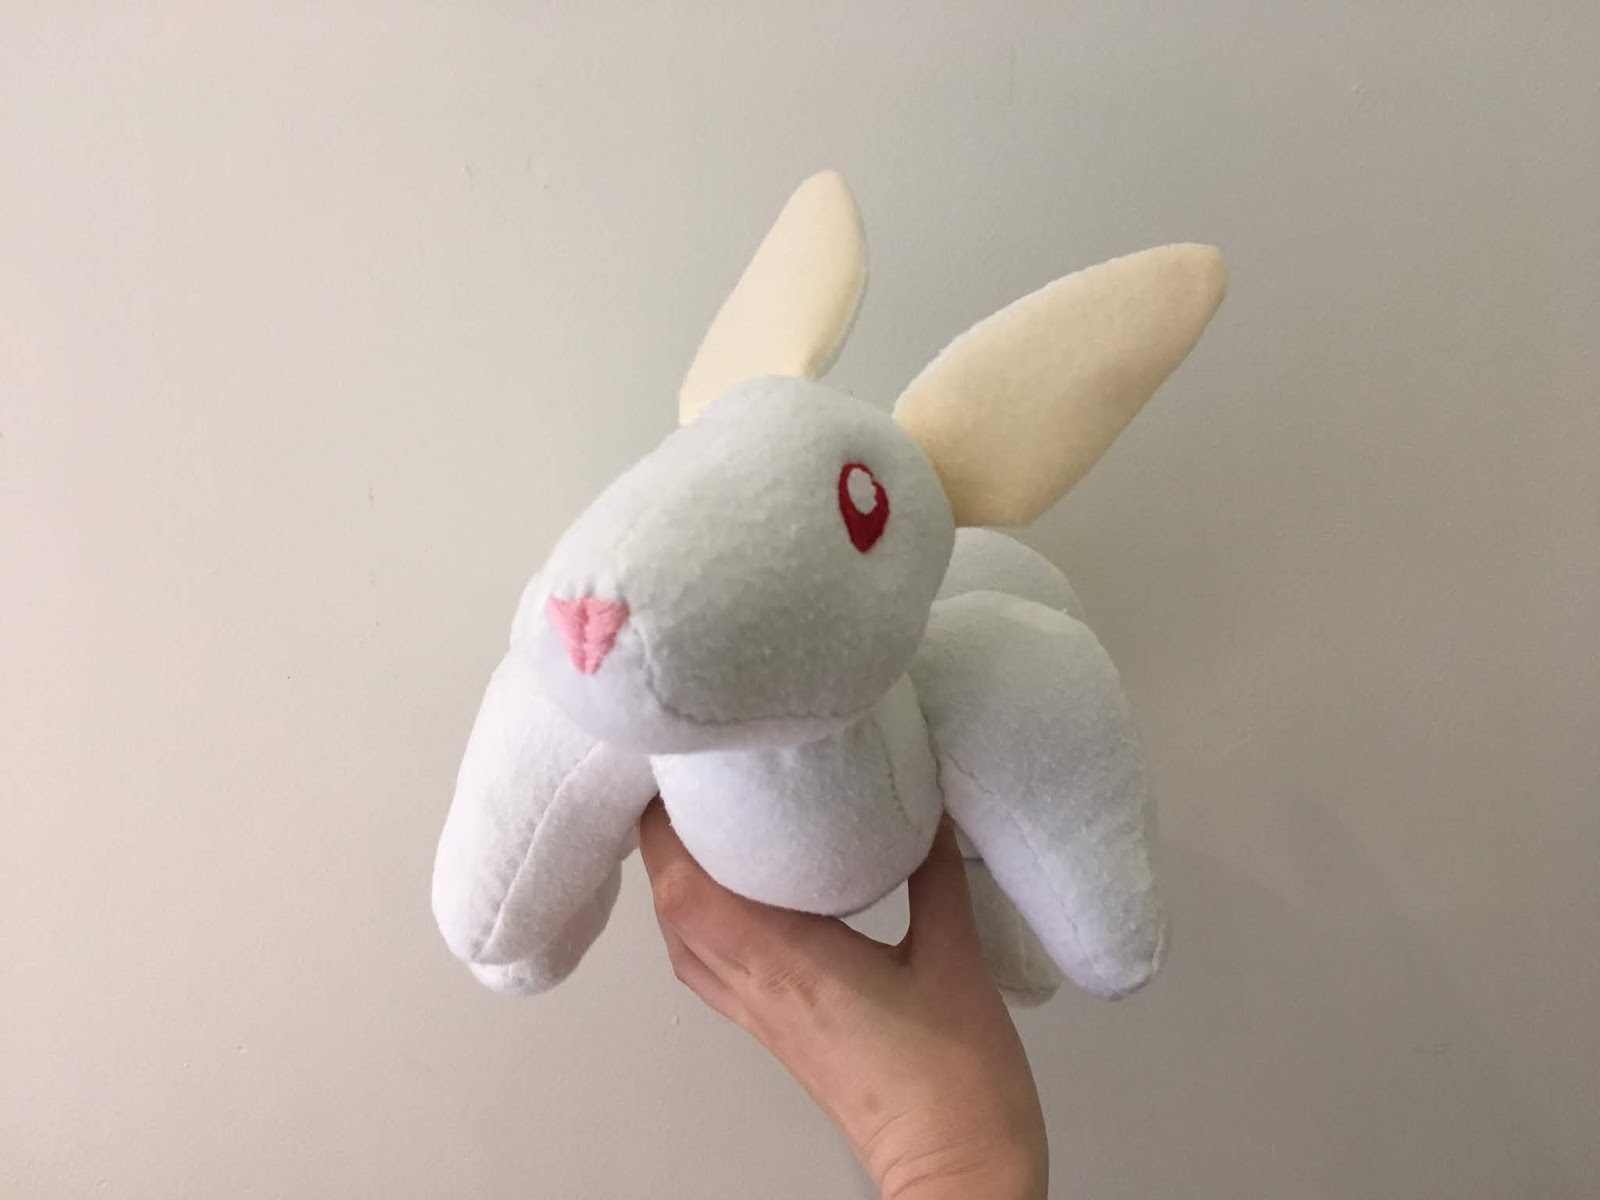
I can't quite put my finger on it...


...oh. Maybe it's that this bunny is seriously buff. Dr. Bonkers, have you been experimenting with steroids??? It seems that in making the paper pattern, I failed to take into account the stuffing, which makes the pieces considerably... bulkier than the paper suggests. Hence the ripped rabbit.

Well this just won't do. I have no problem with Dr. Bonkers refuting the dichotomy between brains and brawn, but this is just ridiculous. Time to do a little emergency surgery to reduce this bunny's bodybuilder physique.


I removed a considerable amount of stuffing and took in a lot of the fabric on the legs. This is where a stitch like the ladder stitch comes in handy: it's nigh-invisible on the front of a project if done well! It's a really useful stitch for finished stuffed animals and the like, and well worth learning. Anyway, back to the rabbit. Let's look at a side-by-side comparison of the back leg size, before and after.


Ohhh much better. Let's finish the job, shall we? We can't have a lopsided bunny!


Now that's a rabbit! He's still a bit muscular if you ask me, but that's okay. Dr. Bonkers believes that a sound body and a sound mind compliment each other. He listens to news podcasts while he lifts (with a spotter present, of course). I should probably follow his example.


Jokes aside, I'm really proud of how this rabbit turned out! Pretty good for an amateur pattern, eh? He's about the right size for a rabbit, too. There's just one thing missing, though...


Now that's a handsome rabbit!

Friday, October 19, 2018

The Other Kind of Lace

What else is there to do for my Aubrey costume? Let's consult my handy reference drawing (this is why we make one!):

According to the reference, I've got four parts left: fake piercings, belt, shoelaces, and Dr. Harris Bonkers (who hasn't shown up for quite a while in the podcast, but I still want him!). Of these, I think that the shoelaces are going to be the easiest. I already have crochet thread in red and other colors, I just need to braid some strands together to make it shoelace-thick!

Based on some preliminary experimentation, 6-9 strands of size 10 crochet thread is about as thick as your average shoelace. I tried to make a 6-strand flat braid, and it turned out really cool looking! It also took me an hour to braid 2 inches... yeah maybe not the route to go while I'm on a time crunch. Instead, I tripled up the strands and made a much quicker 3-stranded braid with black and red threads. The result is still pretty awesome, especially since the two laces aren't identical (one has two red strands and one black, the other has two black and one red):


But wait, how did I get those little plastic pieces (aglets) to put on the end of the laces? I wasn't terrible concerned with durability since this is a costume I'll wear intermittently (and replacing laces is pretty easy), so I actually used Scotch tape! I wrapped a few inches of tape tightly around the end of the lace, being careful to keep it from spiraling down the lace, and trimmed the end flush to the tape. A dab of superglue at the end keeps things from unravelling. 


It looks just like the real-deal, and honestly, it feels sturdier than I anticipated. I'll keep you all updated on how well it holds up; this might actually be a viable option for regular-use shoelaces if you want to make your own! Time will tell, though, so I'll refrain from making any more wild claims. Instead, here's the laces on my boots:


Snazzy! I really like this look, actually, and they're very easy to make. Assuming they hold up reasonably well, I might make a bunch of laces in different colors for everyday use! But that's an after-cosplay project. Three more pieces to go!

Sunday, October 14, 2018

Putting it Together

It's October already, and that means it's less than a month until Halloween! I'm so excited! It also means that I need to finish my Aubrey cosplay if I want to wear it around. I maaaaay have gotten sidetracked with some... other projects recently, but now's the time to buckle down! And I'm starting that by putting all of the components that are done together. Time to sew!


First, I sewed all of my lovely patches onto the lapels of my jacket. It already looks very cool. Where's the Pine Guard patch, you ask?


It's a secret society, I'm not gonna leave it out in the open! (Plus I can be all cool and flip my collar whenever I want to show it off.)

But that's not the only thing that's happening to this jacket! Remember those wing decals I made way back when?


They've been sewn on as well! And in order to really drive home the "flame" part of the Lady Flame, I made some fire decals in the same style and added them to the "pockets" in the front. Finally, a use for fake pockets!


Put it all together, and it turns out pretty cool if I do say so myself!


With that, the jacket is pretty much finished. I could probably just throw this on and pass for Aubrey, but whoever likes to do fun things halfway? Onwards, to more projects!

Tuesday, October 9, 2018

A Bulky Break

I love lace, I really do. It's interesting to work, it's pretty, and there are so many options when it comes to making it!

That said, sometimes my poor fingers need a break.

After the copious amount of lacework I've done in the past few months, I thought I'd give myself a little change of pace with some thicker yarn. And since bulky stuff works up so quick, why not make a set of items?

Enter these beauties!


Cute, right? The patterns are the Dewey Decicowl and the Ana Beanie, adjusted slightly to accommodate the weight of the yarn. They're not supposed to be a set, per se, but I think they work really well together!

Both patterns are great for an intermediate crocheter. The general shape of cowl/hat should be familiar by that point, but each piece utilizes a number of less common stitches that add textural interest. The Ana Beanie uses a sideways construction to make the ribbing, which intermediate crocheters may not have seen before. That said, both patterns are quite easy once you get the hang of the new stitches, and the finished products are a fine addition to your fall/winter wardrobe! I think that I'll be using that hat pattern quite a bit in the near future, when I start to consider Christmas presents!