Showing posts with label scarf. Show all posts

Sunday, January 3, 2021

Winging It

Happy New Year!

(Insert a paragraph about how 2020 has been terrible and 2021 is going to be so much better, blah blah blah. You’ve heard it before, you can fill in the rest.)

The deadline for the Foundations Revealed competition is fast approaching, which means I really need to finish my costume. So the next piece I decided to tackle was the wings! If you remember from a few months ago, I made a mockup fairy wing out of wire and crocheted mesh. It looked good, but I ran into trouble developing a harness. The wire was just too flimsy, and I couldn’t source the right wire for the job. Alas, the design had to be scrapped, and I started over. To avoid the wire issue, I wanted to make a shawl to give the impression of wings, rather than attempting another standalone structure. It wouldn’t look as “realistic,” but I figure that a fairy visiting people’s houses would probably use some sort of illusion or glamour on herself anyway.

The poor original wing just couldn’t stand up to the pressure of use (or as it turns out, having boxes collapse on it in my closet...)

Since this costume is inspired by the Dream Fairy poem, there were a few requirements for Wing Design 2.0. The colors and shape should be reminiscent of a Luna moth’s wings, and it also needed “silver spots”. At first I tried to make my own design, but that just wasn’t working out (props to all the pattern designers out there) so I turned to my favorite source of historical patterns instead: archive.org. Soon enough, I happened upon a half-square shawl from the 1885 book Knitting and crochet. A guide to the use of the needle and the hook (available here). To me, the lozenge shapes look like a stylized version of the veins and scales of a butterfly’s wings, and it wasn’t hard to lengthen the half-square shape to better reflect the Luna moth’s long trailing tails. I picked out some lace yarn in pale green and burgundy and set to work.


This pattern was actually pretty quick and easy to work up. It’s colorwork, but you only use one color per row so there’s no need to worry about carrying strands. And since it’s mostly garter stitch, it was perfect for mindless knitting while watching TV. The original pattern called for a crocheted border on top and tassels along the sides, but I extended the border all the way around and just used tassels on the ends. The edges needed that extra bit of stability, in my opinion. And it turned out sooooooo long! It feels so dramatic and elegant to wear, I love it.

The last step was to add the “silver spots upon her wings” like the poem says. In keeping with the fantastical themes of this project, I interpreted the spots as small flowers crocheted with silver thread. I couldn’t figure out a good way to incorporate them into the knitting, so I opted to applique onto the finished product. This has the added bonus of being easily removable once the contest is over; I want to be able to wear the shawl in my everyday outfits without it feeling like too much of a costume.


And there we have it: one more piece of the puzzle down! There’s lots more to do but I’m almost finished with the chemise and drawers, so expect those soon. And until next time, stay crafty!

Friday, January 3, 2020

Throwing in the Cowl

Christmas is always such a busy time of year for me! I like to hand-make gifts, of course, and that means a lot of projects with the same deadline. Sadly, this year I was so pressed for time that I didn't manage to photograph a few of the projects. However, I did get one set of photos, of the present I made for my mom.

She likes lightweight scarves and cowls, to ward off the chill indoors, so I set out looking for a good pattern. I came across the Mira River Wrap by Tammy Canavan-Soldaat. It's a beautiful beaded scarf, knit in lace-weight yarn. The squishy stretchiness of the finished product is a result of a technique called "smocking," in which stitches are wrapped and gathered in particular patterns. 

Originally, I set out to make a scarf exactly like the one pictured in the pattern, albeit with a different color scheme. Then came the issue: time. Like I said, Christmas is a busy time of year, and no matter how early I start I always wind up with fast-approaching deadlines to meet. And leave it to me to pick a lace-weight yarn: the most time-consuming of the yarns! In order to make sure this Christmas present arrived on Christmas, I made some alterations. Instead of making a long straight scarf, I would join the ends and turn in into a cowl! The seam ended up somewhat visible, just because I hadn't planned for it, but ultimately it still looked intentional. And I can say with confidence that this pattern works just as well as a tube! 


Now that the holiday season is firmly in the rearview mirror, I'm excited to get back to some of my personal projects. I have a sweater in the works, and I'm looking to make some things for home decorating as well! Stick around for 2020 and maybe you'll see some of that for yourself!

Speaking of future projects and posting, I think I'm going to continue on with the sporadic schedule for the foreseeable future. Making something interesting and writing about it every single week is difficult when you have a full life's worth of other commitments. I do crafts for the joy of making, and so I'd rather not force myself to produce content that isn't there. I'd rather take my time with it, both in crafting items and writing posts, so that they're enjoyable to read as well. I hope you all agree, and will look forward to new posts, whether they come once a week or once a month. Until next time, stay crafty!

Sunday, June 30, 2019

Argyle Adventures

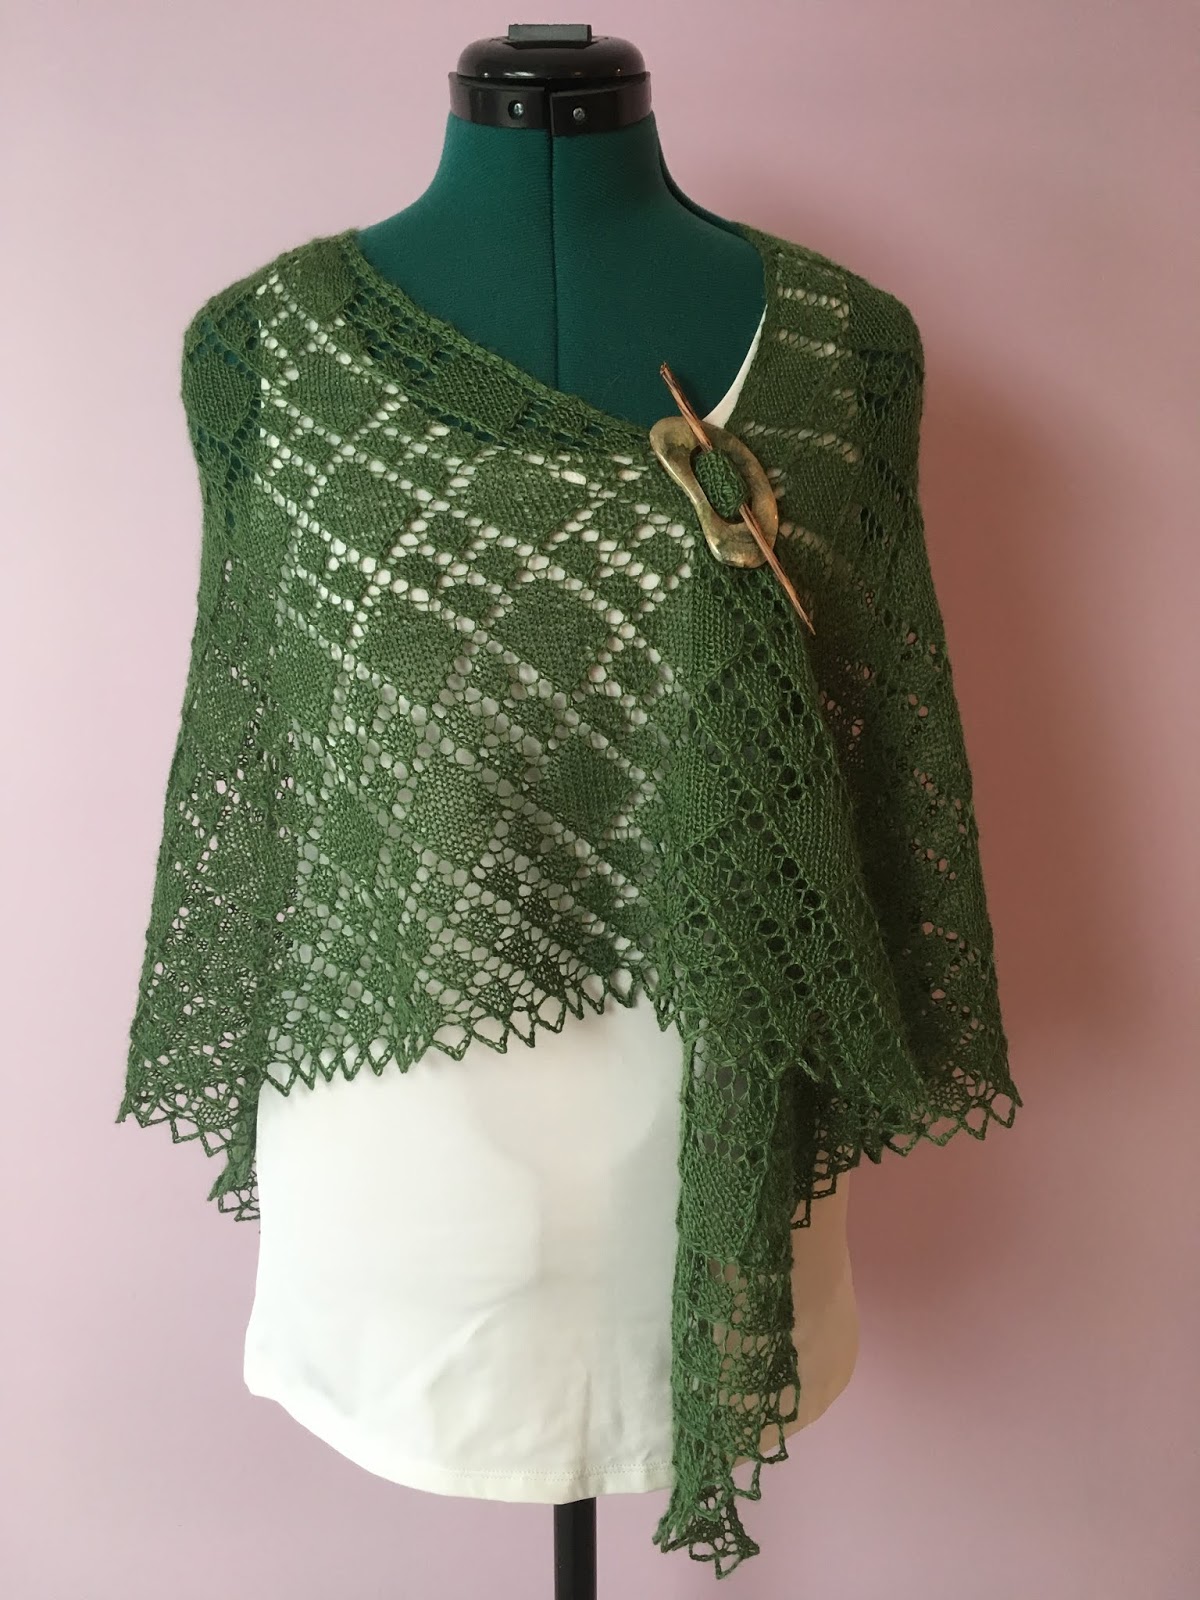
Hello hello! Today I come to you with a finished project: my argyle lace shawl! It's been knit, it's been blocked, and now it's ready for the spotlight! I've already introduced this project and shared my work in progress pictures, so let's cut to the chase and get to the main event, shall we?


Lovely, isn't it? I really couldn't be happier with how this shawl turned out. The argyle-esque pattern works so well in lace, and I love the way it looks in this color yarn, too! It drapes beautifully and looks good open in front or held closed with a shawl pin.

I will say, the shawl is a lot bigger than I imagined it would be. Its wingspan is probably close to six feet, though I haven't measured it precisely: that's a lot for a triangle shawl! When I put it on, the point at the bottom reaches to the back of my thighs! It's definitely a full-coverage type of shawl, and given that the yarn is alpaca, it should prove to be quite warm in the fall months. I think that doing one fewer repeats of the main lace pattern would also make a good shawl that's just a bit smaller. 

My final verdict on the pattern itself is a bit mixed. Although I love the way the shawl looks when it's done right, it was tricky to figure out what "right" meant given the instructions. As I mentioned before, the pattern starts out with a vague comment on how the chart only shows "half" of each row, and that seven stitches are omitted from each row. I also had some trouble with the bind-off instructions, though when I went back to figure out exactly what I had trouble with, the instructions seemed clear enough. I'm not sure whether it's a case of hindsight being 20/20 or me misreading something the first time through. In either case, though, I'd recommend putting in a lifeline before attempting the bind off. You never know when your dad is going to sit on your project and pull out 30 stitches! Overall, I'd recommend it only to practiced knitters who already know their way around a shawl pattern. That way, you'll be able to make sense of murky instructions without tearing your hair out. 

Now that this big project is out of the way, I want to make a smaller item or two before moving onto the next big thing. And I do have to get started on the Taako costume as well. So many crafts, so little time! Join me next week and I'm sure to have something new to show you. But until then, stay crafty!

Monday, June 10, 2019

Argyle Lace Adventures

I think it's high time for an update on this particular project. For those who don't remember, I started a lace shawl using the pattern Argyle a few months ago, right in the middle of one of the busier times of year. Why, you might ask, would I attempt this? That's a very good question.

...Moving on.

Naturally, I had to bench the project when other obligations got too much, but I've since picked it back up. Like any top-down shawl, the rows have gotten longer, and longer... and longer...

Needless to say, it's been slow going for a while. I finally finished the main pattern, though, which is exciting!


Like any piece of lace, it's not much to look at before blocking. It's good to keep that in mind while selecting your yarn: some fibers are harder to block than others! Acrylics in particular can be difficult to block, so be careful about trying to knit lace with those.


I tried to get an idea for what the lace will look like when completed and blocked by stretching out a section. It seems to be coming along nicely! I really like the idea of using lace stitches to make something reminiscent of the colorwork argyle pattern. Hopefully, it'll turn out just as good as those traditional patterns.

I still have the edging to work, though, so I'll get on that. Until next time, stay crafty!

Monday, June 3, 2019

Spun and Woven

Hello hello! This week, I bring to you a fun project I did for a friend's birthday. (And since I know you read these, hi! None of this stuff will be news to you!). Anyway, she recently began to learn how to spin by hand, and was making yarn out of some lovely navy blue wool. The finished product was lovely, in my opinion: maybe a hundred yards of roughly bulky weight yarn. As with all first spinning projects, though, it was a bit uneven in spaces (thick-and-thin is how it's marketed, I think). Uneven yarn is a bit difficult to knit with, so she wasn't sure what to do with it.

Enter me, with my ridiculous penchant for learning as many crafts as possible. I don't much enjoy knitting with thick-and-thin yarn either, but I have learned that it's excellent for certain other crafts: namely weaving. It adds a wonderful texture to woven fabric, especially when paired with smoother yarns. I proposed an idea: I would take her yarn, add some store-bought yarns to the mix, and weave her a scarf as a birthday gift. She agreed, and so we set off to find yarns to complete the set!

Now, I mentioned before that this handspun was navy blue. This is broadly speaking correct, however it doesn't tell the whole story. The wool reads as solid blue at a distance, but upon closer inspection, it has strands of lots of different colors mixed into it: reds and yellows and greens. In order to use other yarns, they had to work well with all of the colors present. It was a bit of a challenge to find something that worked, but we eventually settled on a color palette that played to the handspun's strengths.


The leftmost yarn is, of course, the handspun. Unfortunately, the photo doesn't capture its color very well, but you can see the nice chunky texture it has. The right two yarns are the ones we picked out. The magenta was selected as a stark contrast to the handspun, both in texture and color. It plays off of some of the redder strands of fiber in the handspun. These two yarns were to make up the warp of the scarf, running in striped up and down its length. For the weft, we needed yet another contrast. I tried to find a matching color yarn that would blend in, leaving the striped as the major design element, but we had no luck with that. So instead of matching color, we settled on a very thin light grey yarn. Being a neutral, it worked well with both the previous yarns, and the thinness would make it disappear somewhat in the weave of the fabric. The sections that did show would really pop, though, adding another layer of interest to the scarf's design. Or so I hoped. Nothing to it but to do it now, eh?

After all the yarns were assembled, I got to work warping the project. Rather than simple stripes, I placed the majority of the handspun towards the center, and graded out with the magenta yarn towards the edges. I think it looks a little nicer like that. Then it was just a matter of weaving: it's all just a plain weave, so it went fairly quickly. When all was said and done, it looked like this!


I rather like how it turned out! I hadn't expected the grey weft to show up so much more on the handspun than the magenta, but it makes for an interesting design element, no? When in doubt, claim that you planned it like that all along! It's in my friend's possession now, in any case (and I hope you like it!). I really do like the texture of the handspun with weaving. Maybe I should do some more spinning and then weave with it...

Ah, but that's a matter for another week. For now, I'll take my leave. Stay crafty, everyone!

Tuesday, April 2, 2019

Lace! Again!

We're getting into another busy part of the year for me. Which, naturally, means that I should start another complicated lace shawl. The last one wasn't that bad, was it? No, I must be misremembering, exaggerating even. Besides, I have some pretty green alpaca lace that I bought ages ago, and it's just begging to be knit!

I didn't have a good shawl pattern in mind for the yarn, so I went searching for one. What I came up with was Argyle by Anna Kotsolainen. I'm a big fan of classic angled patterns like argyles and plaids, so I was excited to start it! It didn't seem too difficult from the pictures, anyway.

I'll be honest with you, this pattern was a bit of a challenge. I'm fairly certain that it stems at least in part from translation issues; the pattern seems to have originally been written in Russian, and I think some key details got lost in translation. Specifically, the pattern notes that the lace chart shows only "half" of the pattern, without elaboration. Half? Which half?? How do I figure out the other half???

Only after staring intently at photos of other people's completed projects did I learn what was meant by "half." The pattern is otherwise quite nice, so if you want to try it for yourself, allow me to explain:

When the pattern tells you to begin to work from the chart, you'll notice that the first row has significantly fewer stitches charted than you have on your needle. This is okay. First, knit 3 stitches for your garter border. Then, knit the stitches on the chart, ending with a yarn over. Next, knit one stitch (this is the center stitch). Then, knit all the stitches on the same row of the chart again, and end with another 3 stitches of garter border This is what was meant by the chart only showing half of the pattern. For every subsequent row, follow the same pattern: border, first pass through chart, center stitch, second pass through chart, border. It should look something like this:


Once you get it going, it shouldn't be too much of a problem. That being said, some people made just the "half" shawl without repeating the chart, so you could go for that if you'd prefer. It would make the pattern look rather different, but you do you! I'm going to keep going as intended, and I'll be sure to fill you in. With my luck, this thing will get done just in time for it to be too warm to wear!

Monday, February 11, 2019

A Lace Log

So, lace takes a long time to make. You may or may not be aware of this. Certainly if you've gone through the effort of making lace, you know, but to those on the outside, it may not be so obvious. It might take a bit longer because it's more complicated, you think, but surely I must be exaggerating.

Oh, my sweet summer crafter. How wrong you are.

Let's go through the process of making a shawl. Like, for example, the Frosty Apples Shawlette that I shared a progress report on a few weeks ago. It's a full-sized shawl, but the crescent shape makes for less surface area than an equivalent triangle shawl or circle shawl. It'll be fine. 

You begin. Seven stitches to cast on. Child's play. The rows at first go by like lightning: plain stockinette with only a handful of stitches per row. Sure, you're increasing, but the 20, 30, 50 row marks fly by. You feel like you're making great time. You do a few calculations to see how many rows you need before you can get to the real lace bit.... 120 rows? Well, that's a lot, but it is thin yarn. It's probably fine, you're halfway there already!

Except you're not. You're never halfway there when you think you are.

By the time you actually get to the start of the lace pattern, there are almost 250 stitches per row. 250 tiny stitches to make before you get to turn that work. And you haven't even gotten to the hard part yet. But it's fine. It's just lace, you can handle a few simple yarn overs and decreases. The backside is even plain purling, save for the edges! You have to slow down a bit to read the chart as you go, but it's not so bad. There are only 75 rows left for the entire project, and you already did 120. You put a life line in just in case.

Maybe you're a fast knitter. Maybe yarn overs and decreases come as quickly to you as knits and purls. That's all well and good, but you start to get a strange sinking feeling that this pattern is determined to wreck your workflow. Because the next thing you see on your chart are the beads.

You're forced to rummage around in your craft bag for a crochet hook that's small enough to take a bead while still having a head that's visible to the human eye. You can't fathom what peculiar brand of insanity might compel a crocheter to actually use one of these things for a full project, but you're grateful at least that they're made, because no way were you going to count out and pre-string every single bead you needed for this shawl. Beaded stitches must be handled with care. Put them on the hook, slide the bead on, and replace the stitch on your needle without twisting it or dropping it. You drop it. Dammit.

Well, that's the other thing you suppose these tiny crochet hooks are good for: fixing your mistakes.

You continue on like this for a while, chugging along the non-beaded rows and paying extra care to the beaded ones. After a few tries, you think you've gotten the hang of the beads. They're not so bad, really, when you get to know them. The rows are still getting longer all the while, but you're pretty sure that you can handle it. At this point, what's another stitch added to 300? You turn the page to the final chart, feeling a sense of accomplishment at all you've done so far.

Then you see them. The nupps.

If you're like me, you know what nupps are, but you've never made one. Google is your friend, and in theory they're not that hard. In reality, they are evil incarnate. You try first the traditional way, making far more yarn overs at once than is really advisable, and purling them all together on the back row. This quickly breaks your very spirit, your will to fight. There are dozens of them, maybe hundreds in this pattern. You don't think your poor heart can take it. You consider just forgoing the nupps entirely in place of beads (they seem so tame now), but since you've already used beads, you know they won't stand out. This shawl is supposed to be special, and you really like how all the sample photos look. But can you bring yourself to endure that sort of extended, self-inflicted torture for 30 more rows?

You search desperately for alternatives, and come up with one saving grace. A method for making nupps with a crochet hook that confines the little monstrosities to a single row. No more purling 9 together for you. It's far from a pleasant time getting out the crochet hook again, but you figure it's the lesser of two evils. Your progress slows to a crawl. The bind off taunts you, so few rows away and yet so far. Centimeter by centimeter, you make your way forward until you purl that final row. Better put in another lifeline at this point, because you have to do a crochet bind off, and you know it's not going to be right the first time. Whyever would you get it right the first time? That would be too easy.

But after about half a dozen false starts, you get the hang of it, and thank goodness you only have to bind off once. Break the thread and you get your first and final real gift of this pattern: a mere two blissful ends to weave in. Colorwork can go suck a lemon, you've got this.

And finally, you're done! You spread out your shawl to admire your work:


Wait. That's not what the pictures for the pattern looked like. This is all scrunchy, you can barely see what the design is supposed to be. Did you do something wrong? You thought you followed the directions perfectly. (Well, except for that time you realized you messed up eight rows ago and decided to just leave it in instead of spending two hours fixing the mistake. Or that other time you did the same thing. Or...)

No my friend, you haven't made some mystery error. This is the final blow the project will deal to your will to live before you vanquish it. For you see, lace looks terrible until it's blocked.

Blocking isn't so bad, you think. You just get the thing wet and pin the important areas to a blocking pad. And you'd be right about that. But you see, with a lace design like this one, there are a lot of important bits that have to be individually pinned. Each pattern repeat becomes a set of points which have to be outlined. You're not sure quite how many repeats there are, but the memory of agonizingly long rows towards the end give you a pretty good idea. And just to put icing on the cake, your set of blocking pads isn't quite big enough to lay out the entire shawl. Of course.

Still, you manage to find a configuration that covers most of the important stuff. You lay it out, sticking hundreds of pins in the thing in an effort to force it into the shape you want. Your hands smell like wet wool, and it's probably about midnight by now. All that's left to do is go to sleep and hope for the best.

At this point, you're probably seriously questioning the life choices of everyone who has made more than one lace shawl. The first time was nearly enough to break you. Your eyes are chronically tired from all the finicky little stitches you have to look at, and your hands have cramped up more times than you can count. You'd have finished half a dozen worsted weight shawls in the same time. This couldn't possibly be worth it.

The next morning, you wake up and wander over to your blocking setup, which is probably blocking access to a door to somewhere important. Your family member/roommate/pet is standing indignantly in front of it, confused and/or annoyed at the interruption to their daily routine. You take out all the pins, grumbling as you ask yourself whether it was really necessary to use this many. Probably not, you think. This whole project probably wasn't necessary. Still, you're here now, and you finally get to pick up the finished, fully blocked shawl to get your first good look at it.

...Oh.

Wow.

The photos on your computer really didn't do it justice, did they? Up close, you can see every stitch, every intricate detail. Light filters through the fabric, giving it almost an etherial quality. You try it on, and it's light as a feather, beads giving it just enough weight to drape gracefully down your back. Even if it's a little vain to say, you feel like you've really created something beautiful.

You try to take photos of it, because you want to share the accomplishment with your friends and family. Finding a place to drape it in its full glory is a challenge.


Ah, but just like the photos online, a static image just isn't enough to do it justice. You try to capture it in closeups, but to no avail.


Pretty, yes, but not as pretty as it is in person. You feel like nothing short of a professional photographer will be able to capture it in its full glory, so you settle for sending these pictures to your friends and revel in the real thing yourself. After all the time, all the frustration and mistakes, you've done it. It was so much more work than you'd imagined at the start, and you thought about giving up more than once. But maybe it was worth it in the end after all.

You start planning your next lace project.

Sunday, January 27, 2019

Back to Lace

You all know I can't stay away from lace for too long, right? It's so pretty and delicate and interesting to look at... I might be in love. Which is good, because I have at least five lace/fingering weight projects lined up, and plenty more on the wishlist.

The only problem with lace is the time it takes to make. So many stitches to make! Which means that if I want a lace item for a particular event, I really have to start early. As it happens, just such an event will be happening this spring.

I'm not going to share details because it would give away my location (and I'm not keen on letting everyone who can access a webpage know where I live), but come late spring, I'll need a yellow shawl or other accessory. I don't happen to own many yellow things, so I sensed a prime opportunity coming my way. I could certainly make myself a yellow shawl, couldn't I?

I knew I had to start as soon as possible, so shortly after New Year's, I found a pattern and got to work. There are a whole host of lovely shawl patterns to be found online, and after some deliberation, I went with the Frosty Apples Shawlette by Lyubov Shalnaya. I've never made a crescent shawl before, so I thought this might be a good introduction. Some new techniques, some beading, lots of pictures and charts to direct me. Here's my progress so far!


These top-down shawls start out so tiny!


But it gets wide pretty quickly! Took me quite a while to get to the end of the plain stockinette section.


Pro-tip: always use lifelines. Seriously, I put this in before I started the lace pattern and was almost immediately rewarded, as I messed up the first lace row and was able to rip back with no trouble whatsoever.


There are two lace charts in this pattern: the border and the edge. The border is the transition between the stockinette base and the edge lace, and as of right now, that's the part I have finished.


Lace doesn't look like too much when it's all scrunched up like this, but you can sort of get a feel for the pattern's shape (if you squint). It's almost magical when it all blocks out! But that's a ways away still.

I'm determined to get this project done with time to spare, so expect to see it again soon! Until next time!

Friday, January 4, 2019

Return of an Old Favorite

Okay, so when I say old, I mean from a couple of months ago. This blog hasn't been around for that long yet!

This is the last of the Christmas presents I have left to share, this one for my mom (and thank goodness I won't have to think about gift-giving on that scale again for another 10 months). She actually requested the pattern specifically after seeing it from another project. Yes, once again it's the Ana Beanie!


Last time, I was using bulky yarn, but this one was crocheted tightly with worsted weight. I think it gives the hat a pleasing squishiness! And I made the faux-fur pompom myself, again at the request of mom. If you also like the fur pompom style, don't ever bother buying them from the store: it's easy and way cheaper to make your own. Five minutes, a patch of fur-fabric, and some stuffing is really all you need.

After finishing the hat, I was left with about half a skein of yarn, which was begging to be crocheted into something matching. So I drew on another previously-used pattern - the Dewey Decicowl - to whip it up. Unfortunately, there wasn't enough yarn for the button tab, but I think it looks good regardless!


Well, that just about wraps up Christmas 2018. It's been fun, but I'm excited to work on some personal projects for a while! I'm going to go back to my once-per-week schedule now, so expect this deluge of crafts to slow to a steady drip. And as always, stay crafty!

Sunday, December 30, 2018

Wo(ven) is Me

More Christmas gifts this time! I have a lot of those to share. This one was another relatively new craft for me: weaving. I had a bunch of interestingly textured yarns in various shades of blue, so I decided to go for a simple design that let the yarn do all the talking. I used three different types of yarn in my warp: a fuzzy, vibrant blue, a more subdued, knobbly yarn, and a bit of another homespun yarn that varied both in its thickness and its color! I really wanted the stripes of these yarns to be the focal point, so for the weft, I used some very thin cotton yarn, doubled up for strength. It recedes into the background in comparison to the worsted weight/bulky yarns used for the warp, so you hardly notice that it's what's holding the entire scarf together! The construction of the scarf itself was plain weave (I haven't really mastered anything else on rigid heddle yet), again so that the different yarns were the focus. I'm quite pleased with the result!


Of course, this is for the recipient to use however she wants, but I personally think that this scarf would go great with denim. The colors are reminiscent of a medium wash blue jean, and it would be a fun fall style to throw this on with a pair of jeans and a contrasting shirt/sweater! And it really goes to show that if you have interesting yarns, you don't have to do anything super fancy to them to get a nice product. Just give them a chance to shine, and they will!

Tuesday, October 9, 2018

A Bulky Break

I love lace, I really do. It's interesting to work, it's pretty, and there are so many options when it comes to making it!

That said, sometimes my poor fingers need a break.

After the copious amount of lacework I've done in the past few months, I thought I'd give myself a little change of pace with some thicker yarn. And since bulky stuff works up so quick, why not make a set of items?

Enter these beauties!


Cute, right? The patterns are the Dewey Decicowl and the Ana Beanie, adjusted slightly to accommodate the weight of the yarn. They're not supposed to be a set, per se, but I think they work really well together!

Both patterns are great for an intermediate crocheter. The general shape of cowl/hat should be familiar by that point, but each piece utilizes a number of less common stitches that add textural interest. The Ana Beanie uses a sideways construction to make the ribbing, which intermediate crocheters may not have seen before. That said, both patterns are quite easy once you get the hang of the new stitches, and the finished products are a fine addition to your fall/winter wardrobe! I think that I'll be using that hat pattern quite a bit in the near future, when I start to consider Christmas presents!

Sunday, September 9, 2018

Pattern Review: Falling Water

I like making puns, and this pattern beat me to the punch! I had a skein of lovely bright turquoise fingering weight yarn from Mad Tosh that I needed a project for. The sensible thing to do would be to make myself a pair of socks, but socks are no fun. (Apologies to those who enjoy making socks). Plus then 70% of the pretty yarn would be hidden inside my shoes! No, I needed a project that let it all show, loud and proud! And I found that in the Falling Water scarf by Bonnie Sennot.

I'm a sucker for some lace, as I've probably demonstrated often enough, but I'm still not super well-versed in the ways of knitting. This pattern was a good compromise. It has a relatively simple lace pattern that is easy to understand and memorize, but the result is quite stunning. Take a look!


Isn't it pretty? The subtle variations in the yarn really emphasize the impression of waterfalls and flowing rivers. The scarf is just long enough for me to double up to wear, though of course with a repeated pattern like this, you can make it practically any length you like!

Cons are few and far between on this one. If you're looking for lace because you like to be challenged, this will be a little boring. The repeats are short, and so you need a lot of them to make a wearable scarf. And like any lace, it needed a good thorough blocking before the pattern could really shine, so don't work this pattern in a yarn that's hard to block. Other than that, it's a great little scarf pattern, especially for people looking for a first peek at lace!

Tuesday, August 7, 2018

Diamond in the Rough

Finally! It is finished!

Backstory time: I bought this mill-end cotton weaving thread for dirt cheap on a whim one time while I was at the yarn store. There were a bunch of ratty-looking hanks laid out on a shelf, some a little dirty, all tangled. But it felt nice and I liked the colors, so why not? I managed to get it untangled over the course of a few days, and then I had to figure out what to do with it. What do you do with an entire pound of fine cotton thread?

My mind jumped to lace, as it usually does. Crocheted lace can feel a bit bulky and awkward, but I reasoned that the thread was so fine that it would negate the nature of the craft. And I was looking for a suitable Christmas present for my dear friend, who had gifted me a chemistry-themed sweater for a past birthday. She was the kind of person who might enjoy some fine fillet lacework. I got her approval on a shawl pattern and set to work in mid-October. Sure it was lace, but fillet crochet goes comparatively fast! The pattern was so easy to memorize! Surely I could manage in two and a half months.

I was wrong. So very wrong.

First of all, fillet crochet might be a fast type of lace, but it still goes pretty darn slow when you're using a .75 mm crochet hook! And even though the pattern was easy, it was impossible to concentrate on for more than an hour or two at a time. The stitches were so tiny they cramped my hand and tired my eyes. The shawl didn't get finished by Christmas. It didn't get finished by January or February either. I made progress at a snail's pace.

Then, summer came, and I found myself with an hour's commute by train. An hour where I couldn't really move, but I could very well put a podcast on and use my hands for their favorite task. I was determined to get it done by summer's end.

And now, I can finally say I've done it! It took an estimated 80 hours, and it's 7 months late, but it is done. And forgive me for being egotistical, but it is beautiful!


I mean, look at it! look at that drape, and the way the diamond pattern shows across the back! Is it perfect? Of course not! But let me tell you, a good blocking will hide a multitude of sins. No way I kept my gauge consistent over the course of 10 months, but thanks to water, foam, and straight pins, you'll only see the gauge mistakes if you're really looking for them. And besides, mistakes make the piece unique! They show how much personal effort you've put into a special gift. 

I really think that this project turned out well. It's the largest and finest piece of lace I've made by far, and I hope my friend likes it too. It's currently sitting pretty in a cute box, ready for the next time I see her. 

This has been a really fun project, and I'm excited to do even more lacework. I love the result so much!

... But maybe I'll take a break and try something in a bulky yarn first. 😅

Sunday, June 17, 2018

Slow Going


It grows! Slowly but surely, this shawl is getting longer. If you're into instant gratification, I would not recommend going the route of lacework in super-fine thread, but it is turning out quite nicely so far. We're at inch 32 of 60 so there's still a way to go, but I'm confident I'll make it there eventually!

Monday, May 21, 2018

Finished Scarf

Due to a bout of illness, I wasn't able to finish my mom's silver-and-teal scarf for Mother's Day. Fortunately, she's a patient person, and I think she thought it was worth the wait! I'm quite pleased with how the scarf turned out. It has a very shifty, silky feel, and the color seems to change depending on the angle from which the fabric is viewed because of how the two yarn colors lay on each other. It was a completely accidental feature, but a beautiful one! Here, I'll stop talking and you can just see the pictures (modeled by the equally beautiful Mannie Quinn):


Thursday, May 10, 2018

I Teal Gray-t

First of all, I apologize for the radio silence this past week. Somehow I've fallen into the habit of posting on Thursdays (why Thursdays?), and I missed posting last week. I was just busy, but hopefully I'll have more time during the summer!

Or... I would apologize if there was anyone to apologize to. According to the stats, I'm still just flinging posts into the void of the Internet, with nobody but myself to see it. Ah well, I'll show this to my friends eventually!

Anyway, Mother's Day is fast approaching, and I always make my mom a handmade gift. This year, she had picked out some really nice bamboo yarn in teal and silver (or gray, to make my silly title work), and I'm making her a scarf. It's still a work in progress, but have a picture!


I've got myself a little rigid heddle loom, which is really quite versatile for its simplicity. The pattern was meant to be a sort of houndstooth, but I neglected to take into account the balance of the weave. I'm still pretty new to weaving, so rookie mistakes! It's turned into this broken stripe-y thing instead.


I think it looks good, even if it isn't what I intended! Experimenting is how you learn, and now I've learned to make sure I've got a balanced weave if I want to make certain patterns. I still like it, and hopefully my mom will, too!

Thursday, April 12, 2018

Knitting: It's About Time!

I've been crafting for a long time, but in all those years, I never learned to knit. Oh sure, I have a pair of needles, and every few years I would clumsily attempt a cast-on and a few rows before losing interesting and ripping everything out again. My grandma taught me to crochet, my mother taught me to sew, and I taught myself tatting, papercutting, embroidery, weaving, and all the rest. I figured I didn't need knitting with all those other tools at my disposal!

But then, I just happened upon a book in the local bookstore on knitted lace on the bargain shelf. The patterns were, on the whole, beautiful, and the instructions were clear and well-written. Surely buying it couldn't hurt? Just to look at the pictures, to fill a space on my bookshelf. Then I started looking at patterns online. Pretty patterns. Stylish patterns. Knitting patterns. If I wanted to actually have any of those items, I would have to learn to knit. So I wiped the dust off of a pair of needles, made a few test squares, and got started.

Now, I am terrible at being a beginner. I hate the simplistic, plain crafting that's always suggested for a first project. It's. So. Boring. So whenever possible, I just... don't. I don't believe that your first project has to be some variation of a plain one-stitch rectangle. It takes a little longer to do, and you have to learn a handful more techniques at once, but you can absolutely start with a project like this:


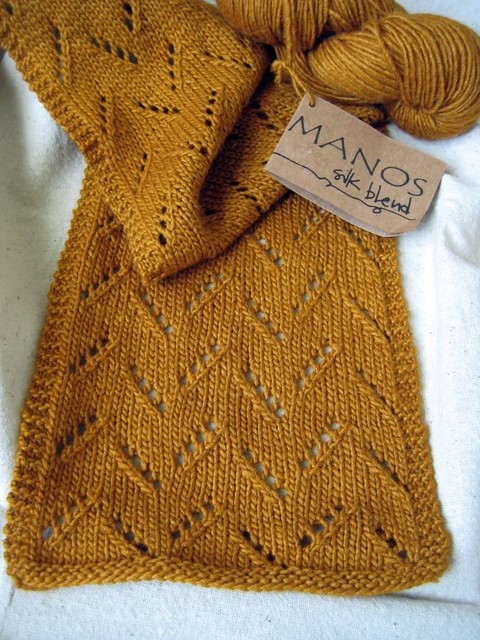
This is a free pattern called the Peaks and Valleys Scarf, available here. I liked it a lot: it was way more visually interesting than a plain garter stitch scarf, but not so complicated that I couldn't manage to figure it out. In fact, the instructions proper fit on less than half a page. I needed to learn a handful more techniques than I would have needed for garter stitch, but the repeating pattern gave me plenty of time to practice.

So I did! I knit and purled and made mistakes and fixed them. Many of the skills I knew from crocheting came in handy, and I learned new skills as well. The result was far from perfect, but I'm proud of it all the same!


The scarf curled pretty badly when I first knit it (It's the nature of stockinette), but a little steam blocking evened that right out. If you don't have a steamer, soak a pillowcase and lay it over your work before ironing right on top of the pillowcase. It does the trick nearly as well!

Now that I've finished a proper project with a proper pattern, I can officially call myself a knitter! I'm sure I'll be going on a knitting spree, making up for all those years I was too stubborn to try. If you want to learn how to knit too, I'll be posting a tutorials reference page soon. If you already know how to knit, share your tips (and your own first time projects) in the comments! And until next time, keep an open mind and stay crafty!

Thursday, April 5, 2018

An Experiment

Experiment time! I do so love using craft supplies for different projects. You can get really cool effects that way! But using products in ways they were not intended requires trial and error.

You may remember that a little while ago, I tried my hand at marble dyeing. While I love the results and plan to do more in the future, I have more marbling paint than I could ever need! I wanted to see if I could use the paint for any other craft, and after a little Internet searching, I hit upon the idea that perhaps they would work for silk painting.

For those who don't know, silk painting is a technique where some sort of resist is piped onto silk fabric to create a design, and then the fabric is painted with dyes. The resist prevents the dyes from spreading across the line, resulting in clean, white lines and blocks of color that look a bit like watercolors. I wanted to try my hand at the craft using materials I have in my house. Hence, the experiment! Here's how it went.


I took one square silk scarf and cut it in half. I didn't have anywhere big enough to stretch the entire square out, and I wanted to try a few different ways of fixing the paint, so two scarves it was! In marble dyeing, the fabric is pretreated with alum, so I did that for one scarf and left the other alone to treat after the paint was applied.


Next, I drew a design. Water lilies seemed like a traditional and beautiful choice, and it would give me a chance to play around with blending colors in the large water areas.

Then it was time to resist! Or... to add the resist. I didn't have any proper resist around, but I did have beeswax. Beeswax is often used for batik dyeing, so I predicted it might work for painting as well. I melted it with a candle flame and used an old paintbrush to apply it across light pencil lines I traced onto the fabric. This was probably the trickiest part! The beeswax dripped when liquid and solidified quickly, making it hard to get an even line.


Finally, the painting! The scarf is just stretched over a plastic storage container (which wasn't quite big enough, but I digress). I took the paints and applied them as I saw fit. Most of the colors bled readily, but the beeswax stopped it as long as the line wasn't broken. White was the only color that didn't bleed well, not did it blend with the other colors readily. But otherwise, the colors mixed to produce a lovely watercolor effect.

For the pre-treated scarf, all I had to do to finish was to remove the alum and wax. For the untreated scarf, I first treated it with the alum solution and let it dry for a day. Then I washed both scarves gently with water to remove the alum. The beeswax needed to be melted out, so I sandwiched the scarves between layers of paper towel and ironed them. This left an oily stain on the fabric, so it's not a method I would recommend. Fortunately, the already-mottled colors of the water hid the stain well!


And there we have it! Both of the scarves turned out pretty nicely for a first try, and neither bled when I tried to wash them. Hooray for colorfastness! It was a bit easier to apply the wax and paint to the untreated scarf; it seemed like the fabric absorbed the liquid better that way. And since both methods fixed the paint to the scarf well, I'd recommend whatever is easier to do!

On the downsides, these scarves are now rather stiff. I ended up using a lot of paint to cover the fabric, and it affected the feel. Paints, unlike dyes, have a matrix of non-pigmented molecules that hold the pigments, and too much of that structural material can stiffen fabric. I wouldn't want to wear either of these scarves on my skin (but they'll look nice as a wall hanging). In the future, I'll dilute the paints considerably and see if I can get vibrant colors without saturating the fabric quite so much.

And thus ends the experiment! I learned lots about how the marbling paints work, so I'd say it was a success. But there's still more to test, so perhaps you'll see more silk painting here in the future!