Thursday, May 31, 2018

Patching Things Up

Well I've certainly been jumping from project to project, haven't I? Time to get back to something long-term: the Aubrey cosplay! After brushing up on my embroidery skills, I took another crack at making patches for the lapel of Aubrey's jacket:


Much better! These still have a bit of wonkiness that defines their handmade charm, but they're much nicer. I used two strands of embroidery thread at a time instead of six, and the results are much smoother in texture. You can see it especially well in the closeups:


There are still some things I'd like to improve. I haven't found a good way of outlining shapes so that the boundaries between colors are sharp, for example. But I have plenty of patch ideas left to make, and with them plenty of opportunities to make them better! I'll add a hand-embroidery section to the craft resources soon (-er or later) so you can try your hand at it too!

Thursday, May 24, 2018

Papercutting Tutorial

I love papercutting. The materials are so simple: a piece of paper and a blade are really all you need. But the results are delicate, beautiful, and complex.

I learned papercutting by trial and error, and mostly on my own. There aren't many resources online or in books for learning advanced papercutting techniques. Most are geared towards kids cutting paper snowflakes, and while technically that's also papercutting, I was looking for more refined instructions for an audience that didn't need permission to use the scissors! I never found those instructions, so if you're looking for some yourself, allow me to help with a tutorial!

First, gather your supplies. Paper and a blade (I use a craft knife) are a must. Some people also use small, sharp scissors: it's up to you to decide what you're more comfortable with. Any paper will work for papercutting, though higher quality stuff will last longer. I personally prefer to use origami paper, as it can readily be found in a wide range of colors. Right now, though, I'm just using a piece of white sketchbook paper. You can use anything from tissue paper to cardstock. Be aware, though: thinner papers will rip more easily, and thicker papers will be harder to cut through.

Apart from the absolute essentials, you'll also benefit from a cutting mat and a pencil. The cutting mat protects your work surface from the blade if you're using a craft knife: cardboard works in a pinch but may dull your blade faster. And a pencil will allow you to sketch the design on the back of the piece before you start.


All right, now let's get started! Planning is essential for papercutting: there's no undoing a cut once you've made it, so you need to be sure of where it's going! Flip your paper to the wrong side (if there is one) and begin lightly sketching the shape of your design. I'll be drawing a dragon. Why? Because I can!


Some poses are better than others for papercutting. You can't shade anything or use different colors, so it's hard to differentiate between objects put in front of one another. The more distinctive you can make the silhouette, the better. So the sleeping dragon on the left might be cute, but it would be much harder to design a papercut of it than the one on the right.


Once you're chosen the design, lightly sketch it out full size on the paper, paying the most attention to the outline of the shape. Be aware: since you're sketching on the backside of the paper, the actual result will be a mirror image. If the direction of asymmetry is important (like for words), carefully sketch them in reverse. I don't particularly care about the direction for this one, so I'm not worrying about it. Mark out any features inside the shape that need to be visible as well. You'll need to find a way to differentiate these areas. For me, the major areas of concern are the wings: I want to make a distinction between the wing bones and the membrane.


Fortunately, we aren't limited to only silhouettes! I could cut out the membrane entirely, leaving only the edge line intact. But that would make the wings very fragile, and it wouldn't be visually interesting. So instead, I'm adding a bunch of spiderweb-lines to make a lacy pattern. It will be open enough to be distinct from the wing bones, and stronger than pure open space. I'm also adding some scale patterns to the body - because it looks cool - and cutting out the eyes and the horns. When you're adding details, be careful that you don't split the piece in half. All of the positive space (the paper) has to be connected, or else it'll fall apart! Ideally, every major area should be connected by multiple points to those around it. This lends strength to your finished product, making it less likely to tear when handled.


Now (finally) we begin cutting! You can cut out the rough outline of the piece in order to make it easier to handle, but don't cut close to the outline yet! In fact, start with the inner detailing. The laciest, most delicate parts should be cut out first, while there's still lots of surrounding paper. That way, you're less likely to rip it. So following these rules, I started with the wing membranes.


Once that's done, you can cut the outline. Be careful here: you'll likely have spots without much room for error. For me, those spots are around the outer edge of the wing membrane. Cut away small sections at a time so that excess paper doesn't get in your way.


There's no big wisdom to success here: a sharp knife and a steady hand are needed. If you cut or rip a section, you can try to put a dab of glue on the backside to repair it, but this isn't always successful. Alternatively, you can improvise and cut a new pattern that fits your mistake! No matter what you do, you'll end up with something simple but beautiful! Here's mine right after cutting:


Here you can see the wisdom of sketching lightly on the wrong side. The paper around the wings is so skinny that it would be extremely difficult to erase marks without ripping the paper. Better, then, to make light marks which won't show up on the right side! Turn the piece over and admire your work.


The principles of papercutting aren't complicated. Cut shapes from a piece of paper: that's the gist of it. But the simplicity belies a beautiful art form that requires little more than patience and a steady hand to create. Hopefully this tutorial has given you inspiration to try some papercutting of your own. Brandish your craft knives (carefully!) and get to it! Happy papercutting!

Monday, May 21, 2018

Finished Scarf

Due to a bout of illness, I wasn't able to finish my mom's silver-and-teal scarf for Mother's Day. Fortunately, she's a patient person, and I think she thought it was worth the wait! I'm quite pleased with how the scarf turned out. It has a very shifty, silky feel, and the color seems to change depending on the angle from which the fabric is viewed because of how the two yarn colors lay on each other. It was a completely accidental feature, but a beautiful one! Here, I'll stop talking and you can just see the pictures (modeled by the equally beautiful Mannie Quinn):


Thursday, May 17, 2018

Finally...

...I am updating the craft resource page! I promised that things would be added to it soon. Apparently "soon" means "in a month"!

But better late than never, right? You can flip to the craft resource page with the tab right underneath the blog title. I've assembled a page for each craft with a description and links to tutorials, diagrams, and instructions. There are only a few crafts listed right now, but I'll add more as I find good tutorials for them! If you have a craft you're itching to try, comment and I'll try to make a page for it. Maybe I'll even get to learn something new in the process!

Thursday, May 10, 2018

I Teal Gray-t

First of all, I apologize for the radio silence this past week. Somehow I've fallen into the habit of posting on Thursdays (why Thursdays?), and I missed posting last week. I was just busy, but hopefully I'll have more time during the summer!

Or... I would apologize if there was anyone to apologize to. According to the stats, I'm still just flinging posts into the void of the Internet, with nobody but myself to see it. Ah well, I'll show this to my friends eventually!

Anyway, Mother's Day is fast approaching, and I always make my mom a handmade gift. This year, she had picked out some really nice bamboo yarn in teal and silver (or gray, to make my silly title work), and I'm making her a scarf. It's still a work in progress, but have a picture!


I've got myself a little rigid heddle loom, which is really quite versatile for its simplicity. The pattern was meant to be a sort of houndstooth, but I neglected to take into account the balance of the weave. I'm still pretty new to weaving, so rookie mistakes! It's turned into this broken stripe-y thing instead.


I think it looks good, even if it isn't what I intended! Experimenting is how you learn, and now I've learned to make sure I've got a balanced weave if I want to make certain patterns. I still like it, and hopefully my mom will, too!

Thursday, April 26, 2018

Gives you Wings

It's been a while since I gave an update on the Aubrey cosplay, hasn't it? I'll admit, I've gotten sidetracked with other projects, but that doesn't mean this cosplay has fallen completely to the wayside! In between re-learning embroidery, I decided to make the wing decals for the back of the jacket. I already had colored felt and matching thread lying around, so it was just a matter of putting things together. First, I drew a wing design onto a piece of paper, just to get the dimensions right. I wouldn't want to make a pair of wings that was too big for the jacket, right? Satisfied with the size, I proceeded to cut the parts out of felt and pin them together:


Pretty cool so far. I love gradients, and this fiery maroon to yellow one makes me happy! Next, I had to sew everything together. I chose to hand sew, using a blanket stitch around the entire border of each piece in a corresponding thread color. Felt doesn't fray or unravel, so I didn't have to worry about hems or securing the edge with the stitch. Once I finished that, the wings looked like this:


From a distance, the stitches blend in well, but a close up shows my handiwork:


The blanket stitch is a worthwhile stitch to learn if you do any hand-sewing, and it's fairly easy to learn, too. I'll be sure to add a page for hand sewing tutorials soon so you can teach yourself the basics. And then I'll get back to those embroidered patches. Maybe this cosplay will be done by Halloween!

Thursday, April 19, 2018

Pattern Review: Sydänmaa Cabled Mittens

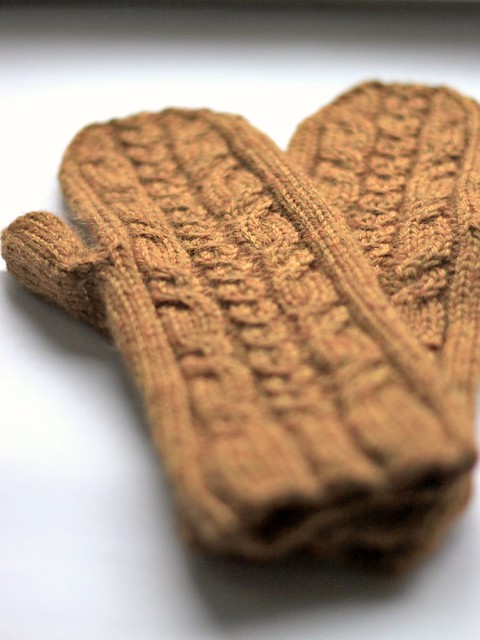
Cables! The quintessential knitting technique! Of course, I had to try them (and much sooner than anyone would recommend to a beginning knitter). I had a ball of Cascade 220 worsted in a lovely teal color, so I figured mittens would be a good idea. I came across this pattern, called Sydänmaa (link here), which I quite liked:


Don't fear the Finnish title: the pattern is available in English. For the curious, "Sydänmaa" means "heartland" in Finnish. I did try to learn the language a few years back at the behest of a friend, but languages just don't come easily to me. Unless we're talking the language of crafts! Speaking of, I took to a borrowed pair of double pointed needles to try Sydänmaa myself.


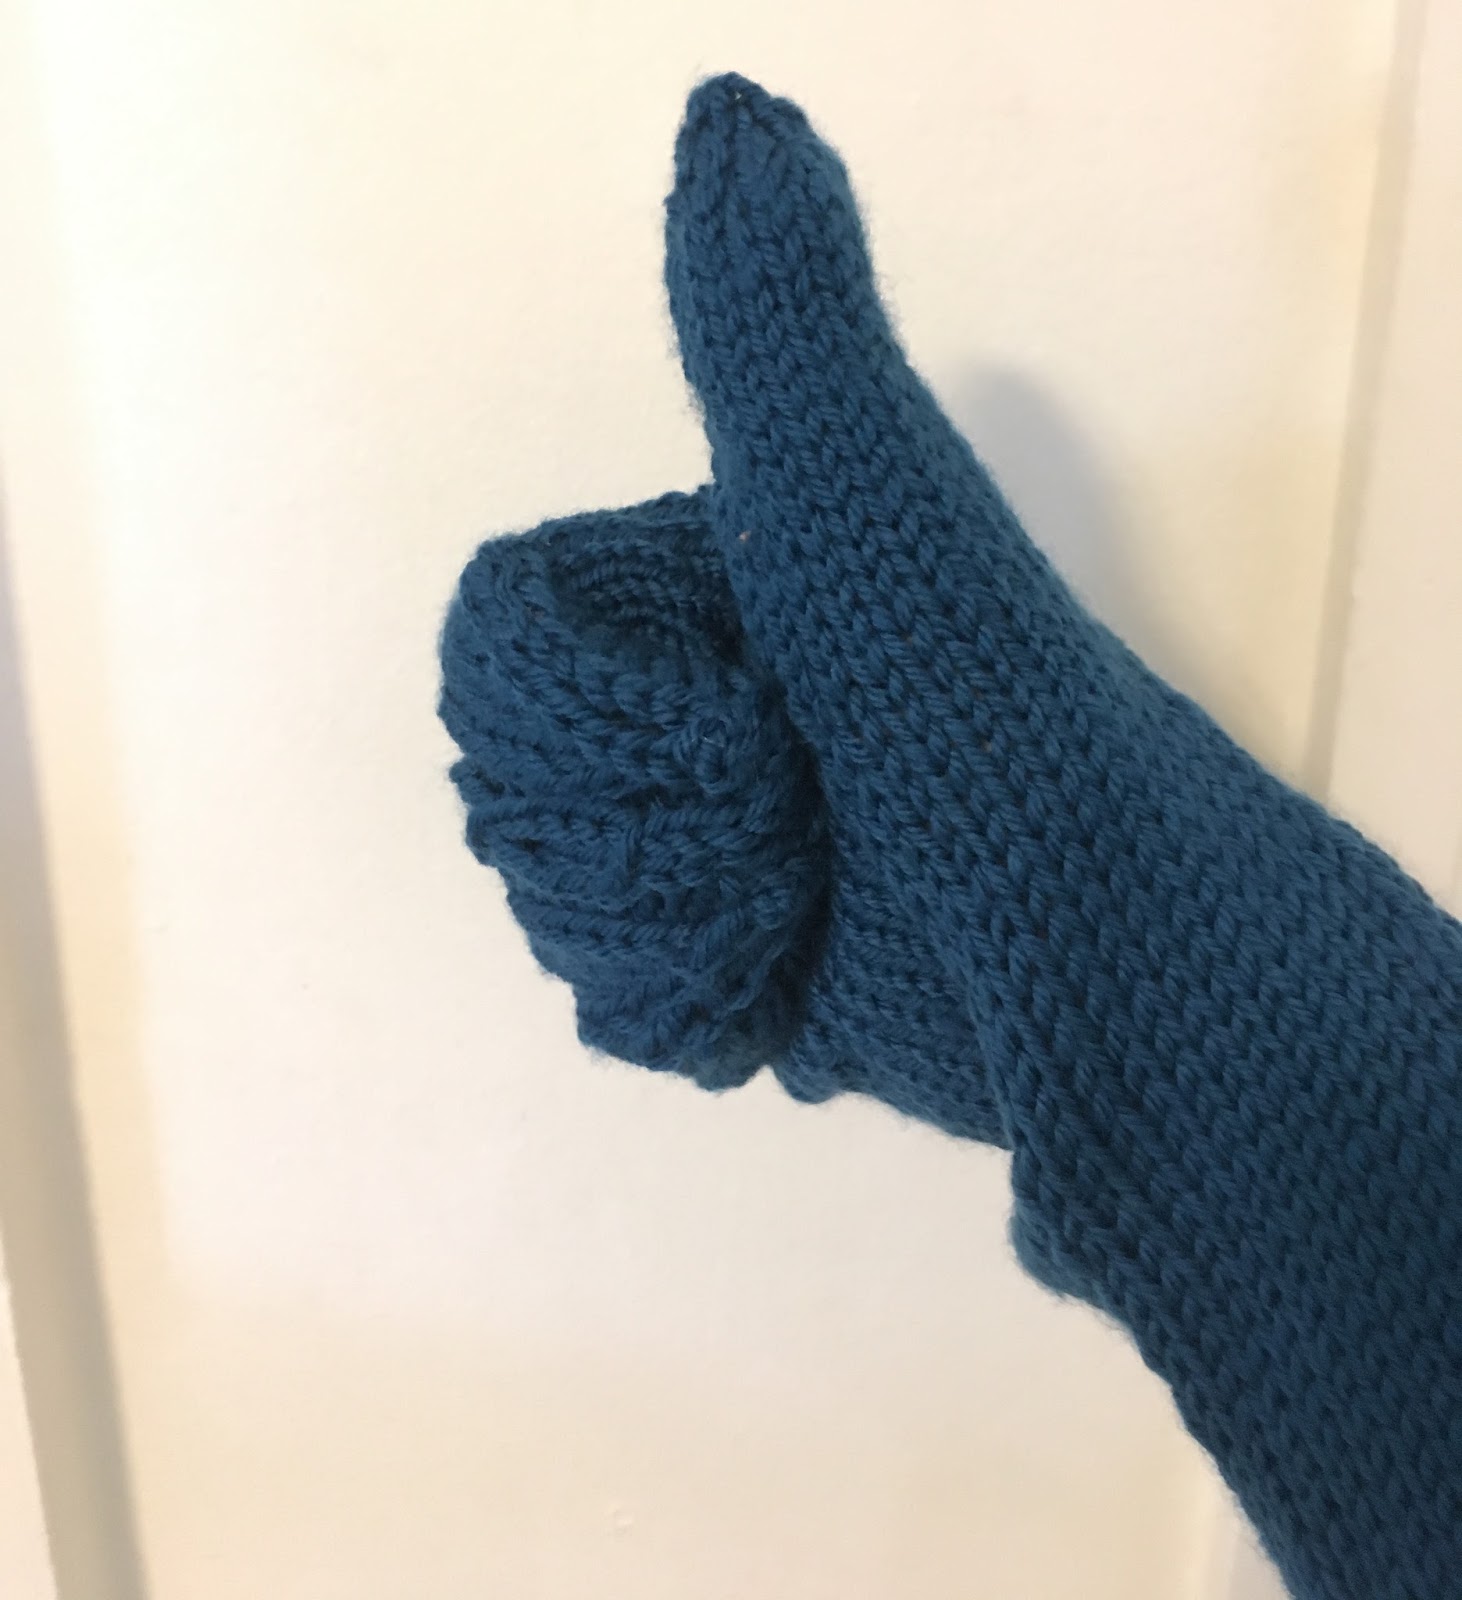
The results! These mittens were clearly made for someone with much longer fingers than mine. I cut out an entire pattern repeat and they still fit fine. I can't say that I'm a huge fan of how long the wrist sections are, either, but that's a personal stylistic choice rather than one of fit.

The charts were easy to read even for a beginner, and the shaping of the thumb fit my hand nicely once I corrected for length. I liked the style of the cables as well, though those could be changed fairly easily if you wanted to try something different on the backs.

Overall, apart from the length issue, it was a good pattern. Clear instructions made for a fine result that was easy to adjust to my hand. To conclude:


Thumbs up for Sydänmaa!