Hello hello! I've been having fun with colors, lately. Specifically, color palette challenges. If you've never heard of the color palette challenge, it's when you're given a small set of colors (usually 4-5) to use to make a drawing. You're not allowed to use any colors but the ones you're given in the palette, though blending is usually allowed!
If you're an aspiring digital artist, I really recommend trying these challenges out. I've been using this palette from Death in Heavens on Tumblr, but there are a thousand options out there, and you can make your own too! I thought it might be fun to use my OC (Azure) from an RP game I've been playing as the subject for a series of palette challenges. She's not usually a mermaid or a fairy, but hey, the colors spoke to me! Here are the results: warning for some totally non-sexual exposed breasts if you're bothered by that sort of thing.
Tuesday, September 25, 2018
Tuesday, September 18, 2018
Tutorial: Pine Guard Patch
So... remember when I said there would definitely not be any more patches for a while?
I lied.
After all, what's a TAZ Amnesty cosplay without the all-important Pine Guard patch! It lets everyone know that Aubrey, Duck, and Ned mean business! (And, you know, keeps them from going crazy while they're in Sylvain). I can't complete an Aubrey cosplay without one. And if any of you want to be part of this abomination-fighting society, you can make one too.
Supplies:
You don't need to knot each thread as you add it: just leave an inch or two of tail and hold it in place until you've made a few stitches. When you're done with the thread, weave each end into the back of the piece and snip off the excess. And try to orient the direction of the stitches so that no individual stitch is longer than about half an inch. They tend not to lie flat to the fabric if they're too long, ruining all your nice detail work. For this patch, this meant that the tree threads ran horizontally, while the background threads ran vertically.
I lied.
After all, what's a TAZ Amnesty cosplay without the all-important Pine Guard patch! It lets everyone know that Aubrey, Duck, and Ned mean business! (And, you know, keeps them from going crazy while they're in Sylvain). I can't complete an Aubrey cosplay without one. And if any of you want to be part of this abomination-fighting society, you can make one too.
Supplies:
- Black felt
- Small embroidery hoop (not technically necessary, but it'll make your life so much easier, trust me)
- Embroidery needle
- Embroidery thread in green, yellow, yellow-orange, orange, red, and dark red
- Small piece of chalk
- Scissors
Instructions:
First, put the felt in the embroidery hoop. Make sure that the entire inside of the hoop is covered in felt: this will keep the fabric taut and let you maintain an even tension with the thread. You can still do this without an embroidery hoop, but it'll be a lot harder to do.
Next, take your chalk and draw a sketch of the patch. For the Pine Guard, this is a pine tree in front of a retro-style gradient. I went with a very geometric, simplified design, but if you have the skills and/or the patience, go ahead and make it more detailed. At this stage, you'll want to make sure that your circles are circular and your lines are straight, or else they'll be crooked in the final product.
All pretty obvious so far, right? Well, if you've never embroidered before, this next one is a step you might've skipped over. Next, you'll want to go over all of your chalk lines with a simple back stitch, in colors that match (or are similar to) the ones you'll use for the fills. It doesn't have to be super pretty, as long as it makes a neat outline. These are the lines you're really going to use to guide your embroidery.
Then start filling! It's best to use 2-3 strands of the embroidery floss, instead of the whole six-stranded piece: the fill will come out more even. Use the satin stitch to fill in the areas bordered by your backstitched lines, taking care to ensure that each stitch is parallel and runs the full length of the area. I started with the tree first, since it made the most sense to me to work from the inside out.
You don't need to knot each thread as you add it: just leave an inch or two of tail and hold it in place until you've made a few stitches. When you're done with the thread, weave each end into the back of the piece and snip off the excess. And try to orient the direction of the stitches so that no individual stitch is longer than about half an inch. They tend not to lie flat to the fabric if they're too long, ruining all your nice detail work. For this patch, this meant that the tree threads ran horizontally, while the background threads ran vertically.
When you're finished, you should have a pretty little pine-tree patch!
Remove the embroidery hoop and cut the felt so that there's a small border around the embroidery. This is why we used felt: you can cut as close as you like, and it won't fray. Be careful not to snip the embroidery thread though! Weave in any remaining threads, and your patch is ready to wear! Here's the back of the finished product:
And the (much nicer) front!
And with that, you've now been inducted into the Pine Guard. Who knew it was that easy? Now we just have to find some abominations to fight!
Sunday, September 9, 2018
Pattern Review: Falling Water
I like making puns, and this pattern beat me to the punch! I had a skein of lovely bright turquoise fingering weight yarn from Mad Tosh that I needed a project for. The sensible thing to do would be to make myself a pair of socks, but socks are no fun. (Apologies to those who enjoy making socks). Plus then 70% of the pretty yarn would be hidden inside my shoes! No, I needed a project that let it all show, loud and proud! And I found that in the Falling Water scarf by Bonnie Sennot.
I'm a sucker for some lace, as I've probably demonstrated often enough, but I'm still not super well-versed in the ways of knitting. This pattern was a good compromise. It has a relatively simple lace pattern that is easy to understand and memorize, but the result is quite stunning. Take a look!
Isn't it pretty? The subtle variations in the yarn really emphasize the impression of waterfalls and flowing rivers. The scarf is just long enough for me to double up to wear, though of course with a repeated pattern like this, you can make it practically any length you like!
Cons are few and far between on this one. If you're looking for lace because you like to be challenged, this will be a little boring. The repeats are short, and so you need a lot of them to make a wearable scarf. And like any lace, it needed a good thorough blocking before the pattern could really shine, so don't work this pattern in a yarn that's hard to block. Other than that, it's a great little scarf pattern, especially for people looking for a first peek at lace!
Tuesday, August 28, 2018
Batches of Patches
... I'm running out of patch-based puns, guys. There are only so many in the world.
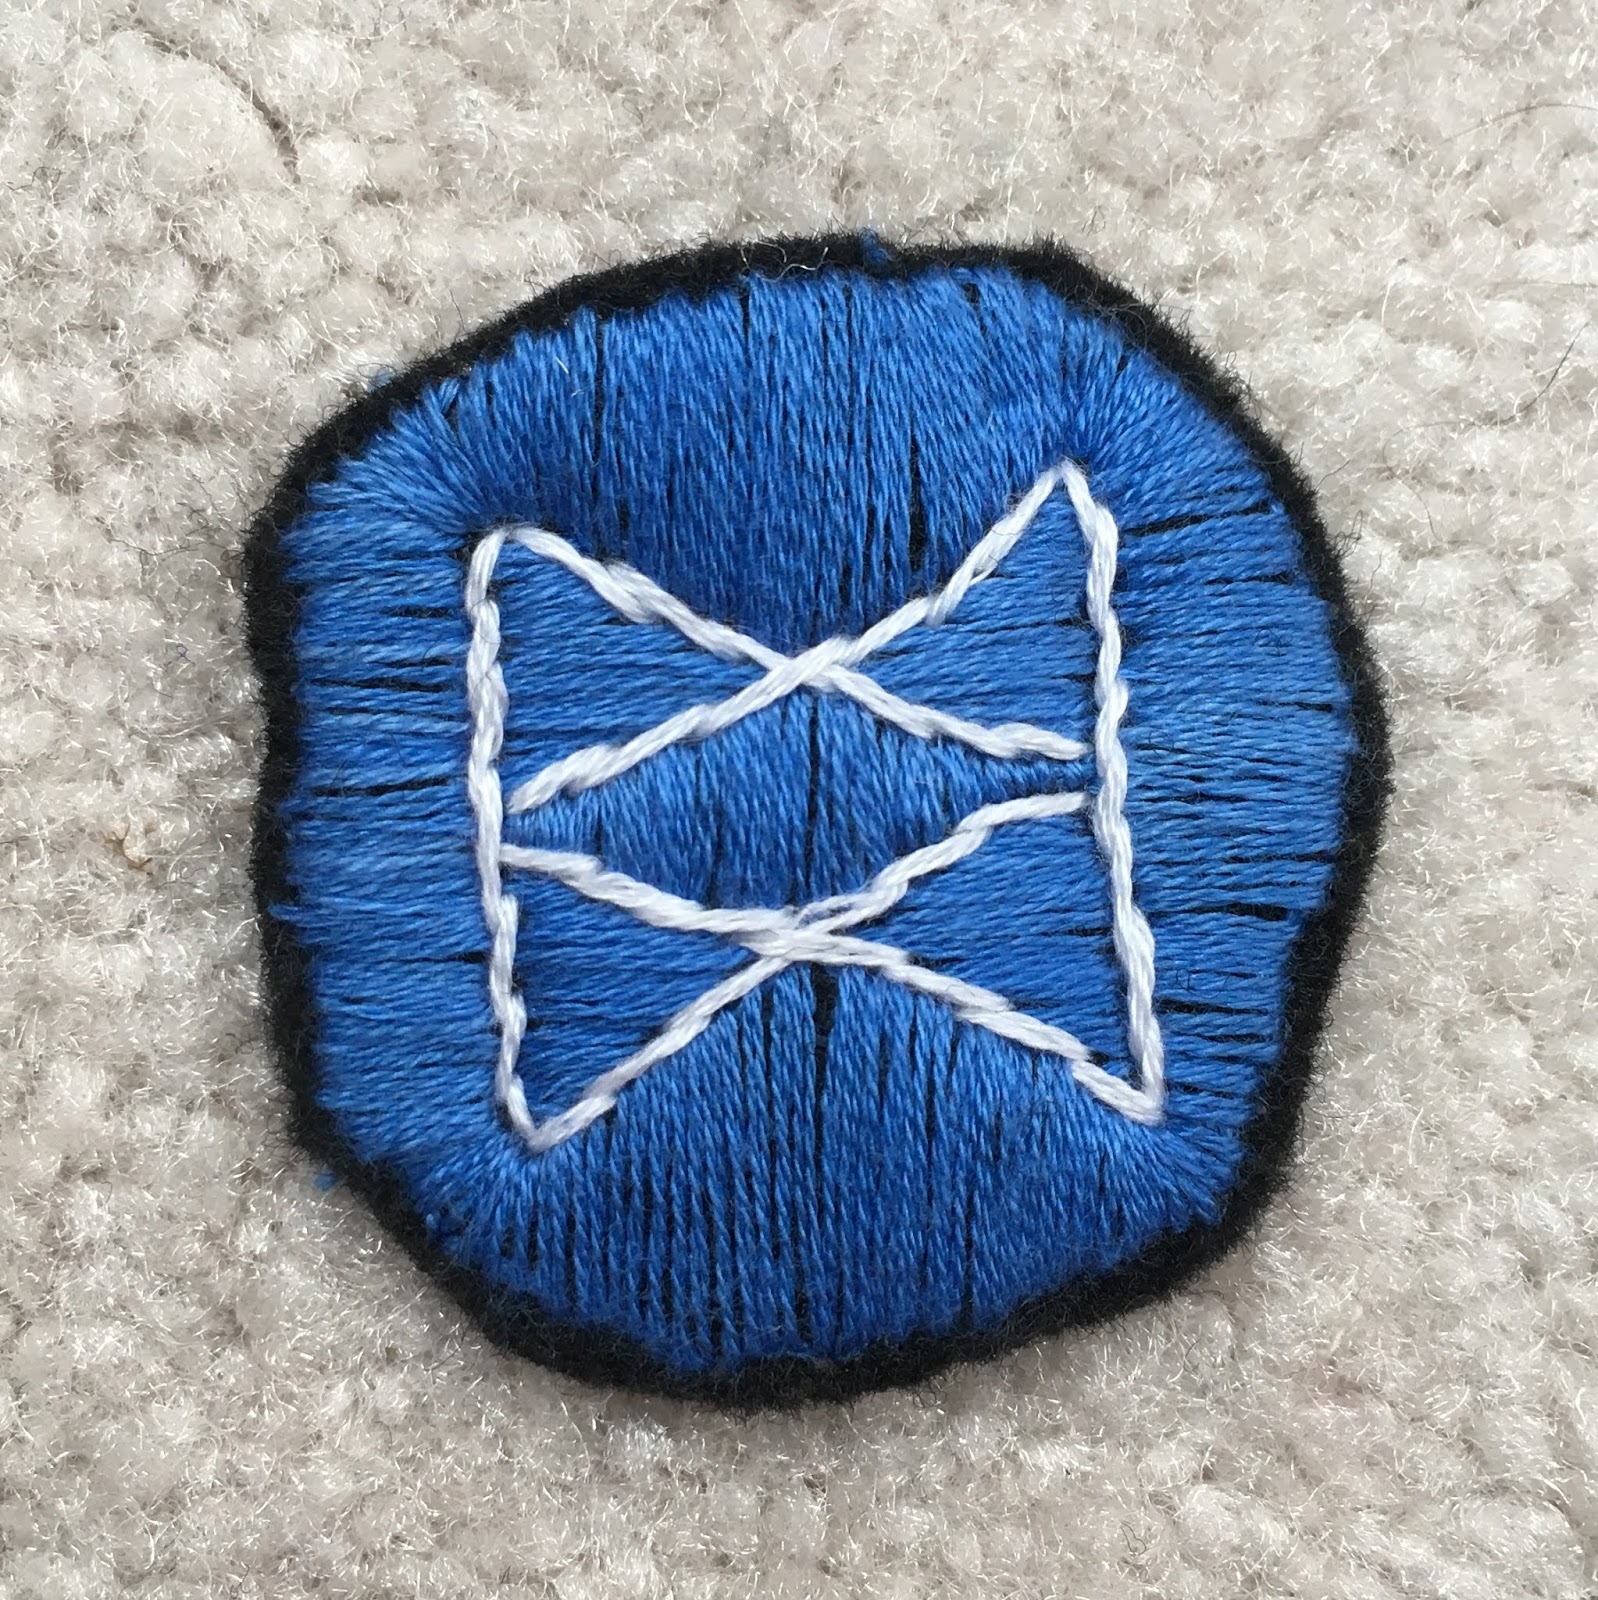
Fortunately, I've finished my last patches! Looking from the first patch I made to the last few, I can definitely say I've improved. It's just like they say: practice makes perfect. As it turns out, you need a lot of patches to cover big lapels like the ones on my jacket, so there are nine new patches total! Here's a group shot:
I think I used up most of the ideas I sketched out when I started this project. Lots of random stuff that just seemed like it would go with Aubrey's style. The radioactivity symbol in particular is fitting!
And some more stuff that I thought looked cool...
Some of the patches came out better than others. Of course they did! That's the beauty of a handmade project is that there is variation in the stitches. I'm happy with most of these last patches, but I think the scarab beetle and bat wings are my favorite for how professional they look!
Or... they would be my favorite, if I could resist waving my nerdy little flag.Never mind that I'm already waving a huge nerd flag by making a cosplay from a podcast. I already paid homage to the first Adventure Zone arc, balance, with the Abraca-f*ck-you umbrella, but I couldn't resist making the Bureau of Balance insignia as well.
And since this is a podcast we're talking about, I wanted to give a nod to the first podcast I ever listened to. In high school, a friend introduced me to Welcome to Night Vale, and I systematically ate through the available episodes. The fun, spooky mood and unique humor of the show appealed to me so much, and showed me that podcasts could be something I really enjoyed! So of course, we need a Night Vale eye to complete the look!
And that's all she wrote for patches! I've filled up all the space on the lapels, so it must be done, right? It's not like Aubrey has a secret patch that proclaims her membership in an elite monster-fighting team... right?
Of course not. There definitely won't be a tutorial coming for anyone who wanted to try their own hand at embroidering a custom patch. So don't expect one.
...
You didn't see anything.
Fortunately, I've finished my last patches! Looking from the first patch I made to the last few, I can definitely say I've improved. It's just like they say: practice makes perfect. As it turns out, you need a lot of patches to cover big lapels like the ones on my jacket, so there are nine new patches total! Here's a group shot:
I think I used up most of the ideas I sketched out when I started this project. Lots of random stuff that just seemed like it would go with Aubrey's style. The radioactivity symbol in particular is fitting!
And some more stuff that I thought looked cool...
Some of the patches came out better than others. Of course they did! That's the beauty of a handmade project is that there is variation in the stitches. I'm happy with most of these last patches, but I think the scarab beetle and bat wings are my favorite for how professional they look!
Or... they would be my favorite, if I could resist waving my nerdy little flag.
And since this is a podcast we're talking about, I wanted to give a nod to the first podcast I ever listened to. In high school, a friend introduced me to Welcome to Night Vale, and I systematically ate through the available episodes. The fun, spooky mood and unique humor of the show appealed to me so much, and showed me that podcasts could be something I really enjoyed! So of course, we need a Night Vale eye to complete the look!
And that's all she wrote for patches! I've filled up all the space on the lapels, so it must be done, right? It's not like Aubrey has a secret patch that proclaims her membership in an elite monster-fighting team... right?
Of course not. There definitely won't be a tutorial coming for anyone who wanted to try their own hand at embroidering a custom patch. So don't expect one.
...
You didn't see anything.
Monday, August 20, 2018
Character Creation
Woo, back from vacation! I spent a week in Colorado, it was lovely. But I'm not here to talk about that, I'm here to talk about creating fictional characters. It's not exactly a "crafty" topic, but let's face it, this blog is more about me babbling on about my interests than a dedicated craft guide. And character design makes use of many of the same creative skills that you use to get crafty!
First off, it's important to consider what you are designing a character for. Are you writing an original story? Planning on a fanfiction with OC's? Looking to join an RPG? I usually fall into the latter group, though I dabble in the former from time to time. Next, consider the implications that this has on your character. If you're writing fanfiction or joining an RPG, you probably don't have complete control over the setting. Therefore, your character has to work within the established setting. For example, an elf mage would fit right in to a high fantasy Dungeons and Dragons setting, but would feel out of place in a Steven Universe fic. A sentient rock being turned warrior, on the other hand, could fit into either story! If you're writing original fiction then you have control over the setting, but you still should consider whether or not your character fits. Part of building up a believable world is making the characters seems like they belong there (unless they're not supposed to belong!).
Now that you've figured out what is/isn't an appropriate character for the setting, start building up details about them. Start with the big picture first: their name, gender/pronouns, species (if there's more than one option in your story), basic personality traits, etc. If you're playing an RPG, go ahead and figure out all the relevant stats too. You don't need to go into a huge amount of detail about their appearance/clothing, unless it's imminently relevant to the story you want to tell. Of course, if you already have a lot of ideas in that area, write them down. I like to draw a sketch of the character, in a dynamic pose that informs their personality, as a reference for how they look on a day-to-day basis.
This is the point where a lot of writing advice will tell you to work out as many details of your character as you possibly can. Write an extensive backstory, list their favorite foods, colors, animals, historical figures, their every goal for the future and all their values. Honestly, I don't think you need to do this, at least not in one go. Whenever I would try to list all the traits of a character before writing/playing them, I forgot about them within five minutes of starting to use the character. Either my predetermined traits didn't actually mesh together as well as I thought they did, or the course of the story would be more logical or funny or interesting if my character acted differently. By the end of a day, half the list could be scribbled out and replaced with new information, which kind of defeats the purpose of listing everything at the start.
This isn't to say that you shouldn't plan. And it's not to say that you shouldn't know intimate details about your character. But I find it better to plan the big picture stuff, and let the details form as I go. Major personality traits and backstory elements will determine a majority of the character's actions, after all, so you can get away with planning those and little else. In a oneshot RPG I participated in recently, I was very minimalist with my preparations. A name (Cici) and a few character traits (short temper, loyal, self conscious about her height) were really all I decided up front. As the game progressed, Cici grew into a fierce, almost gruff figure who didn't want to admit that she cared about her teammates, and who was more than willing to rip apart anyone who stood in their way. She was also surprisingly caring and gentle when her friends got hurt, having an enhanced skill in medicine discovered partway through the game that informed another aspect of her character. Had I planned every detail out from the beginning, it would have been very difficult to fit the unexpected medical skill in without toppling the whole pile! Cici ended up being a fun, volatile character to play, in part because my minimalistic planning allowed her to be.
If you decide to take my route of figuring out character details as you go, I have one more suggestion. Keep a list of what you learn about your character as you play/write. If at some point they say their favorite ice cream flavor is cherry, make a note of it, and keep all of your notes in one place. This will help prevent your character from being inconsistent and may stop plotholes before they form. And check to make sure you're not contradicting yourself before you commit to a particular trait!
Using this system, I've found a nice balance between staying consistent and being free to explore a character's potential. It's an excellent way to play an RPG, and it works for writing fiction just as well. Do you like to plan every single detail of a character before you start? Or would you like to try my way and fly by the seat of your pants a little bit? Let me know!
First off, it's important to consider what you are designing a character for. Are you writing an original story? Planning on a fanfiction with OC's? Looking to join an RPG? I usually fall into the latter group, though I dabble in the former from time to time. Next, consider the implications that this has on your character. If you're writing fanfiction or joining an RPG, you probably don't have complete control over the setting. Therefore, your character has to work within the established setting. For example, an elf mage would fit right in to a high fantasy Dungeons and Dragons setting, but would feel out of place in a Steven Universe fic. A sentient rock being turned warrior, on the other hand, could fit into either story! If you're writing original fiction then you have control over the setting, but you still should consider whether or not your character fits. Part of building up a believable world is making the characters seems like they belong there (unless they're not supposed to belong!).
Now that you've figured out what is/isn't an appropriate character for the setting, start building up details about them. Start with the big picture first: their name, gender/pronouns, species (if there's more than one option in your story), basic personality traits, etc. If you're playing an RPG, go ahead and figure out all the relevant stats too. You don't need to go into a huge amount of detail about their appearance/clothing, unless it's imminently relevant to the story you want to tell. Of course, if you already have a lot of ideas in that area, write them down. I like to draw a sketch of the character, in a dynamic pose that informs their personality, as a reference for how they look on a day-to-day basis.
This is the point where a lot of writing advice will tell you to work out as many details of your character as you possibly can. Write an extensive backstory, list their favorite foods, colors, animals, historical figures, their every goal for the future and all their values. Honestly, I don't think you need to do this, at least not in one go. Whenever I would try to list all the traits of a character before writing/playing them, I forgot about them within five minutes of starting to use the character. Either my predetermined traits didn't actually mesh together as well as I thought they did, or the course of the story would be more logical or funny or interesting if my character acted differently. By the end of a day, half the list could be scribbled out and replaced with new information, which kind of defeats the purpose of listing everything at the start.
This isn't to say that you shouldn't plan. And it's not to say that you shouldn't know intimate details about your character. But I find it better to plan the big picture stuff, and let the details form as I go. Major personality traits and backstory elements will determine a majority of the character's actions, after all, so you can get away with planning those and little else. In a oneshot RPG I participated in recently, I was very minimalist with my preparations. A name (Cici) and a few character traits (short temper, loyal, self conscious about her height) were really all I decided up front. As the game progressed, Cici grew into a fierce, almost gruff figure who didn't want to admit that she cared about her teammates, and who was more than willing to rip apart anyone who stood in their way. She was also surprisingly caring and gentle when her friends got hurt, having an enhanced skill in medicine discovered partway through the game that informed another aspect of her character. Had I planned every detail out from the beginning, it would have been very difficult to fit the unexpected medical skill in without toppling the whole pile! Cici ended up being a fun, volatile character to play, in part because my minimalistic planning allowed her to be.
If you decide to take my route of figuring out character details as you go, I have one more suggestion. Keep a list of what you learn about your character as you play/write. If at some point they say their favorite ice cream flavor is cherry, make a note of it, and keep all of your notes in one place. This will help prevent your character from being inconsistent and may stop plotholes before they form. And check to make sure you're not contradicting yourself before you commit to a particular trait!
Using this system, I've found a nice balance between staying consistent and being free to explore a character's potential. It's an excellent way to play an RPG, and it works for writing fiction just as well. Do you like to plan every single detail of a character before you start? Or would you like to try my way and fly by the seat of your pants a little bit? Let me know!
Saturday, August 11, 2018
Definitions
What is a craft?
I call this place Late Crafternoon, as a portmanteau of “Late Afternoon” (the time I feel the most creative) and “Craft” (the thing I do when I feel creative). But what actually is a craft? The Oxford Dictionary defines it as “An activity involving skill in making things by hand.” That certainly covers all of the basics that you think of as crafts - knitting, sewing, crochet, woodworking - but really, it includes much more. You could consider almost all "arts" to be crafts as well: painting and sculpting require tremendous skill and are made by hand. Why do we consider some a "craft" while others are elevated to the term "art"?
I'm not a historian, sociologist, or linguist, so I'll leave it open-ended. To me, the distinction seems rather unnecessary. Arts, crafts, I love them all. Because of that, I'm going to start sharing more of my "arts" here, not just the things that reside safely within the realm of craft. I love to create, and that extends to ink drawings, digital art, even animation. So look out for more here soon!
Tuesday, August 7, 2018
Diamond in the Rough
Finally! It is finished!
Backstory time: I bought this mill-end cotton weaving thread for dirt cheap on a whim one time while I was at the yarn store. There were a bunch of ratty-looking hanks laid out on a shelf, some a little dirty, all tangled. But it felt nice and I liked the colors, so why not? I managed to get it untangled over the course of a few days, and then I had to figure out what to do with it. What do you do with an entire pound of fine cotton thread?
My mind jumped to lace, as it usually does. Crocheted lace can feel a bit bulky and awkward, but I reasoned that the thread was so fine that it would negate the nature of the craft. And I was looking for a suitable Christmas present for my dear friend, who had gifted me a chemistry-themed sweater for a past birthday. She was the kind of person who might enjoy some fine fillet lacework. I got her approval on a shawl pattern and set to work in mid-October. Sure it was lace, but fillet crochet goes comparatively fast! The pattern was so easy to memorize! Surely I could manage in two and a half months.
I was wrong. So very wrong.
First of all, fillet crochet might be a fast type of lace, but it still goes pretty darn slow when you're using a .75 mm crochet hook! And even though the pattern was easy, it was impossible to concentrate on for more than an hour or two at a time. The stitches were so tiny they cramped my hand and tired my eyes. The shawl didn't get finished by Christmas. It didn't get finished by January or February either. I made progress at a snail's pace.
Then, summer came, and I found myself with an hour's commute by train. An hour where I couldn't really move, but I could very well put a podcast on and use my hands for their favorite task. I was determined to get it done by summer's end.
And now, I can finally say I've done it! It took an estimated 80 hours, and it's 7 months late, but it is done. And forgive me for being egotistical, but it is beautiful!
This has been a really fun project, and I'm excited to do even more lacework. I love the result so much!
... But maybe I'll take a break and try something in a bulky yarn first. 😅
Backstory time: I bought this mill-end cotton weaving thread for dirt cheap on a whim one time while I was at the yarn store. There were a bunch of ratty-looking hanks laid out on a shelf, some a little dirty, all tangled. But it felt nice and I liked the colors, so why not? I managed to get it untangled over the course of a few days, and then I had to figure out what to do with it. What do you do with an entire pound of fine cotton thread?
My mind jumped to lace, as it usually does. Crocheted lace can feel a bit bulky and awkward, but I reasoned that the thread was so fine that it would negate the nature of the craft. And I was looking for a suitable Christmas present for my dear friend, who had gifted me a chemistry-themed sweater for a past birthday. She was the kind of person who might enjoy some fine fillet lacework. I got her approval on a shawl pattern and set to work in mid-October. Sure it was lace, but fillet crochet goes comparatively fast! The pattern was so easy to memorize! Surely I could manage in two and a half months.
I was wrong. So very wrong.
First of all, fillet crochet might be a fast type of lace, but it still goes pretty darn slow when you're using a .75 mm crochet hook! And even though the pattern was easy, it was impossible to concentrate on for more than an hour or two at a time. The stitches were so tiny they cramped my hand and tired my eyes. The shawl didn't get finished by Christmas. It didn't get finished by January or February either. I made progress at a snail's pace.
Then, summer came, and I found myself with an hour's commute by train. An hour where I couldn't really move, but I could very well put a podcast on and use my hands for their favorite task. I was determined to get it done by summer's end.
And now, I can finally say I've done it! It took an estimated 80 hours, and it's 7 months late, but it is done. And forgive me for being egotistical, but it is beautiful!
I mean, look at it! look at that drape, and the way the diamond pattern shows across the back! Is it perfect? Of course not! But let me tell you, a good blocking will hide a multitude of sins. No way I kept my gauge consistent over the course of 10 months, but thanks to water, foam, and straight pins, you'll only see the gauge mistakes if you're really looking for them. And besides, mistakes make the piece unique! They show how much personal effort you've put into a special gift.
I really think that this project turned out well. It's the largest and finest piece of lace I've made by far, and I hope my friend likes it too. It's currently sitting pretty in a cute box, ready for the next time I see her.
This has been a really fun project, and I'm excited to do even more lacework. I love the result so much!
... But maybe I'll take a break and try something in a bulky yarn first. 😅
Subscribe to:
Posts (Atom)